Have you ever craved something creamy and cold—but also wanted it to be a little more wholesome? What if we told you that a delicious ice cream made with sweet red beans could be your new favorite treat?
Sounds surprising, right? But in Japan, this isn’t just a trend—it’s tradition.
Jump to Recipe Print RecipeLet’s dive into the magic of Azuki Red Bean Ice Cream, a dessert that’s naturally sweet, full of fiber, and delightfully creamy—without using any heavy cream.
Table of Contents
What Is Azuki Red Bean Ice Cream (小豆アイスクリーム)?
Azuki Red Bean Ice Cream is a traditional Japanese frozen dessert made from sweetened red bean paste, milk, and sugar. Known in Japan as 小豆アイスクリーム, this ice cream stands out from Western versions due to its use of azuki beans—tiny red legumes that are lightly sweet, earthy, and packed with nutrients. Often used in wagashi (traditional Japanese sweets), azuki beans give the ice cream a subtly nutty taste and a velvety texture. Unlike many other ice creams that rely on heavy cream, this recipe uses whole milk for a lighter, refreshing finish.
It’s especially popular during summer in Japan and is often enjoyed in mochi-based desserts, parfaits, or as a scoop alongside matcha treats. If you’ve never had red beans in a dessert before, this is the perfect introduction to their unique flavor.

What Makes Azuki Ice Cream So Special?
Azuki Ice Cream combines the natural sweetness of sweet red beans (anko) with the comforting creaminess of milk to create a dessert that’s light yet deeply flavorful.
Here’s why you’ll love it:
- No heavy cream — just whole milk and sweet red bean paste
- Simple to prepare, especially if you have an ice cream maker on hand
- Great for make-ahead treats and freezer storage
- Wholesome and rich in fiber, thanks to the azuki beans
Time Required: About 30 minutes of active prep + 8 hours chilling & freezing
Skill Level: Beginner-friendly
Essential Ingredients for Azuki Ice Cream
Here’s what you’ll need:
Main Ingredients:
- 1¼ cups whole milk – Adds creaminess without using heavy cream
- ⅓ cup sugar – Feel free to modify the amount based on how sweet you like it
- 15 oz sweet red bean paste (anko) – Gives the ice cream its signature nutty flavor. You can use a canned version or make your own using azuki beans and sugar
For Serving:
- 2 tsp shredded almonds (optional) – Adds a subtle crunch and light nutty flavor

Why These Ingredients Matter
- Whole milk: Keeps the ice cream light while still delivering a creamy mouthfeel
- Sugar: Balances the earthy and nutty flavors of the azuki paste
- Anko (red bean paste): The heart of the recipe, providing both flavor and body
- Shredded almonds: Optional garnish that provides a delicate crunch and enhances presentation
Substitutes & Variations:
- Use coconut milk instead of whole milk for a dairy-free or vegan version
- Try maple syrup or honey in place of white sugar for a natural sweetener
- Add mochi bits, crushed nuts, or vanilla for extra flair
Step-by-Step Instructions
Let’s walk through how to make this unique and delicious frozen treat.
1. Warm the Mixture
- Pour 1¼ cups of whole milk and ⅓ cup of sugar into a saucepan and mix together.
- Stir over medium heat until the sugar completely dissolves
- Add 15 oz of sweet red bean paste (anko) and whisk until the mixture is fully blended
- Turn off the heat and let it cool for a few minutes

2. Cool It Thoroughly
- Place the saucepan in a bowl of ice water and allow it to cool fully
- Cover the mixture and chill it in the refrigerator for a minimum of 4 hours, or leave it overnight for best results.

3. Churn the Ice Cream
- Prepare your ice cream maker following the instructions that came with it.
- Pour the chilled mixture into the machine, ensuring not to overfill it
- Churn for about 25 to 30 minutes, or until the texture becomes thick and creamy

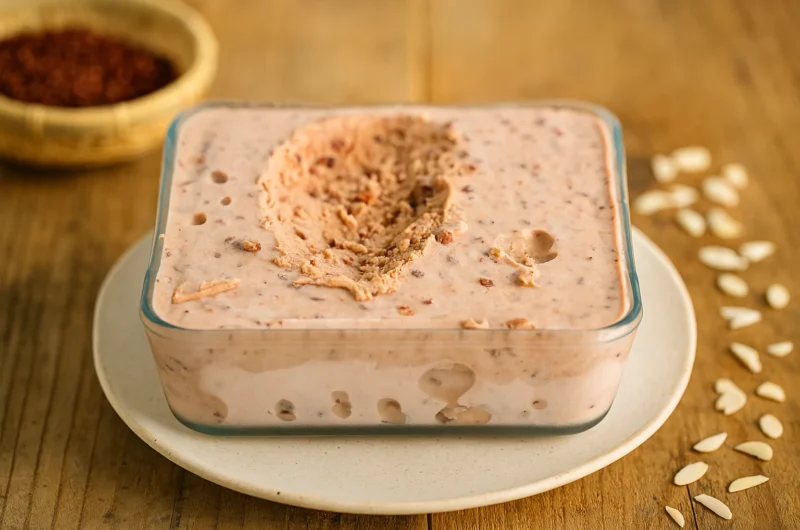
4. Freeze for Later
- Transfer the ice cream to an airtight container
- Flatten the surface with a spatula
- Cover and freeze for 3 to 4 hours until firm
- To help avoid ice crystals, gently lay plastic wrap on the surface of the ice cream before closing the container.

Assembling and Serving Tips
When it’s time to enjoy your homemade Azuki Ice Cream:
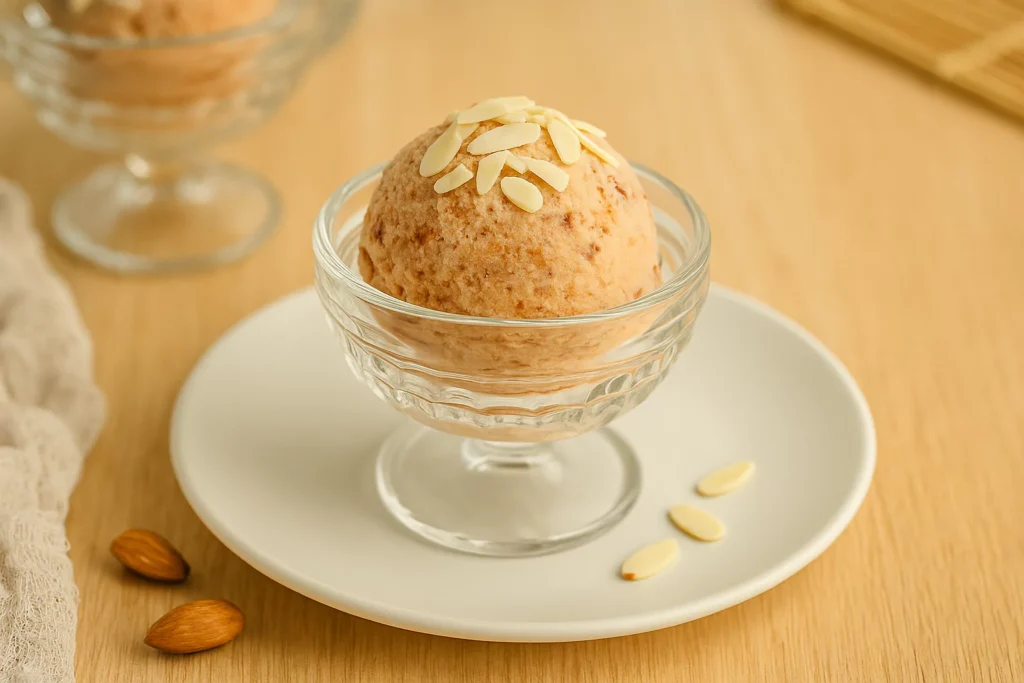
- Use a warm scoop or spoon for easier serving
- Serve in glass bowls to highlight the soft pink tones of the ice cream
- Top with shredded almonds for a gentle crunch
- Pair it with matcha cake or a drizzle of sweetened condensed milk for an indulgent touch

Hana’s Recipe Tips
“Always chill the base fully before churning. That’s the key to a smooth and creamy result without needing heavy cream. If you don’t have an ice cream machine, you can still make it—just freeze the mixture and stir every 30 minutes over a few hours to keep it light and airy. It might take longer, but the result is totally worth it.” — Hana
Azuki Red Bean Ice Cream (小豆アイスクリーム)
Course: DessertCuisine: JapaneseDifficulty: Easy6
servings10
minutes5
minutes180
kcalThis Azuki Red Bean Ice Cream (小豆アイスクリーム) is a light, creamy Japanese dessert made with sweet red bean paste, whole milk, and a touch of sugar. No heavy cream needed—just simple ingredients and big flavor. Perfect for a refreshing treat!
Ingredients
1¼ cups whole milk
⅓ cup sugar (adjust to taste)
15 oz sweet red bean paste (anko), canned or homemade
2 tsp shredded almonds (optional, for topping)
Directions
- Add 1¼ cups of whole milk and ⅓ cup of sugar to a medium-sized saucepan.
- Heat over medium heat and stir until sugar is fully dissolved.
- Stir in 15 oz of sweet red bean paste and whisk until the mixture becomes smooth and fully blended.
- Remove from heat and set the saucepan in a bowl of ice water to let the mixture cool down fully.
- After it has cooled, cover the mixture and place it in the fridge for a minimum of 4 hours or leave it overnight for better flavor and texture.
- Set up your ice cream maker. Pour the chilled mixture into the machine, making sure not to fill it more than two-thirds of the way.
- Churn for 25–30 minutes, or until the mixture is thick and creamy.
- Transfer to an airtight container. Level the surface, seal the container, and freeze for 3 to 4 hours until firm.
- Serve with a sprinkle of shredded almonds if desired.
Notes
- Allow the ice cream to rest at room temperature for 5 to 10 minutes before scooping for a smoother texture. Store in the freezer for up to two weeks. For a dairy-free version, substitute whole milk with full-fat coconut milk.
Storage and Make-Ahead Advice
- Shelf Life: Store in the freezer for up to two weeks
- Prevent Freezer Burn: Use a tightly sealed container and press plastic wrap on the surface
- Serving Tip: Let it sit out for 5–10 minutes before scooping so it softens to a creamy texture
Recipe Variations to Try
Chocolate Azuki Ice Cream
Stir in a tablespoon of cocoa powder to the milk before adding the red bean paste
Vegan Coconut Azuki
Substitute whole milk with full-fat coconut milk and use maple syrup in place of sugar
Matcha Swirl
Mix a small amount of matcha powder into half of the ice cream base, then swirl it gently into the rest before freezing
Tofu-Infused Version
Blend silken tofu into the milk mixture for an even silkier, protein-rich version
Final Thoughts: A Sweet Fusion of Flavor and Simplicity
Azuki Red Bean Ice Cream blends tradition with simplicity. Its light, refreshing flavor and smooth texture offer something truly unique—especially for those exploring Asian desserts. Whether you’re new to Japanese cuisine or already a fan, this recipe is easy to make, fun to serve, and incredibly satisfying.
If you love discovering lesser-known treasures in Japanese culture, check out this guide to teamLab Borderless and other hidden gems in Japan. It’s a great way to explore the cultural richness that inspires traditional desserts like this one.
Related Recipes You’ll Love
If you’re a fan of Japanese-inspired frozen desserts, don’t miss our step-by-step guide to making the best Matcha Ice Cream at home. This smooth and refreshing treat, made with traditional ingredients, pairs perfectly with Azuki Red Bean Ice Cream.
Frequently Asked Questions (FAQs)
Q1: Is Azuki Ice Cream healthy?
Yes. Azuki beans are packed with fiber, antioxidants, and plant-based protein. This ice cream is lower in fat compared to cream-based options.
Q2: Can I make it without an ice cream machine?
Yes, just pour the mixture into a shallow dish, freeze it, and stir every 30 minutes for 2 to 3 hours to keep the texture smooth.
Q3: Can I make it ahead of time?
Absolutely. This recipe is ideal for preparing in advance. Just let the ice cream rest at room temperature briefly before serving for best texture.
Q4: What does Azuki taste like?
Azuki beans have a mild, earthy sweetness with a nutty background. The flavor is delicate and complements dairy beautifully.
Q5: Can I use store-bought anko?
Yes, store-bought sweet red bean paste works great. However, if you want more control over the sweetness and texture, homemade anko is a great option.