Have You Ever Wondered What Happens When Crunchy Meets Creamy?🤔
Imagine biting into a sushi roll that combines the delicate flavors of traditional Japanese cuisine with the satisfying crunch of tempura. Sounds amazing, right? That’s exactly what Chicken Tempura Sushi brings to the table! Whether you’re a sushi newbie or a seasoned foodie, this dish is sure to become your new favorite. Let’s dive in and uncover how to make this crispy, creamy delight at home. 😋Let’s prepare Chicken Tempura Sushi together.
P.S. If you’re new to making sushi rice, check out this helpful guide on how to fix sticky sushi rice grains to ensure your rolls turn out perfectly every time.
🌸Table of Contents
🌟 Why Chicken Tempura Sushi is a Must-Try
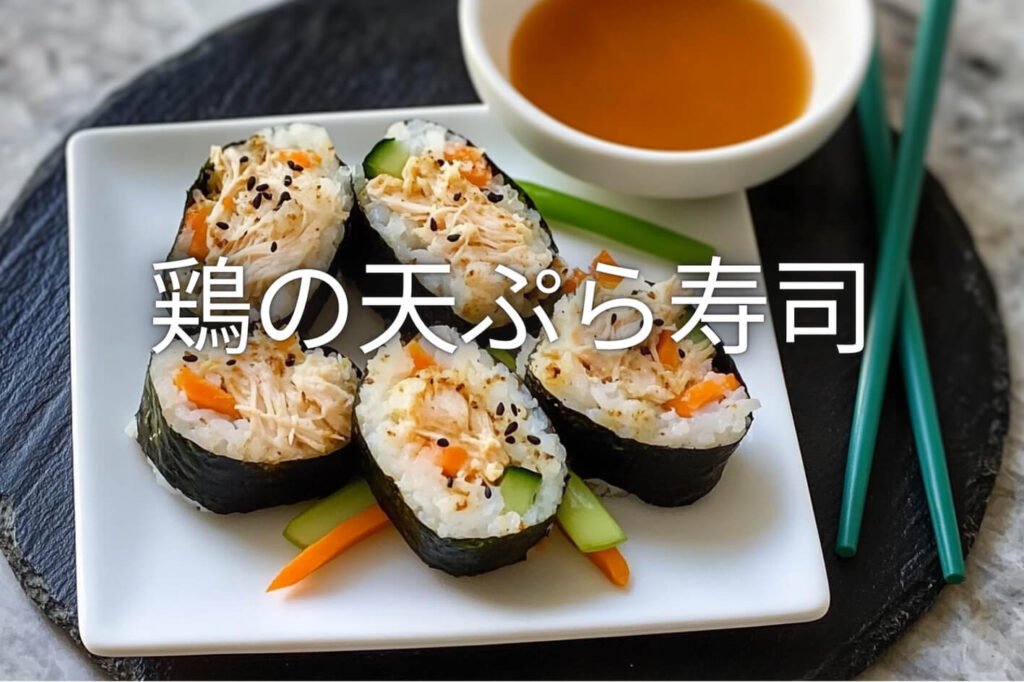
Chicken Tempura Sushi is a fusion of textures and flavors: the crispy chicken tempura, soft sushi rice, and fresh veggies all wrapped up in a seaweed hug. It’s special because it takes the best parts of sushi and adds a crunchy twist that keeps you coming back for more.
- Time Requirement : About 45 minutes (including prep and cooking).
- Difficulty Level : Easy-peasy! If you can roll sushi, you’re golden. 👌
This recipe is perfect for weeknight dinners, weekend gatherings, or even as an impressive dish to bring to potlucks. Plus, it’s versatile enough to customize based on your taste buds!

🛒 Essential Ingredients: What You’ll Need
Here’s what makes this dish magical:
1. Sushi Rice 🍚
The base of any good sushi roll, sushi rice is sticky and slightly sweet. It holds everything together like glue.
- Substitution Tip : If you don’t have sushi rice, short-grain white rice works too, but the texture might differ slightly.

2. Nori (Seaweed Sheets) 🌿
These thin sheets of dried seaweed are essential for wrapping your sushi rolls. They add a subtle oceanic flavor and keep the ingredients snug.
3. Chicken Tempura 🐔✨
The star of the show! Lightly battered and fried chicken pieces provide the crunch we all crave.
- Pro Tip : Use boneless, skinless chicken thighs for juicier results.
4. Vegetables 🥦🥕
Fresh veggies like avocado, cucumber, and carrots add color, nutrition, and balance to the dish.
- Variations : Swap out veggies based on what you have—zucchini, bell peppers, or even spinach work well.
5. Soy Sauce & Wasabi 🍱
For dipping, of course! These condiments elevate the umami flavors of the sushi.
6. Optional Extras 🧂
- Sesame seeds for garnish.
- Spicy mayo for a kick.
🥢 Step-by-Step Instructions: Let’s Get Rolling!
Now comes the fun part—making your Chicken Tempura Sushi from scratch. Follow these steps carefully, and you’ll be rolling like a pro in no time.
Step 1: Cook the Sushi Rice 🍚
- Rinse 1 cup of sushi rice under cold water until the water runs clear.
- In a pot, combine the rinsed rice with 1¼ cups of water. Bring it to a boil, then lower the heat, cover the pot, and let it simmer gently. Simmer for 15 minutes.
- Remove from heat and let it sit, covered, for another 10 minutes. Fluff with a fork and mix in sushi vinegar (or a mix of rice vinegar, sugar, and salt).

Step 2: Prepare the Chicken Tempura 🐔✨
- Cut chicken thighs into bite-sized strips. Season lightly with salt and pepper.
- For the batter, whisk together ½ cup flour, 1 egg yolk, and ½ cup ice-cold sparkling water. The bubbles help create a light, airy coating.
- Pour oil into a deep pan and heat it to 350°F (175°C). Coat each piece of chicken in the batter, then carefully place it in the hot oil. Fry the chicken in batches, turning occasionally, until it turns a rich golden brown, which should take about 3-4 minutes per batch. Drain on paper towels.

Step 3: Slice Your Veggies 🥑🥕
Thinly slice your veggies so they fit nicely inside the rolls. Think matchstick-sized pieces for cucumbers and carrots.
🎨 Assembly: Building Your Masterpiece
Now that everything’s prepped, let’s assemble these beauties!
- Place a sheet of nori on a bamboo sushi mat. Gently spread a thin, even layer of sushi rice over the nori, leaving a 1-inch border at the top for sealing the roll.
- Sprinkle sesame seeds over the rice for extra flavor and texture.
- Turn the nori sheet over so that the rice is facing down and the shiny side of the nori is on top. Add a strip of chicken tempura, avocado slices, cucumber, and carrot in a line across the center.
- Roll tightly using the bamboo mat, sealing the edge with a bit of water.
- Using a sharp knife, slice the roll into 6 to 8 evenly sized pieces for serving. Wipe the blade between cuts for clean slices.
Presentation Tip : Arrange the sushi rolls on a plate with soy sauce, wasabi, and pickled ginger on the side. Sprinkle extra sesame seeds on top or add a drizzle of spicy mayo for an elegant finishing touch. 🎉

🥡 Storage and Make-Ahead Tips
If you’ve made extras (or just want to save some for later), here’s how to store them without losing their magic:
- Chicken Tempura : Store in an airtight container in the fridge for up to 2 days. Warm it up in the oven at 350°F (175°C) for 5–10 minutes to keep it crispy and delicious. Avoid microwaving—it’ll get soggy.
- Sushi rolls are best enjoyed fresh, but if you have leftovers, store them in the fridge for up to 24 hours. To keep them from drying out, wrap them tightly in plastic wrap.
Make-Ahead Hack : Prep the rice and veggies ahead of time, then assemble the rolls just before serving for maximum freshness.
🍴 Recipe Variations: Get Creative!
Why stop at one version when you can try many? Here are some fun twists:
- Spicy Chicken Tempura Sushi : Toss the chicken in a mix of sriracha and honey before frying.
- Veggie Lover’s Version : Skip the chicken and load up on tempura-fried veggies like sweet potato or zucchini.
- Create a California-inspired roll by adding crab sticks or imitation crab alongside the chicken for a delicious surf-and-turf twist.

🎊 Conclusion: Time to Roll Up Your Sleeves!
Congratulations—you now know how to make Chicken Tempura Sushi like a pro! This dish is proof that sushi doesn’t have to be complicated to be delicious. With its crispy, creamy goodness, it’s sure to wow your family and friends. Now that you’re ready, gather your ingredients, heat up the stove, and get rolling! Experiment with different fillings and sauces to make it truly yours. Happy cooking! 🍣❤️
And if you’re craving authentic Japanese flavors, why not plan a trip to Tokyo? Discover these 7 hidden gems in Tokyo that every food lover should explore!
❓ FAQs: Your Burning Questions Answered
Q: How to make homemade Chicken Tempura Sushi?
A: Great question! Making Chicken Tempura Sushi at home is easier than you think. Start by preparing sushi rice and cooking crispy chicken tempura. Roll them together with fresh veggies like avocado and cucumber using nori sheets, and voilà—your homemade Chicken Tempura Sushi is ready! Follow the step-by-step instructions in this article for detailed guidance. 🍣
Q: Is Chicken Tempura Sushi healthy?
A: While it’s not exactly “low-calorie” due to the frying, it’s packed with protein, healthy fats from avocado, and fiber from veggies. Moderation is key!
Q: Can I bake the chicken instead of frying it?
A: Yes! For a lighter option, coat the chicken in panko breadcrumbs and bake at 400°F (200°C) for 15-20 minutes.
Q: How do I keep my sushi rice from getting mushy?
A: Rinse the rice thoroughly before cooking and avoid overcooking. Also, let it cool slightly before assembling the rolls.
Q: Can I freeze Chicken Tempura Sushi?
A: We don’t recommend freezing sushi rolls, as the rice and veggies may lose their texture. Stick to refrigerating for short-term storage.
Q: What’s the best way to serve this dish?
A: Serve it alongside miso soup, edamame, or a fresh salad for a well-rounded and satisfying meal. Serve with chopsticks for an authentic experience!
There you have it—a full guide to making Chicken Tempura Sushi that’s as fun to make as it is to eat. Now go forth and conquer the kitchen! 🥢✨