Have You Ever Wondered What Happens When Chewy Mochi Meets Creamy Ice Cream?
Imagine biting into a soft, chewy rice dough only to find your favorite ice cream hidden inside like a sweet secret treasure. Sounds magical, right? Welcome to the delicious world of Mochi Ice Cream! This Japanese treat has become a global sensation, and the best part? You can make it at home with just a few ingredients and a little patience.
What Makes This Mochi Ice Cream Recipe So Special?
This recipe brings the traditional charm of Japanese mochi together with the creamy coolness of ice cream. It’s surprisingly easy, even for beginners. You don’t need any fancy equipment, just a microwave or steamer, a rolling pin, and your favorite ice cream. It takes around 30 minutes of hands-on prep (plus some freezing time), and you’ll be rewarded with 12 delicious mochi ice cream balls.
Perfect for summer, parties, or as a fun cooking project with kids, this recipe also offers flexibility—you can switch up the flavors, textures, and shapes. Let’s dive in!
Table of Contents
What Is Mochi Ice Cream?
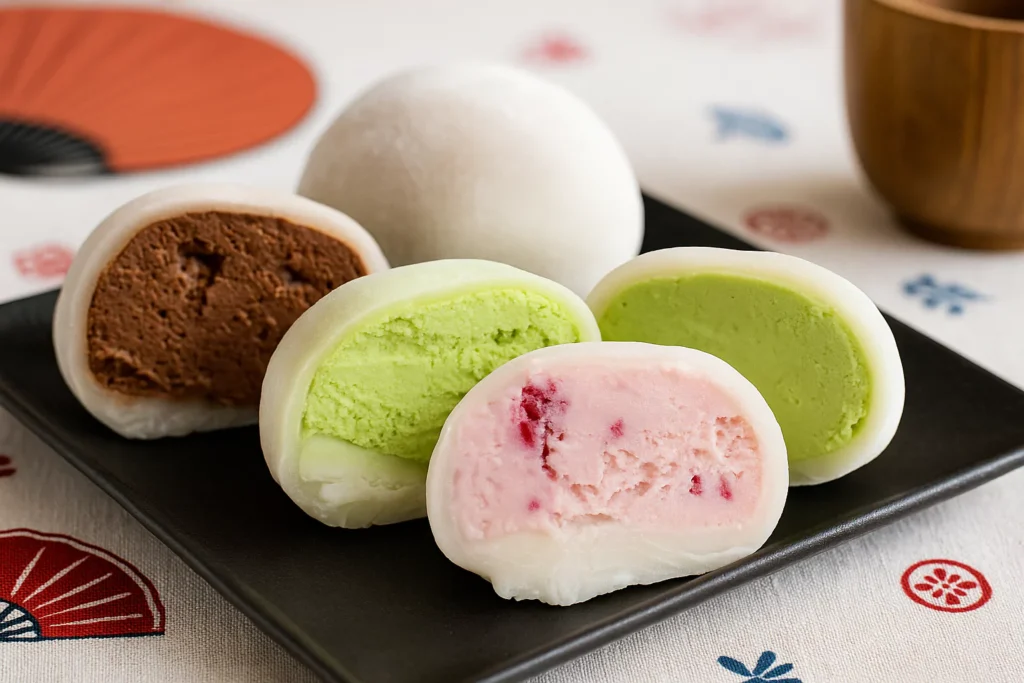
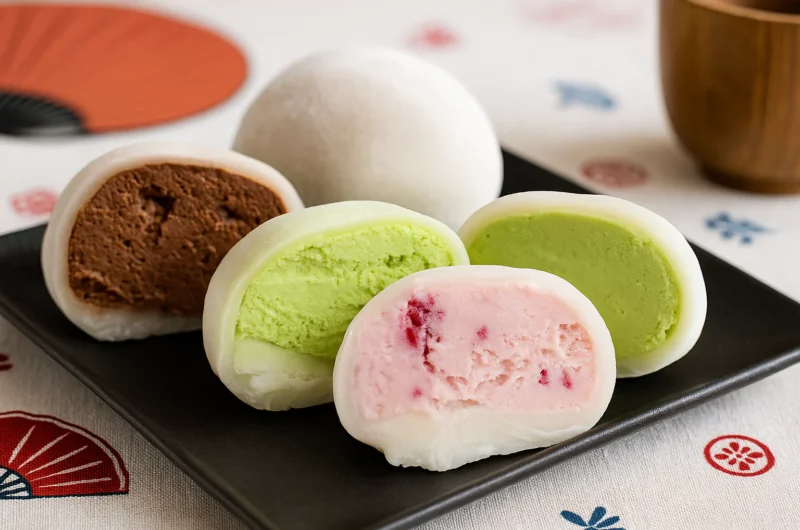
Mochi Ice Cream is a delightful little dessert made by wrapping soft, chewy rice dough called mochi (餅) around a ball of creamy ice cream. The mochi is made from mochigome (糯米), a type of short-grain glutinous rice that becomes stretchy, sticky, and satisfyingly elastic when cooked and pounded. This traditional Japanese rice cake has long been a part of Japanese culture, often enjoyed during special celebrations.
Growing up, one of my all-time favorite treats was Yukimi Daifuku (雪見だいふく) a classic Japanese sweet that featured a scoop of vanilla ice cream enveloped in delicate mochi. It was super popular in Japan during the 1980s, and I still remember the joy of that first cold, chewy bite!
Fast forward to the early 1990s, when Frances Hashimoto a Japanese-American entrepreneur and former CEO of Mikawaya introduced the world to a more accessible version of this treat: mochi ice cream. Her idea brought a fun twist to a beloved tradition, and it quickly became a worldwide favorite.
This hand-held dessert is not only irresistibly cute (kawaii) but also incredibly satisfying. Every bite combines the tender stretch of mochi with the rich chill of ice cream. It’s the kind of dessert that makes your taste buds smile and trust me, it’s hard to stop at just one!

Mochi Ice Cream @JapanDishes
Essential Ingredients for Mochi Ice Cream
Here’s what you’ll need to whip up these chewy-creamy delights:
- ¾ cup Shiratamako (sweet glutinous rice flour)
- Or use ¾ cup Mochiko as a substitute.
- ¾ cup water
- ¼ cup sugar (don’t skip it keeps the mochi soft)
- ½ cup potato starch or cornstarch (for dusting)
- Ice cream of your choice (vanilla, matcha, strawberry, mango… your call!)
Substitutions and Variations:
- Use Mochiko if Shiratamako is unavailable. Mochiko yields a slightly different texture softer and more elastic.
- You can go dairy-free by using vegan ice cream.
- For natural color, mix a small amount of matcha, cocoa, or fruit puree into the mochi dough.
✅ Step-by-Step Instructions to Make Mochi Ice Cream
Important: Freeze time needed is about 4 hours, so plan ahead!
Step 1: Prepare the Ice Cream
- Using a medium cookie scoop, portion out your ice cream into aluminum or silicone cupcake liners.
- Immediately return them to the freezer for a few hours until they are completely frozen solid.

Step 2: Make the Mochi Dough
- In a medium bowl, whisk together:
- ¾ cup Shiratamako (or Mochiko)
- ¾ cup water
- Mix until the flour dissolves.
- Add ¼ cup sugar and stir until smooth.

Step 3: Cook the Mochi
Microwave Method:
- Cover bowl loosely with plastic wrap.
- Microwave on high (1000w) for 1 minute.
- Stir with a wet spatula.
- Microwave another 1 minute, stir again.
- Final round: Microwave 30 more seconds. The mixture should turn translucent.

Steaming Method:
- Wrap the steamer lid with a towel.
- Steam mochi mix for 15 minutes.
- Stir halfway with a wet spatula.
- Cook until translucent.
Step 4: Shape and Cool the Mochi
- Generously dust a sheet of parchment paper with potato starch.
- Place the cooked mochi on top.
- Sprinkle more starch to prevent sticking.
- Roll out the mochi to about ⅛ inch (3mm) using your hands or a rolling pin.
- Refrigerate for 15 minutes to set.


Step 5: Cut and Store the Wrappers
- Cut the chilled mochi dough into 3.5-inch circles using a cookie cutter or bowl.
- Brush off extra starch gently.
- Layer the cut circles between sheets of plastic wrap.


🧡 Hana’s Recipe Tips
Hi, I’m Hana! Here are my favorite tricks to perfecting Mochi Ice Cream:
- Work fast: Keep your ice cream balls frozen until the very last second.
- Don’t skimp on starch: It’s the secret to non-sticky mochi.
- Use different flavors: Strawberry, chocolate, matcha, or even cookies ‘n cream!
- Smaller scoops = easier wrapping.
- Use gloves: It helps when handling sticky mochi.
Have fun experimenting!
🍓 Love fruity mochi desserts? Try our easy recipe for Strawberry Mochi (Ichigo Daifuku) a soft mochi filled with sweet red bean paste and fresh strawberries!
How to Assemble the Mochi Ice Cream
- Place a mochi circle on a sheet of plastic wrap.
- Put one ice cream scoop in the center.
- Pinch all four sides of the mochi wrapper to seal the ice cream inside.
- Dust sticky areas with more potato starch.
- Twist the plastic wrap tightly to hold shape.
- Place each wrapped mochi into a cupcake liner to keep it round.
- Freeze again for 2-3 hours.


When you’re ready to eat, let it sit at room temperature for 2-3 minutes before biting in. Enjoy the chewy shell and cold center!


🫰 Storage and Make-Ahead Tips
- Store mochi ice cream in a ziplock bag or airtight container in the freezer.
- They will last 2-3 weeks (if you can resist that long!).
- To avoid freezer burn, press out all air from your storage bag.
- You can make the mochi wrappers a day ahead, layer with plastic wrap, and chill in the fridge.
Creative Recipe Variations
- Matcha Madness: Add 1 tsp matcha powder to the mochi dough.
- Choco Dream: Mix in 1 tbsp cocoa powder.
- Tropical Vibe: Use mango or coconut ice cream inside.
- Fruity Surprise: Place a small piece of fruit inside with the ice cream (like a berry or banana slice).
- Rainbow Mochi: Use natural food coloring for colorful dough.
Mochi Ice Cream もちアイス
Course: DessertCuisine: JapaneseDifficulty: Easy12 pieces
servings30
minutes5
minutes120 per mochi ice cream ball
kcalSoft, chewy mochi wrapped around your favorite ice cream—this Japanese dessert is the perfect handheld sweet treat! Make it easily at home with just a few simple ingredients.
Ingredients
¾ cup shiratamako (glutinous rice flour)
(or substitute with ¾ cup mochiko if preferred)¾ cup water
¼ cup sugar
½ cup potato starch or cornstarch (for dusting)
12 scoops of your favorite ice cream
Optional: plastic wrap, parchment paper, cupcake liners, rolling pin, cookie cutter
Directions
- Prep the Ice Cream:
Use a cookie scoop to form 12 small ice cream balls. Place each in a cupcake liner and freeze until completely firm (at least 2 hours). - Mix the Dough:
In a microwave-safe bowl, whisk together the rice flour and water until smooth. Add sugar and stir until dissolved. - Cook the Mochi:
Microwave on high for 1 minute. Stir with a wet spatula. Repeat microwaving in 1-minute increments twice more (final round only 30 seconds), stirring between each. The dough should look glossy and slightly translucent. - Prepare the Surface:
Dust a sheet of parchment paper generously with potato starch. Transfer the warm mochi onto it and sprinkle more starch on top to avoid sticking. - Flatten the Dough:
Roll the mochi dough into a thin layer (about ⅛ inch thick). Let it chill in the fridge for 15 minutes. - Cut the Wrappers:
Use a cookie cutter or glass to cut out 3.5-inch circles. Dust off excess starch with a brush. - Wrap the Ice Cream:
Working quickly, place a frozen scoop of ice cream in the center of a mochi circle. Pinch the edges to seal and wrap in plastic to hold shape. Repeat for all 12. - Freeze Again:
Place mochi ice cream balls back into the freezer for another 2–3 hours before serving.
Notes
- Use cornstarch or potato starch to prevent sticking—don’t skip it!
Keep ice cream frozen until the moment you’re ready to wrap.
You can store finished mochi ice cream in the freezer for up to 3 weeks in an airtight container.
For extra flavor, mix a little matcha or cocoa powder into the dough!
Conclusion: Your Turn to Get Creative!
Mochi Ice Cream is more than just a dessert—it’s a fun and creative way to experience Japanese cuisine right in your kitchen. Whether you’re making it for a party, a summer afternoon treat, or just to try something new, this recipe is sure to impress. Play with flavors, colors, and shapes. Once you get the hang of it, you’ll find yourself wanting to make it again and again.
🤔 FAQs About Mochi Ice Cream
Q: Can I make mochi dough without a microwave?
A: Yes! Use a steamer and cook the dough for about 15 minutes.
Q: Is mochi ice cream gluten-free?
A: Yes, both shiratamako and mochiko are made from glutinous rice, which is naturally gluten-free.
Q: Can I make it vegan?
A: Absolutely! Just use plant-based ice cream.
Q: Why is my mochi too sticky?
A: You need more potato starch on your work surface and tools.
Q: How long can I store them?
A: Store them in an airtight container in the freezer for up to 3 weeks.
Q: What if I don’t have a cookie cutter?
A: Use a glass cup or bowl with a similar size.
Now go make your own little bites of chewy, creamy happiness! 🤤
🌲 Curious about more Japanese culture and hidden gems? Don’t miss this guide to Aokigahara: 12 Eerie Sights You’ll See in the Forest.