Do you ever wonder why homemade cookies taste so much better than the ones from the store especially during Halloween? Maybe it’s the buttery aroma that fills the kitchen, or the excitement of decorating spooky shapes with your own hands. Whatever the reason, Halloween Butter Cookies (ハロウィンクッキー) bring warmth, joy, and creativity to one of the most festive times of the year. In this article, you’ll discover how to make your own batch of soft, crisp, and buttery cookies that melt in your mouth and look perfect for your Halloween celebration.
Overview
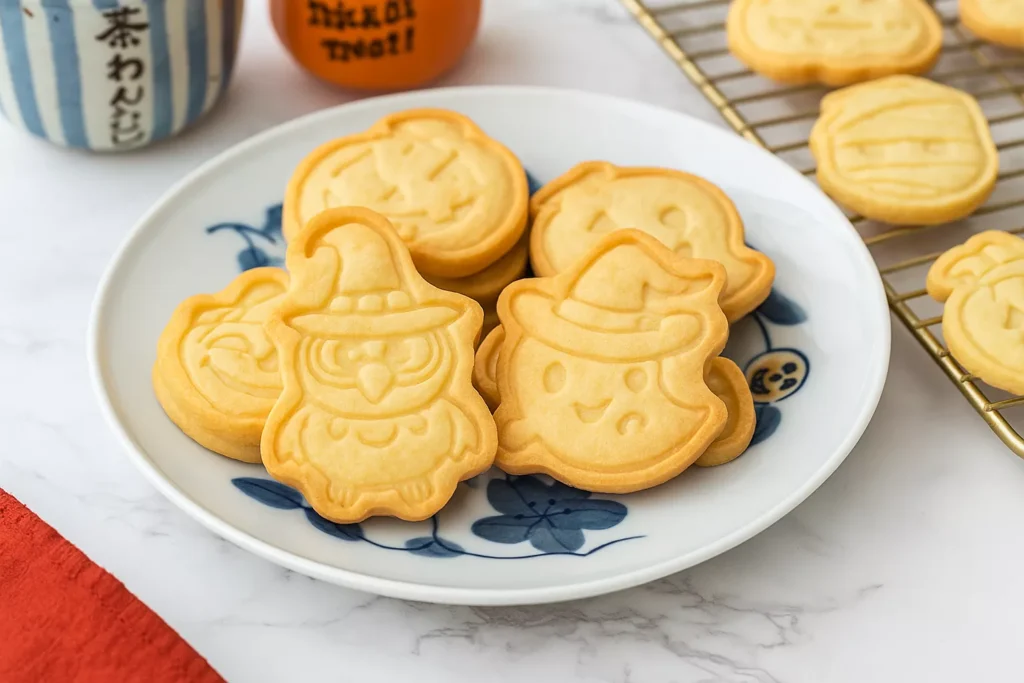
These Halloween Butter Cookies ハロウィンクッキー are more than just a treat—they’re a celebration of fun and imagination. With just a few basic ingredients, you can create cookies that look like ghosts, pumpkins, bats, or even cute little cats. They’re easy enough for beginners but satisfying for experienced bakers who enjoy adding artistic touches.
Time requirement: About 45 minutes from start to finish
Difficulty level: Easy to moderate
Yields: Around 20 to 25 cookies, depending on cutter size

Halloween Butter Cookies ハロウィンクッキー @JapanDishes
What Are Halloween Butter Cookies ハロウィンクッキー?
Halloween Butter Cookies, or ハロウィンクッキー in Japanese, are delicate cookies made with a classic butter base. They’re crispy on the outside, tender in the center, and full of rich flavor. In Japan, these cookies are a favorite seasonal snack, often decorated with cute Halloween designs like ghosts (おばけ), pumpkins (かぼちゃ), or black cats (黒猫). Their simple recipe makes them perfect for family baking days or school Halloween parties.
What makes them special is how versatile they are—you can decorate them with icing, add chocolate chips, or use natural colors to create orange and black doughs. Every batch can look different, yet they always taste buttery and delightful.
Essential Ingredients
Before we start baking, let’s look at what makes these cookies truly irresistible.
Key Ingredients:
- Egg yolk (1 piece): Adds richness, color, and structure to the dough. Using only the yolk keeps the cookies tender.
- Granulated sugar (40g): Sweetens the cookies and helps them develop a light golden crust.
- Milk (10g): Keeps the dough soft and easy to shape while adding a touch of moisture.
- Salad oil (40g): A light, neutral oil that ensures a crisp texture without overpowering the buttery flavor.
- Cake flour (120g): This low-protein flour gives cookies their signature soft and crumbly texture.
Why These Ingredients Matter
Each ingredient plays a specific role in creating the ideal texture:
- The egg yolk binds the dough and enhances the buttery taste.
- Sugar adds sweetness but also affects the crispness of the final cookie.
- Oil keeps them light and crunchy rather than dense.
- Milk helps mix everything smoothly.
- Cake flour ensures the cookies stay tender and not too chewy.
Substitutions and Variations
- You can replace salad oil with unsalted butter for a richer flavor.
- Use almond flour for a nutty twist or whole wheat flour for a rustic version.
- Add vanilla extract, pumpkin spice, or matcha powder to infuse seasonal flavors.
- For vegan cookies, use plant-based milk and vegan butter or oil.
These small changes make it easy to adapt the recipe to your taste or dietary needs.

Step-by-Step Instructions
Now, let’s bake these delicious cookies! Follow these easy steps carefully for the best results.
Preparation
Preheat your oven to 180°C (356°F) and prepare a baking sheet lined with parchment paper. This helps the cookies bake evenly and prevents sticking.
Step 1: Mix Egg Yolk and Sugar
In a medium bowl, whisk together one egg yolk and 40g of granulated sugar until smooth and slightly pale. The mixture should look creamy—this step ensures the sugar dissolves evenly and gives your cookies a smooth texture.

Tip: Don’t overbeat; you just want to mix until the sugar melts into the yolk.
Step 2: Add Oil and Milk
Pour in 40g of salad oil and 10g of milk. Stir gently until the ingredients blend completely. This combination creates a moist and easy-to-handle dough base.

Step 3: Add Cake Flour
Sift 120g of cake flour directly into the bowl. Sifting is important because it prevents lumps and makes your dough soft and smooth. Mix gently using a spatula in a cutting motion, rather than stirring vigorously. This keeps the cookies tender.

When the dough starts to come together, use your hands to form it into a ball. It should feel smooth, not sticky.
Step 4: Roll Out the Dough
Place the dough inside a Ziploc bag and roll it out evenly to a thickness of about 3mm. Using a bag prevents sticking and keeps your workspace clean.
Once rolled out, cut open the bag and peel off both sides of the plastic. This makes it easy to cut shapes later.
Step 5: Cut Out Halloween Shapes
Use your favorite Halloween-themed cookie cutters—pumpkins, bats, ghosts, or stars—to cut out shapes from the dough. Arrange them carefully on the baking tray, leaving space between each cookie.

Step 6: Bake the Cookies
Bake in a 170°C (338°F) oven for about 13 minutes. Turn the baking tray halfway through to prevent uneven browning. The cookies are ready when the edges start turning light golden brown.

Let them cool completely on a wire rack before decorating or serving.
Secrets to Success and Expert Tips
Every good recipe has a few insider secrets. Here are some expert tips to make your Halloween Butter Cookies ハロウィンクッキー turn out perfect every time:
- Don’t overmix the dough. Overworking develops gluten, making cookies tough instead of crisp.
- Chill the dough before cutting. If your dough feels soft, refrigerate it for 15 minutes—it’ll hold shape better.
- Use quality ingredients. Fresh egg yolks, good flour, and clean oil make a big difference in flavor.
- Adjust baking time based on thickness. Thicker cookies need 1–2 extra minutes; thinner ones bake faster.
- Keep an eye on color. They should stay pale golden, not brown—overbaking makes them dry.

These simple tricks can elevate a basic cookie into a bakery-quality treat.
Assembly and Decoration
Once your cookies are baked and cooled, it’s time to bring them to life with fun decorations!
You can decorate them in several ways:
- Royal icing: Use powdered sugar, egg white, and a few drops of lemon juice to pipe spooky designs.
- Chocolate drizzle: Melt dark or white chocolate and create cobwebs, faces, or stripes.
- Colored dough: Divide the dough and add food coloring to make orange pumpkins or black bats.
- Sprinkles: Add Halloween-themed sprinkles before baking for a playful touch.
Decorating isn’t just for kids—it’s a way to express creativity and make each cookie unique. Arrange them neatly on a plate or a wire rack for display.
Hana’s Recipe Tips
As someone who has tested this recipe many times, Hana recommends keeping these points in mind:
- Use a white background tray or Japanese plate to highlight the cookie colors. Presentation is everything!
- Add extra shapes—even small stars or hearts—to make the cookie tray look fuller.
- Mix a few designs in one batch. This gives your cookie set variety and charm.
- For a Japanese twist, use matcha or kinako (roasted soybean flour) to flavor half the dough for a two-tone effect.
These small presentation tips make your cookies look professional and perfect for blog photos or gift boxes.

ハロウィンクッキー @JapanDishes
Storage and Make-Ahead Tips
Butter cookies stay fresh longer than most desserts if stored properly. Here’s how to keep your Halloween Butter Cookies ハロウィンクッキー crisp and delicious:
- Room temperature: Store in an airtight container for up to 7 days. Add a piece of parchment paper between layers to prevent sticking.
- Refrigeration: Not necessary unless your kitchen is hot, but you can store decorated cookies in the fridge for up to 10 days.
- Freezing dough: You can freeze unbaked dough for up to one month. Thaw it in the fridge before rolling and baking.
- Reheating: If cookies lose crispness, warm them in a 150°C oven for 2–3 minutes. They’ll taste freshly baked again!
These cookies also make great gifts. Place them in small bags with ribbons for friends, or use them as party favors.
Recipe Variations
The beauty of this recipe is how easily it adapts to your creativity. Here are a few fun ways to change things up:
- Chocolate Butter Cookies: Replace 10g of flour with cocoa powder for a deep chocolate flavor.
- Matcha Halloween Cookies: Add 1 teaspoon of matcha powder to create green dough perfect for monster faces.
- Pumpkin Spice Version: Add ¼ teaspoon of cinnamon, nutmeg, and clove for a cozy autumn taste.
- Marble Cookies: Mix two colored doughs (orange and white, or black and white) and roll them together for a marbled look.
- Jam-filled Cookies: Cut out small circles in half the cookies and fill them with orange or strawberry jam after baking.
Each variation adds a seasonal or cultural touch to your Halloween spread.
🍁 Related Halloween Recipes You’ll Love
If you enjoy fun and creative Halloween treats, you’ll love exploring more of our festive Japanese recipes! Warm up with a bowl of Japanese Pumpkin Soup (Kabocha no Supu) — creamy, comforting, and perfect for chilly autumn nights. For a spooky twist, try making Halloween Sushi Rolls ハロウィン巻きずし — colorful, bite-sized, and full of Halloween spirit.


🎃 More Pumpkin-Inspired Japanese Treats
Love the cozy taste of fall? Dive into more pumpkin-inspired creations that celebrate the season! Bake a batch of Easy Pumpkin Cookies (Kabocha Cookies) — soft, buttery, and full of autumn charm. Or enjoy the fluffy sweetness of Japanese Pumpkin Melon Bread (パンプキン・メロンパン), a treat that perfectly balances kabocha flavor with the light texture of melon pan.

")
Conclusion
Halloween is the perfect excuse to get creative in the kitchen. These Halloween Butter Cookies ハロウィンクッキー are more than a recipe—they’re an experience filled with warmth, fun, and a touch of nostalgia. Simple ingredients turn into something magical when mixed with imagination and care.
Whether you bake them for a party, gift box, or cozy family afternoon, these cookies are sure to impress. The buttery aroma, crisp texture, and festive shapes capture the spirit of Halloween in every bite. So roll up your sleeves, gather your cutters, and enjoy baking something special this season. And for a travel inspiration twist, check out Snow in Japan: 7 Best Cities for Stunning Winter Views — perfect for planning a snowy getaway after your cookie-baking fun!
FAQs
1. Can I use all-purpose flour instead of cake flour?
You can, but the cookies will be slightly denser. To mimic cake flour, mix all-purpose flour with a bit of cornstarch (about 1 tablespoon per 120g of flour).
2. How can I make these cookies healthier?
You can reduce sugar slightly, use olive oil instead of salad oil, or choose whole grain flour for added fiber. They’ll still taste delicious but with a wholesome twist.
3. Are these cookies safe for kids to make?
Absolutely! The recipe is simple and safe for kids to help with. They’ll love cutting shapes and decorating the cookies.
4. How long do they stay crispy?
If stored properly in an airtight container, they stay crisp for up to a week. Avoid humid areas, as moisture softens them.
5. Can I decorate them with icing before baking?
No, it’s better to decorate after baking. Otherwise, icing can melt and lose shape in the oven.
6. Do they contain butter?
Traditional butter cookies use butter, but this version uses salad oil for a lighter texture. You can easily switch to unsalted butter for a richer flavor.
7. Can I freeze baked cookies?
Yes. Once cooled, place them in a freezer-safe bag with parchment paper between layers. They’ll last for up to two months.
Final Thought:
Halloween Butter Cookies ハロウィンクッキー are the perfect balance of simplicity and creativity. Whether you make them traditional or add your own twist, every cookie tells a story. Enjoy the process, share them with loved ones, and celebrate the season with a touch of homemade sweetness.

Halloween Butter Cookies ハロウィンクッキー
Course: SnacksCuisine: JapaneseDifficulty: Easy24 cookies
servings20
minutes13
minutes75
kcalThese Halloween Butter Cookies (ハロウィンクッキー) are buttery, crisp, and easy to make perfect for spooky season fun. Shape them into pumpkins, ghosts, or bats, and enjoy a light, golden cookie that melts in your mouth.
Ingredients
1 egg yolk
40g granulated sugar
10g milk
40g salad oil
120g cake flour
Directions
- Preheat the oven
Preheat your oven to 180°C (356°F) and line a baking sheet with parchment paper. - Mix egg yolk and sugar
In a medium bowl, whisk together the egg yolk and granulated sugar until smooth and slightly pale. - Add oil and milk
Stir in the salad oil and milk, blending gently until combined. - Add flour
Sift the cake flour into the bowl. Mix with a spatula in a cutting motion to form a soft dough. Once it comes together, knead lightly by hand until smooth. - Roll out the dough
Place the dough inside a Ziploc bag and roll it out evenly to about 3mm thick. Peel off both sides of the plastic before cutting. - Cut shapes
Use Halloween-themed cutters (pumpkins, ghosts, bats, etc.) to cut out the dough. Arrange cookies on the baking tray. - Bake
Bake at 170°C (338°F) for about 13 minutes, turning the tray once halfway through to ensure even baking. Cookies are done when the edges turn light golden. - Cool and decorate
Let the cookies cool completely before decorating with icing, chocolate, or sprinkles.
Notes
- ✪ For a richer flavor, substitute salad oil with unsalted butter.
✪ If the dough feels sticky, chill it for 15 minutes before cutting.
✪ To add color, mix a little matcha or cocoa powder into separate portions of dough.
✪ Store in an airtight container for up to one week at room temperature.