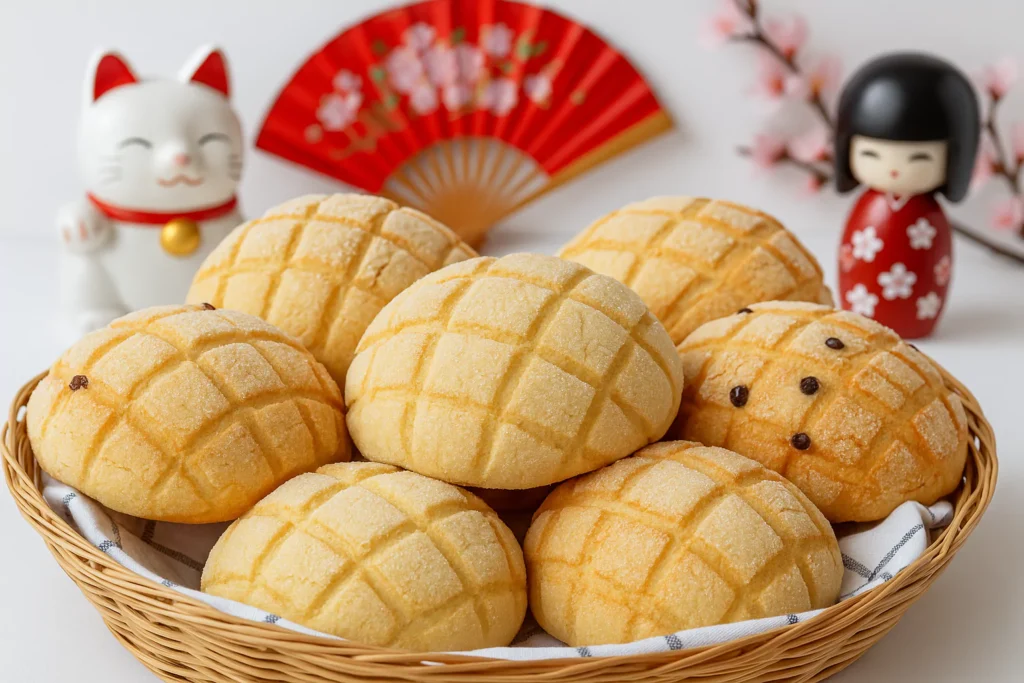
Have you ever tasted a cookie and bread at the same time? If that sounds impossible, then you’re in for a surprise. Melon Pan (メロンパン) is a popular Japanese treat made by wrapping fluffy bread dough in a crisp, sugar-coated cookie layer. It doesn’t taste like melon, but its shell pattern looks like one — and that makes it extra fun!
Jump to Recipe Print RecipeLet’s dive into how you can make this iconic Japanese treat right in your own kitchen. Whether you’re a beginner or a seasoned baker, this guide breaks everything down in a friendly and simple way.
Table of Contents
What Makes Melon Pan Special?
Melon Pan is more than just a sweet bread. It’s a nostalgic comfort food in Japan, sold in bakeries, convenience stores, and even train stations. What sets it apart?
- Dual texture: Soft, fluffy bread inside, crunchy cookie on top.
- Eye-catching design: The crisscross pattern on top looks like a melon.
- Versatile treat: Perfect for breakfast, snacks, or dessert.
Time Needed: About 3.5 hours (including rising times)
Difficulty Level: Intermediate (but don’t worry, we’ll go step-by-step!)

Melon Panメロンパン
Essential Ingredients
Here’s what you need to create the magic:
For the Bread Dough
- Bread flour: 225 g (for structure and chewiness)
- Cake flour: 25 g (softens the texture)
- Salt: 1 tsp
- Granulated sugar: 3 Tbsp
- 1¼ teaspoons instant yeast (or substitute with active dry yeast if preferred)
- Egg: 1 large, beaten
- Whole milk: 50 ml (room temp)
- Water: 50 ml (room temp)
- Unsalted butter: 35 g, cubed
For the Biscuit Dough
- Unsalted butter: 60 g, cubed
- Sugar: 100 g
- Egg: 1 large, beaten
- Cake flour: 200 g
- Baking powder: ½ tsp
Topping
- Granulated sugar: 2 Tbsp
Substitutions and Variations:
- You can use oat or soy milk in place of whole milk for a dairy-free option.
- Try adding cocoa powder or matcha powder to the biscuit dough to give the melon pan a different flavor.
Step-by-Step Instructions
Step 1: Make the Bread Dough (Hand Kneading)
- In a large mixing bowl, combine the bread flour, cake flour, salt, sugar, and yeast.
- Add the beaten egg, milk, and water. Mix until a rough dough forms.
- Move the dough onto a lightly floured surface and knead it by hand for approximately 5 minutes.
- Add the cubed butter and knead again until fully absorbed and the dough becomes smooth.
- Perform the windowpane test to ensure the dough stretches thinly without tearing.
- Shape the dough into a smooth ball, place it in a bowl, cover it, and let it rise in a warm area until it doubles in size. This usually takes about one to two hours.


Step 2: Prepare the Biscuit Dough
- In a new bowl, mash the butter until it becomes creamy.
- Add sugar and mix until well combined.
- Gradually add the beaten egg, mixing thoroughly between additions.
- Sift in the cake flour and baking powder. Mix until the dough forms.
- Divide the dough into ten equal pieces, roll each into a ball, and refrigerate for 10 minutes to make them easier to handle.


Step 3: Divide and Shape the Bread Dough
- After the bread dough has risen, gently deflate it and shape into a log.
- Divide into ten equal pieces.
- Roll each portion into a smooth ball, cover with plastic wrap, and let them rest for 15 minutes.


Assembly and Shaping the Melon Pan
- Roll out each chilled biscuit dough ball into a flat circle roughly four inches in diameter.
- Wrap one piece of biscuit dough over each bread dough ball, cookie side facing outward.
- Dip the cookie side into granulated sugar, coating it lightly.


- Use a knife or dough scraper to gently score a crosshatch pattern on top of each one.
- Place them on a baking sheet lined with parchment paper and allow to rise again for about 50 minutes.


Baking Instructions
- Preheat your oven to 350°F (180°C).
- Once the dough has completed the final rise, place the baking sheet in the center of the oven.
- Bake for 13 to 15 minutes, or until the tops are lightly golden.
- Remove from the oven and let cool on a wire rack before serving.


Pair It with a Warm Drink:
Melon Pan pairs wonderfully with a warm and comforting Japanese drink. Try it with a sweet and creamy Sakura Latte a beautiful seasonal drink that complements the bun’s light sweetness.
Hana’s Recipe Tips
- Always use whole milk for better texture unless you need a dairy-free version.
- Use a kitchen scale to weigh ingredients accurately. Measuring flour with cups can lead to errors.
- Be patient during the first and second rises. The dough needs this time to develop flavor and texture.
- Perform the windowpane test—it helps ensure your bread will be light and fluffy.
- Chill the biscuit dough slightly before assembly. It makes shaping much easier.
- Don’t overbake. Remove from the oven when the top is golden to avoid a dry interior.
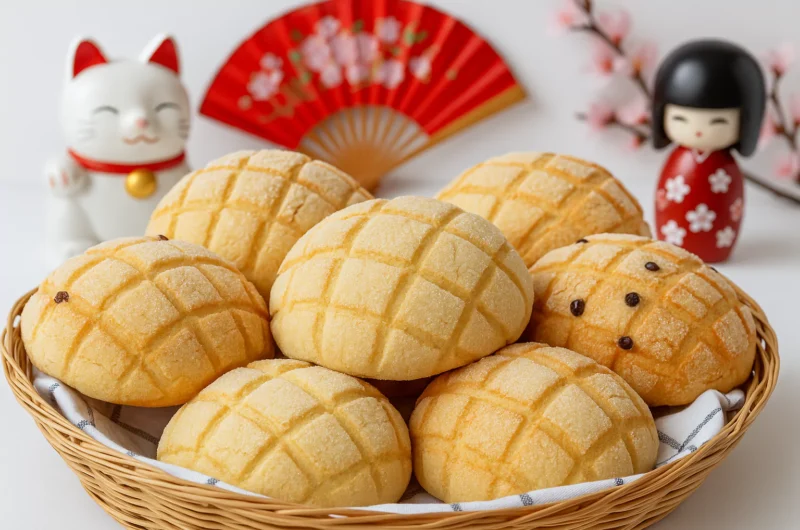
Melon Panメロンパン
Course: Breakfast, SnacksCuisine: JapaneseDifficulty: Medium4
servings2
hours15
minutes300
kcalMelon Pan (メロンパン) is a popular Japanese sweet bun with a soft, airy center and a crispy cookie crust. Despite its name, it doesn’t taste like melon—it’s named for its melon-like appearance. This recipe shows you how to make it easily at home.
Ingredients
- Bread Dough:
225 g bread flour
25 g cake flour
1 tsp kosher salt
3 Tbsp granulated sugar
1¼ tsp instant yeast
1 large egg, beaten
50 ml whole milk (room temperature)
50 ml water (room temperature)
35 g unsalted butter, cubed and softened- Biscuit Dough:
60 g unsalted butter, softened
100 g granulated sugar
1 large egg, beaten
200 g cake flour
½ tsp baking powder- Topping:
2 Tbsp granulated sugar for coating
Directions
- Make the Bread Dough
- Combine the bread flour, cake flour, salt, sugar, and yeast in a mixing bowl and stir to blend.
- Add the egg, milk, and water. Mix until it forms a sticky dough.
- Knead for 5 minutes, then add butter and continue kneading until smooth.
- Test elasticity with the windowpane test.
- Form into a ball, cover, and let rise for 1–2 hours until doubled.
- Make the Biscuit Dough
- Cream butter and sugar together.
- Gradually add the beaten egg.
- Sift in cake flour and baking powder. Mix until dough forms.
- Portion the dough into 10 equal pieces, shape each into a ball, and refrigerate for 10 minutes to firm up.
- Shape the Bread Dough
- Gently punch down the risen dough to release air, then divide it evenly into 10 portions.
- Form each piece into a round ball, then cover and let them rest for 15 minutes.
- Assemble the Melon Pan
- Roll each biscuit dough ball into a circle.
- Wrap over the bread dough balls.
- Dip in sugar and score with a crisscross pattern.
- Let rise again for 50 minutes
- Bake
- Preheat oven to 350°F (180°C).
- Bake for 13–15 minutes until golden brown.
- Cool on a wire rack and enjoy.
Notes
- Always use room-temperature butter for better mixing.
Weighing ingredients gives more accurate results.
If your kitchen is cold, use a proofing box or warm oven for rising.
Dough can be made a day ahead and refrigerated after the first rise.
Melon Pan is best enjoyed fresh but can be frozen and reheated later.
Storage and Make-Ahead Tips
Melon Pan tastes best fresh, but you can enjoy it later with a few tricks.
- Keep the melon pan in an airtight container at room temperature and enjoy within 2 days.
- Place in a sealed container and refrigerate for up to 3 days to maintain freshness.
- For longer storage, freeze the buns individually wrapped in plastic and then in an airtight freezer bag. They’ll last up to one month.
- To reheat, thaw overnight in the refrigerator, then rewarm in a 350°F (180°C) oven for about 5 minutes.
Creative Variations
Melon Pan is already delightful, but why not try changing things up?
- Chocolate Melon Pan: Add cocoa powder to the biscuit dough.
- Matcha Melon Pan: Mix in green tea powder for a Japanese twist.
- Custard-Filled: Inject a small amount of custard into the center after baking.
- Strawberry: Add strawberry extract and pink food coloring to the cookie dough.
You can even shape the dough to resemble seasonal fruits or animals for fun, themed baking projects.
Conclusion
Making Melon Pan at home is a fun and satisfying experience for bakers of all levels. Its charming appearance and sweet taste make it a family favorite and a crowd-pleaser at gatherings. While it takes a bit of time, each step is enjoyable and fulfilling.
Try the classic version first, then have fun experimenting with flavors like chocolate, matcha, or custard-filled. With a bit of patience and care, you can create bakery-quality melon pan right in your own kitchen. It’s a wonderful way to explore Japanese baking traditions and bring something unique to your table.
Remember, the best part of baking is sharing. So once your melon pan are baked and cooled, invite a friend over or surprise your family with a batch of these beautiful buns. They’ll be impressed, and you’ll feel proud knowing you made something special from scratch.
Fun Fact:
Melon Pan is often sold at Japanese airports and themed cafes. If you’re a fan of cute culture, check out the Hello Kitty Airport in Japan a whimsical stop where you might just spot some adorable treats and souvenirs too.
Frequently Asked Questions
Does Melon Pan actually taste like melon? No. Despite the name and the melon-like pattern on top, traditional melon pan does not taste like melon. However, some bakeries now add melon flavor for fun.
Is it okay to substitute all-purpose flour for bread flour? Yes, you can substitute all-purpose flour, but the texture may be slightly softer and less chewy.
Is Melon Pan healthy? Melon Pan is a treat and not intended to be a health food. However, it contains simple ingredients and can be enjoyed in moderation as part of a balanced diet.
Why is my bread dry? The dough might have been overbaked or too much flour was added. Always use a scale and avoid overbaking.
Can I freeze Melon Pan? Absolutely. Wrap each bun separately and freeze for up to one month. Warm them up before serving for the best taste and texture.
Can I make the dough the night before? Yes, you can refrigerate the dough overnight after it completes its first rise. Let it come to room temperature before continuing the next steps.
What does the windowpane test mean? This method helps you determine if the dough has been properly kneaded. Gently stretch a small piece—if it forms a thin, see-through sheet without breaking, the gluten is well-developed and the dough is ready.
Can kids help with this recipe? Absolutely! Children can join in by mixing the dough, flattening the cookie layer, and making the crisscross patterns on top. Just supervise with the oven and sharp tools.
How do I prevent the cookie dough from cracking? Keep it cool but pliable. If it’s too warm, it may become sticky; if too cold, it may crack while wrapping.
How long does it take to make Melon Pan from start to finish? Plan for about 3.5 to 4 hours, including proofing and baking time.