What’s That Yakimeshi Everyone’s Talking About? 🤔
Have you ever wondered why Yakimeshi, Japan’s famous fried rice dish, is a comfort food favorite around the world? 🤔 Whether you’re craving something quick and easy or looking for a way to transform leftovers into a gourmet meal, Yakimeshi has got your back! 🙌 This easy-to-make dish brings together soft rice, tasty ingredients, and a hint of rich umami flavor. By the end of this blog, you’ll know exactly how to whip up a batch of Yakimeshi that will impress your family and friends. Ready to get cooking? Let’s dive in! 🍳✨
🌸Table of Contents
Why You’ll Love Making Yakimeshi
Yakimeshi is a classic Japanese dish that’s loved for its simplicity, versatility, and bold flavors. 🌟 Here’s what makes it special:
- Time Requirement: Just 20–30 minutes from start to finish—perfect for busy weeknights! ⏰
- Difficulty Level: Beginner-friendly! If you can chop veggies and stir-fry, you’ve got this. 👩🍳👨🍳
- Customizable: Use whatever ingredients you have on hand. Leftovers? No problem! 🥗🍖
This dish is all about balance—fluffy rice, crispy veggies, and a savory sauce come together in every bite. Plus, it’s packed with nutrients and flavor. Let’s break it down step by step! 🧾
If you love exploring Japanese cuisine, don’t miss our guide on how to make Aka Shiso Juice (Red Perilla) . It’s a refreshing drink that pairs beautifully with hearty dishes like Yakimeshi!

Essential Ingredients: The Building Blocks of Yakimeshi
Here’s what you’ll need to make authentic Yakimeshi:
1. Rice (the star of the show!)
- Why it’s important: Short-grain Japanese rice is ideal because it’s sticky and holds its shape well. But don’t worry if you only have long-grain rice—it works too!
- For a healthier option, swap in brown rice or try cauliflower rice as a low-carb alternative.
2. Protein (your choice!)
- Options: Chicken, shrimp, pork, beef, tofu, or even leftover cooked meat.
- Why it’s important: Adds heartiness and balances the dish.
3. Vegetables (colorful and crunchy)
- Common choices: Carrots, peas, corn, green onions, and cabbage.
- Why they matter: They add texture, flavor, and nutrition.
4. Eggs (for richness)
- Why they’re key: Scrambled eggs coat the rice and add creaminess.
5. Soy Sauce and Seasonings
- What to use: Soy sauce, sesame oil, garlic, ginger, and a pinch of sugar.
- Why they’re essential: These create the signature umami flavor.
6. Optional Toppings (for extra flair)
- Ideas: Sesame seeds, chopped green onions, or a drizzle of spicy mayo.
Step-by-Step Instructions: Cooking Up Your Yakimeshi 🥢
Step 1: Prep Your Ingredients
- Wash and chop your veggies into bite-sized pieces. 🥕🧅
- Cook your protein ahead of time if needed (e.g., dice chicken or sauté shrimp). 🍗
- Crack and beat your eggs in a small bowl. 🥚
Pro Tip: Ever heard of “mise en place”? It’s a chef’s way of saying “get everything prepped and in place” before you dive in. Having all your ingredients chopped, measured, and ready to go will make cooking a breeze!
Step 2: Cook the Rice
- If using fresh rice, let it cool slightly so it doesn’t clump.
- For leftover rice, fluff it up with a fork.
Why it matters: Cold or slightly dry rice fries better and won’t turn mushy.
Step 3: Sauté the Aromatics
- Heat a tablespoon of oil in a large pan or wok over medium heat.
- Add minced garlic and ginger for fragrance. 🧄
Step 4: Cook the Protein
- Push the aromatics to one side of the pan and add your protein.
- Cook until golden brown and fully done.
Step 5: Stir-Fry the Veggies
- Add your chopped veggies to the pan and cook until tender-crisp.
Step 6: Scramble the Eggs
- Push everything to one side again and pour in the beaten eggs.
- Scramble them directly in the pan until softly set.
Step 7: Combine Everything
- Add the cooked rice to the pan. Break up any clumps with your spatula.
- Pour in soy sauce, sesame oil, and a sprinkle of sugar. Mix well!
Pro Tip: Taste as you go. Adjust seasoning to suit your preferences.

Assembly: Putting It All Together 🎨
Once everything is combined, give your Yakimeshi a final toss to ensure all the flavors are evenly distributed. Transfer it to a plate or bowl and garnish with sesame seeds, chopped green onions, or a dollop of spicy mayo for an Instagram-worthy presentation. 📸✨
Storage and Make-Ahead Tips: Save Time for Later ⏳
- For storage, pop your leftovers into an airtight container and store them in the fridge—they’ll stay fresh for up to 3 days!
- Reheating: Reheat in a skillet over low heat to avoid drying out the rice. Add a splash of water or broth if needed.
- Make-Ahead: Prep your veggies and protein in advance for quicker assembly later.
Recipe Variations: Get Creative! 🎭
Feel free to experiment with these fun twists:
- Seafood Yakimeshi: Swap the protein for shrimp, scallops, or squid. 🦐
- Vegan Yakimeshi: Use tofu or tempeh instead of meat.
- Spicy Yakimeshi: Add sriracha, chili flakes, or kimchi for heat. 🔥
- Pineapple Yakimeshi: Throw in diced pineapple for a sweet-and-savory combo. 🍍

Conclusion: Your New Favorite Dish Awaits! 🎉
There you have it—everything you need to make delicious Yakimeshi at home! 🍚 From its quick prep time to endless customization options, this dish is sure to become a staple in your kitchen. So grab your apron, fire up the stove, and get creative. Don’t forget to share your masterpiece with us—we’d love to hear how it turned out! 😊
FAQs: Your Burning Questions About Yakimeshi Answered 🔥
Q: What is Yakimeshi?
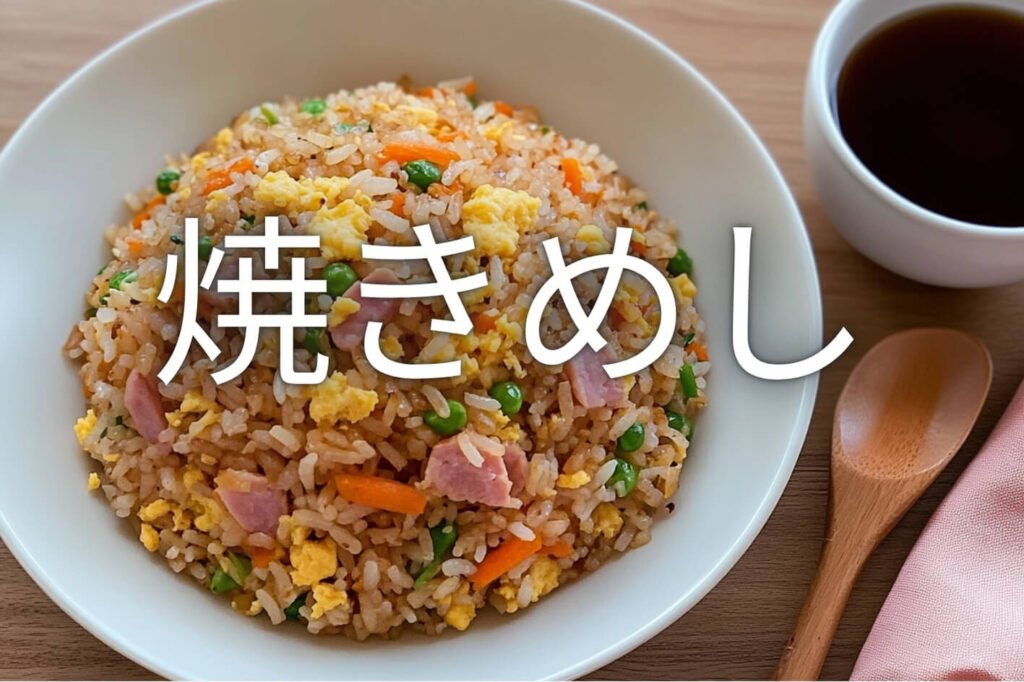
A: Yakimeshi (焼きめし) is a traditional Japanese fried rice dish that combines cooked rice with a variety of ingredients like vegetables, protein (chicken, shrimp, pork, etc.), eggs, and savory seasonings such as soy sauce and sesame oil. It’s known for its rich umami flavor and versatility, making it a quick, easy, and satisfying meal option. Think of it as Japan’s take on fried rice—simple yet packed with deliciousness! 🍚✨
Q: Is it okay to substitute white rice with brown rice in this recipe?
A: Absolutely! Brown rice adds fiber and nutrients but may require a bit more cooking time.
Q: Is Yakimeshi healthy?
A: Yes! It’s packed with protein, veggies, and whole grains. Use less oil and lean proteins to keep it light.
Q: Can I freeze Yakimeshi?
A: While fresh is best, you can freeze it for up to a month. Reheat gently to retain texture.
Q: What’s the difference between Yakimeshi and regular fried rice?
A: Yakimeshi often uses Japanese ingredients like soy sauce and sesame oil, giving it a distinct umami flavor.
Q: What’s the best way to keep my rice from sticking to the pan while cooking?
A: Use a nonstick pan or wok and ensure your rice is not too wet before frying.
Now that you’re armed with all the knowledge you need, go ahead and try making Yakimeshi tonight. Happy cooking! 🍳💖
And if you’re a fan of all things cute and edible, don’t miss this article about super cute Pokémon cakes now on sale in Japan . They’re a must-see for any fan of Japanese pop culture! 🎂 Pikachu would definitely approve.