
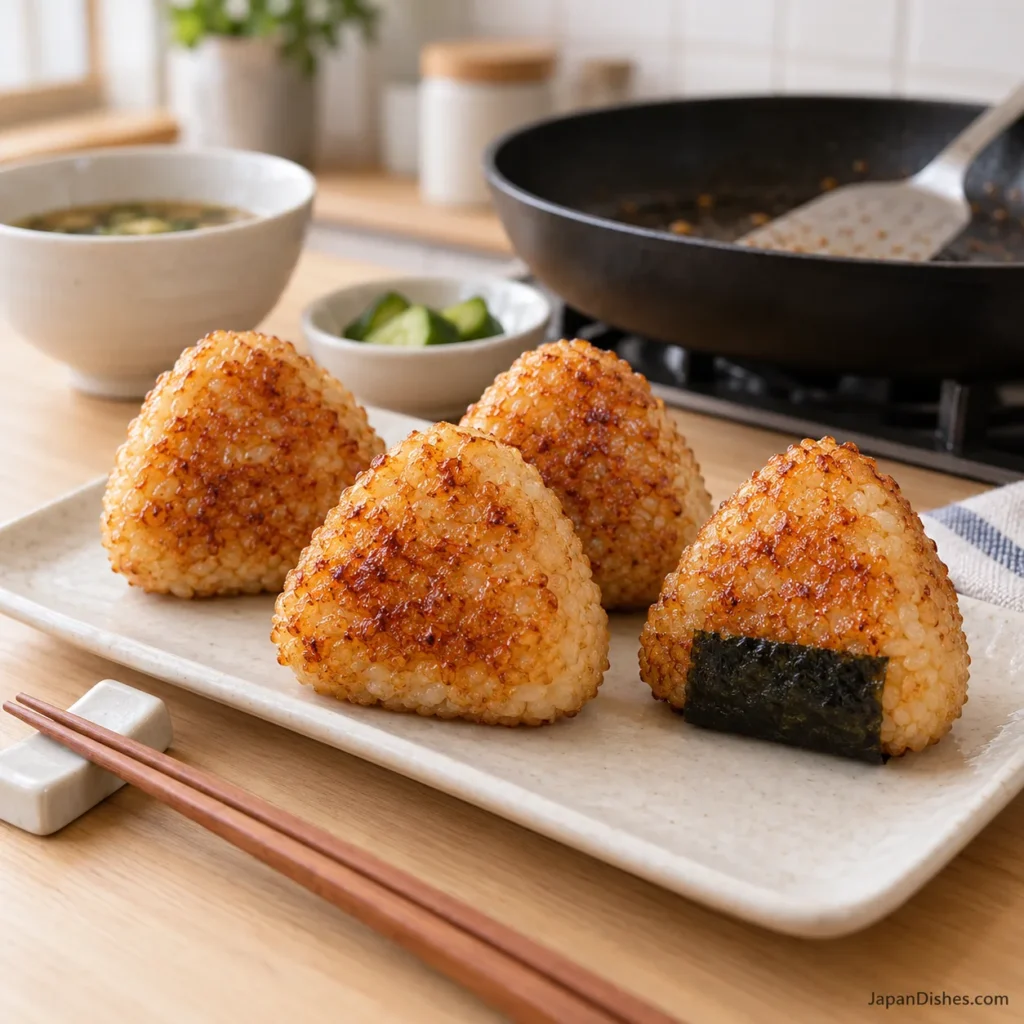
Want yaki onigiri with a crisp, savory crust and a soft rice center—without the triangles breaking when you turn them? Shape warm short-grain rice into compact portions, let the first crust form undisturbed, and add the soy glaze only near the end. The order makes a real difference.
Welcome to Hana’s kitchen at JapanDishes. Today we’re making four Japanese grilled rice balls in a frying pan, with ten photo stages showing the important changes. You’ll see the rice before shaping, the edges before cooking, the first golden crust and the thin final glaze. Keep the recipe card open if you prefer all the instructions and pictures in one place.
What is yaki onigiri?
Yaki means grilled or cooked over direct heat; onigiri are shaped rice balls. Despite the English name, they can be triangular, round or cylindrical. This version uses rounded triangles and a frying pan, so you do not need a charcoal grill or a special mold. The broad flat faces give you plenty of toasted surface.
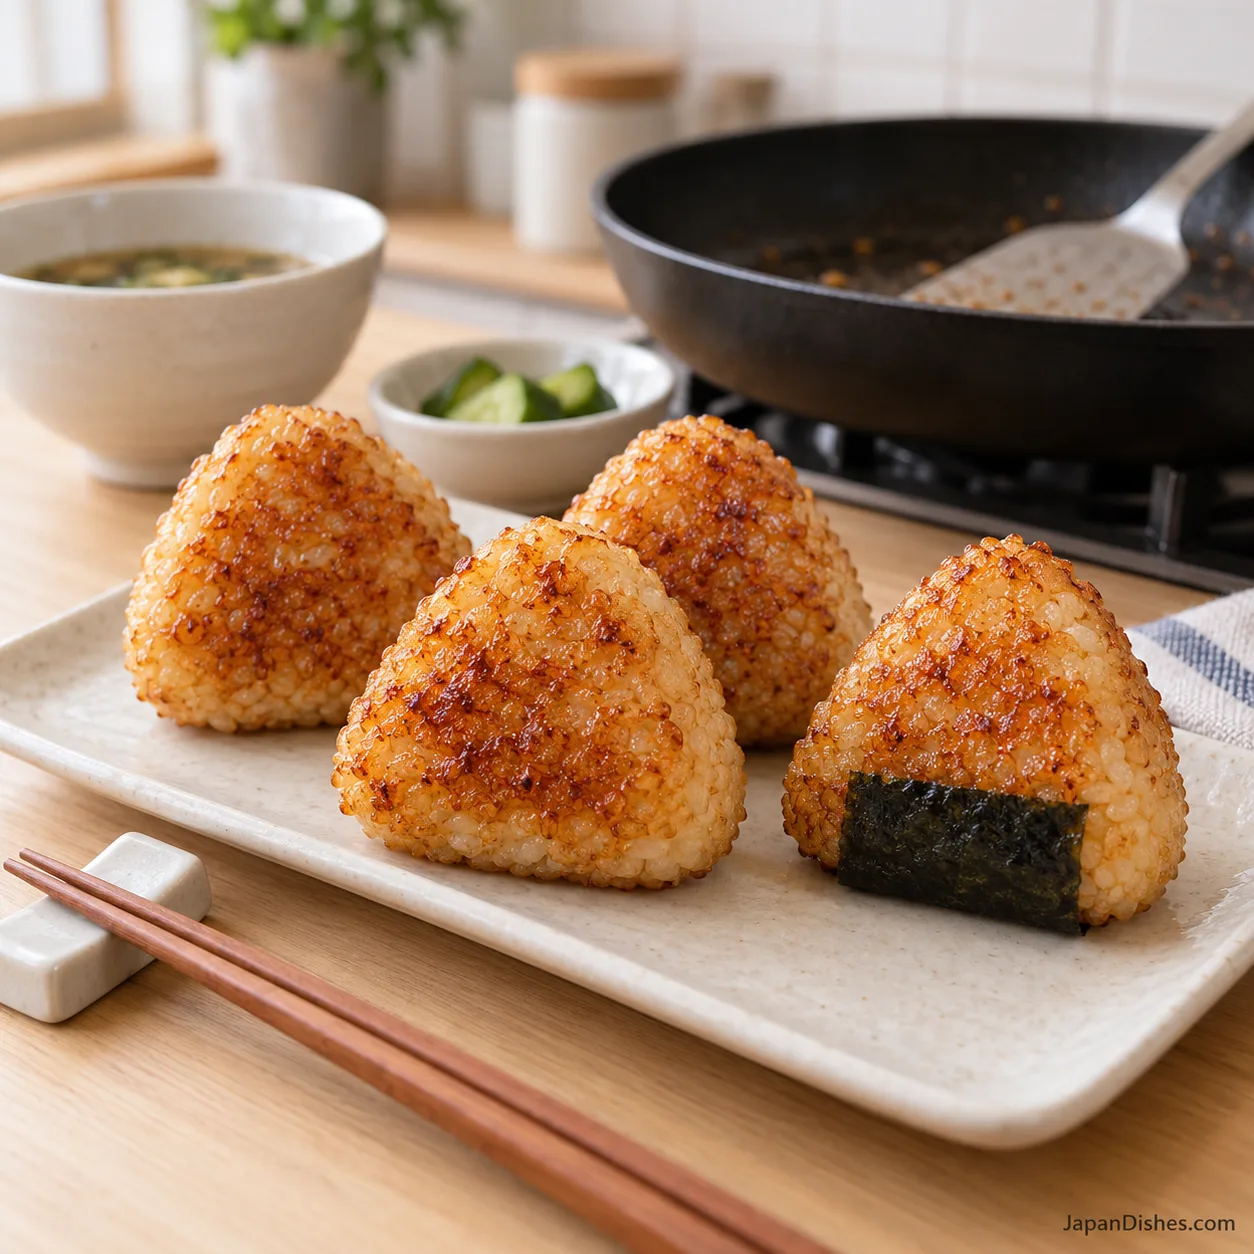
The flavor is simple: toasted rice, a little oil and the savory aroma of soy sauce. There is no filling in this batch. The outside should be golden to amber, with distinct rice grains, while the center stays tender. Dark black patches and an acrid smell mean the surface has gone too far, not that it needs more sauce.
Allow about 30 minutes using freshly cooked rice: 15 minutes preparation, including the short rest, and about 15 minutes cooking. Rice cooking is additional; follow its packet or your rice cooker instructions, then weigh 400 g.
Ingredients for crispy yaki onigiri
- 400 g freshly cooked, warm Japanese short-grain white rice (cooked weight)
- 2 teaspoons neutral cooking oil, such as rapeseed or sunflower oil
- 1 tablespoon Japanese soy sauce (15 ml)
- 1 teaspoon water (5 ml), for the glaze
- 4 small strips toasted nori, optional, for serving
Choose the right rice. Japanese short-grain white rice is the most straightforward choice. Its grains cling together when cooked. Rice sold for sushi is suitable, but use it plain, without sushi vinegar or sugar. Basmati, jasmine and parboiled long-grain rice do not behave the same way when pressed into a triangle.
Use warm, manageable rice. Let freshly cooked rice stop giving off fierce steam before shaping; it should be comfortable to handle through food-safe wrap. Do not leave it on the counter for an extended cooling period. Very wet rice can slump, while cold, dry grains can be difficult to bind. Neither problem is solved by squeezing indefinitely.
Keep the glaze thin. Mix the measured soy sauce with the teaspoon of water. This is enough for light coats on both broad faces of four rice balls; you do not need to use every drop. Standard soy sauce contains soy and usually wheat. For a gluten-free version, choose a product specifically labeled gluten-free and check the other ingredients.
Equipment helps. Use a sound 26 cm nonstick pan, a broad turner, a brush and a scale. Choose utensils approved for your pan coating; use silicone or nylon where metal could scratch it.
How to make yaki onigiri: ten photo steps
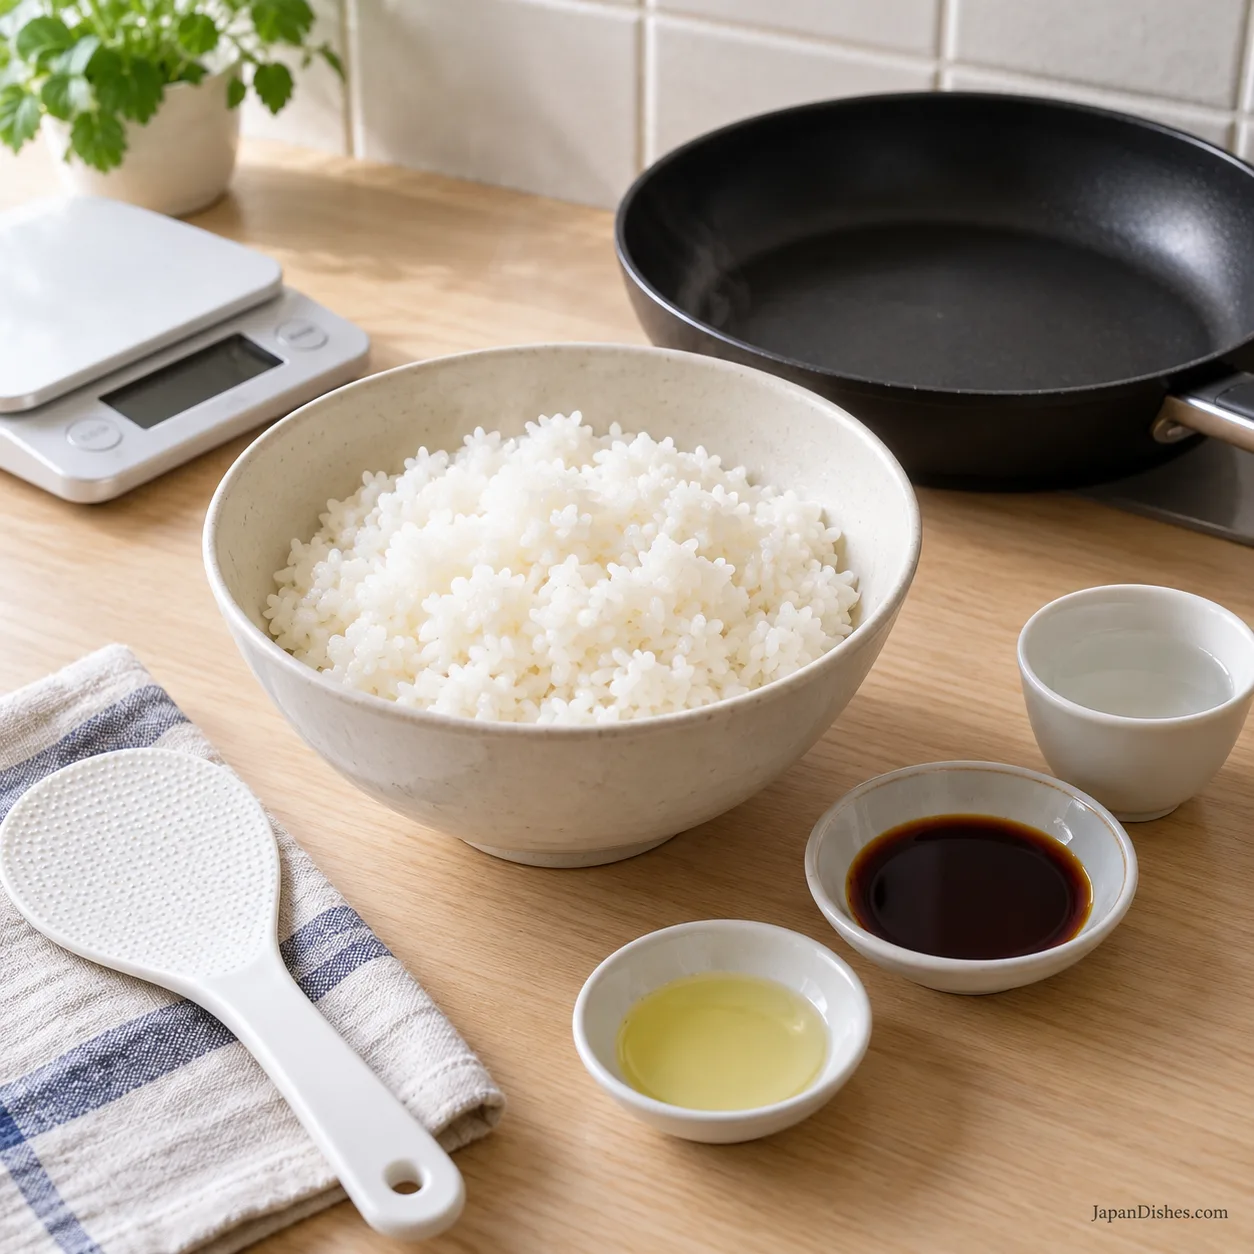
1. Measure the rice and mix the glaze
Weigh 400 g of freshly cooked Japanese short-grain rice into a wide bowl. Gently loosen it with a rice paddle rather than mashing it. In a small dish, stir together 1 tablespoon soy sauce and 1 teaspoon water. Measure 2 teaspoons neutral oil separately. Set out a plate and food-safe plastic wrap. Start shaping once the rice is comfortably warm rather than painfully hot.
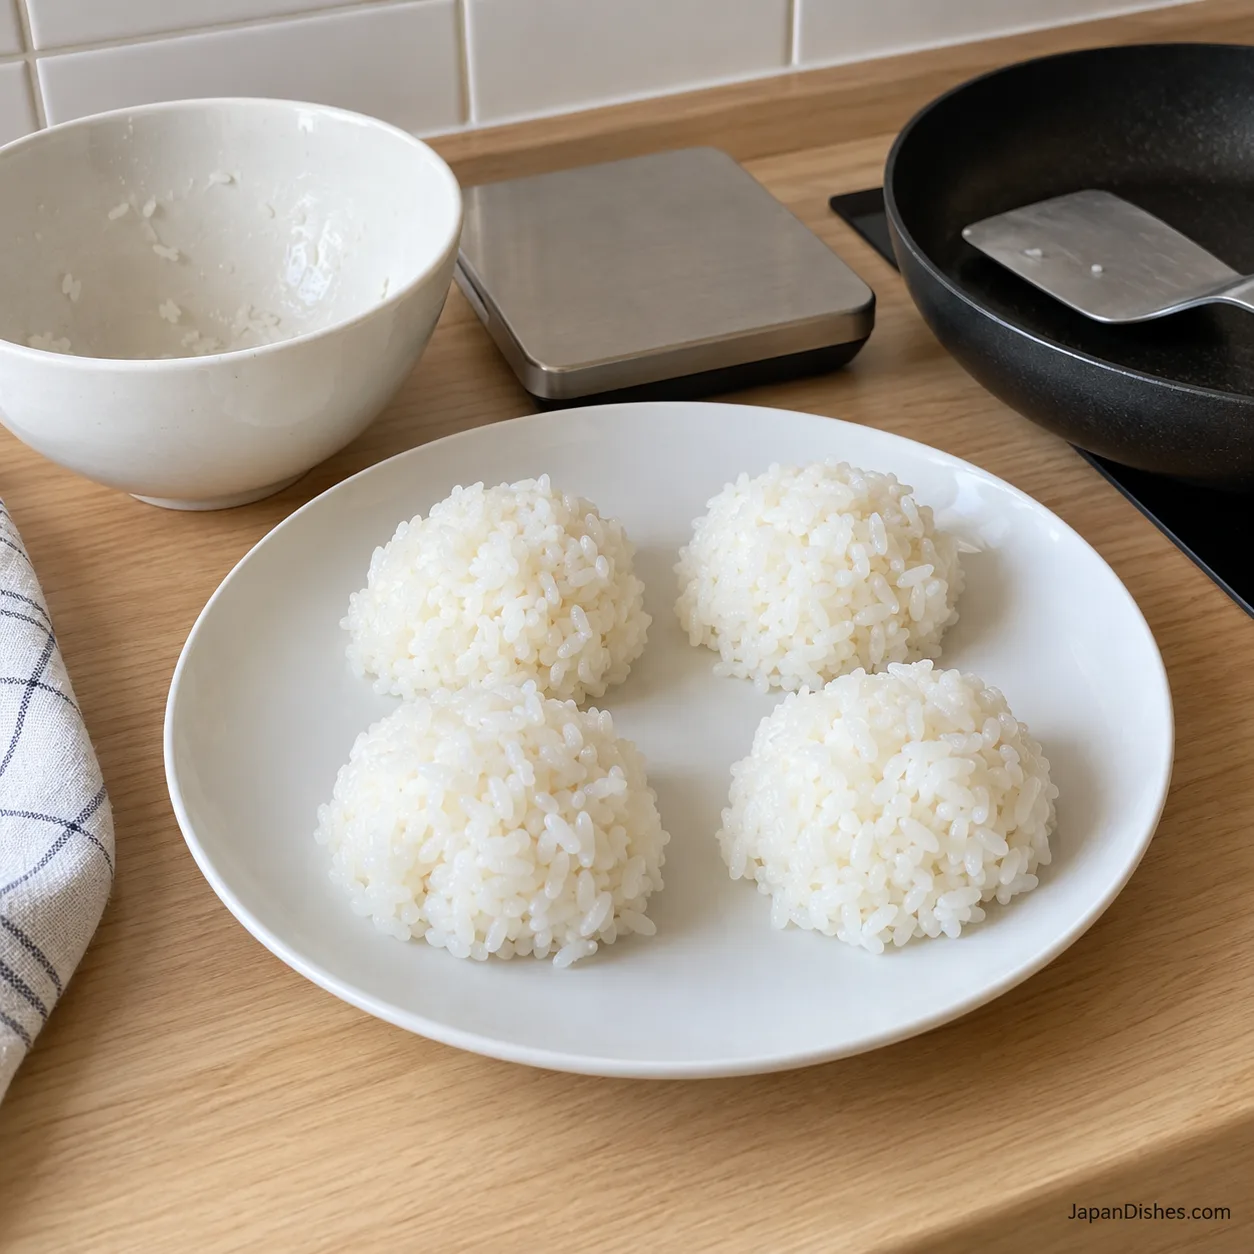
2. Divide into four equal portions
Divide the rice into four portions of about 100 g each. A scale makes this easier and helps the rice balls cook at a similar rate. Keep the portions loose at this stage. Work steadily so the rice stays warm enough to bind, and use a clean paddle to transfer it rather than repeatedly handling it.
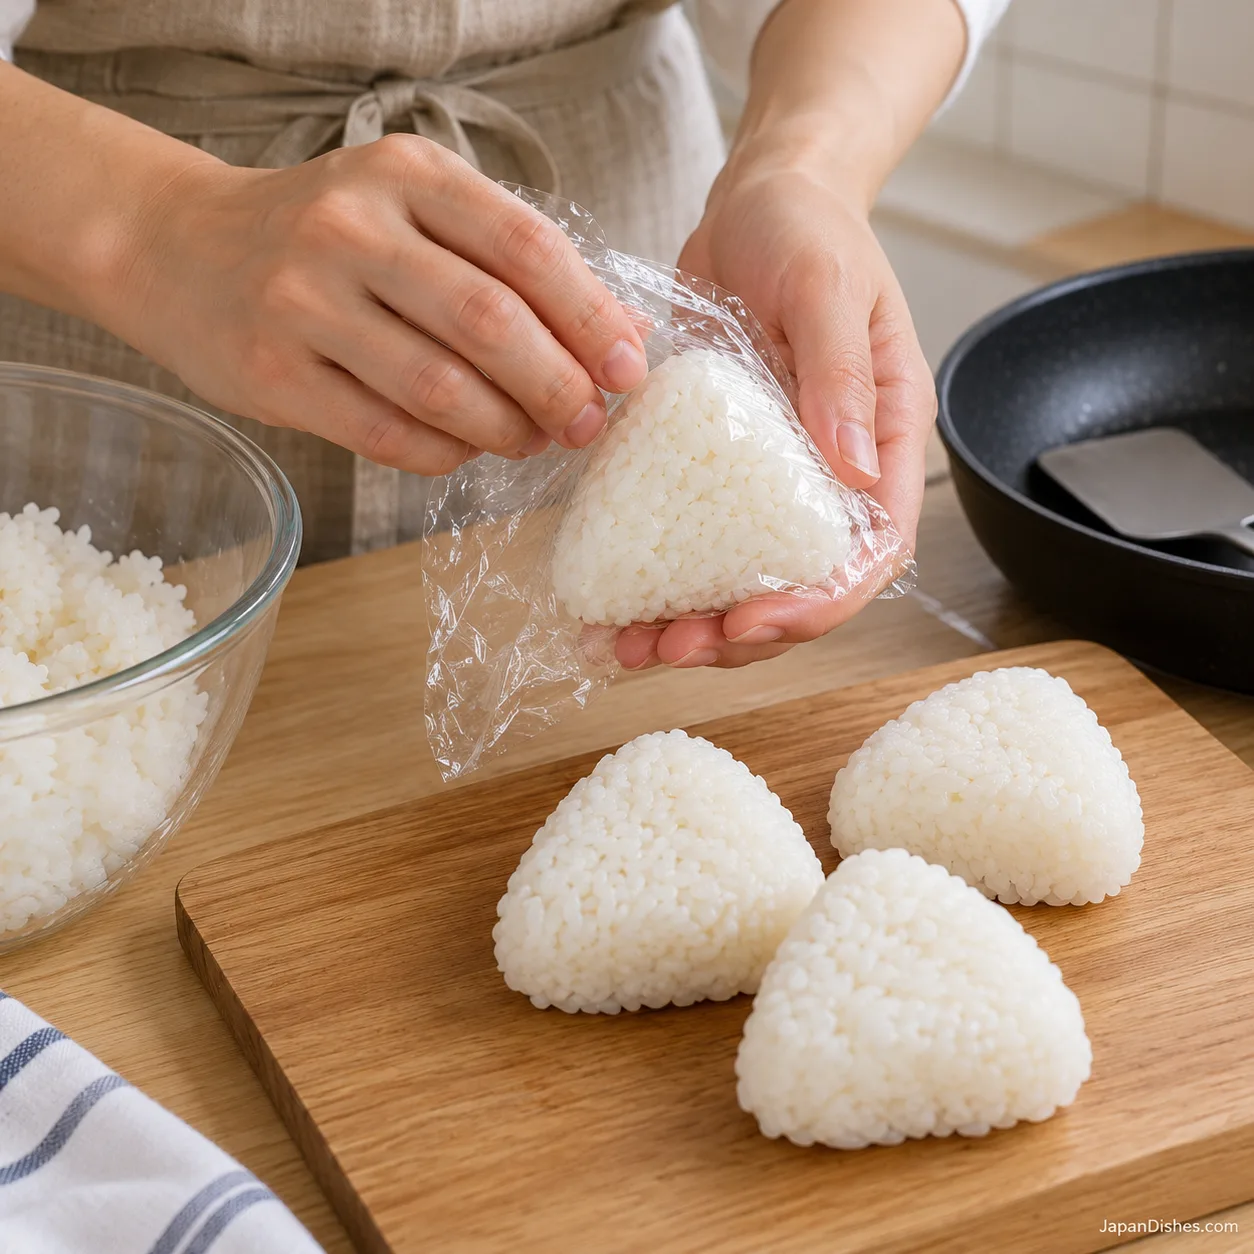
3. Shape a compact triangle
Place one portion in the center of a piece of food-safe wrap. Gather the wrap loosely around it, then cup the rice between your hands. Press the two broad faces gently and rotate to form three rounded sides. The grains should hold together without becoming a smooth paste. Unwrap, check for deep cracks and gently close any gaps. Repeat with the remaining portions.
4. Check the thickness and rest briefly
Aim for four rice balls roughly 7 cm across and about 2.5 cm thick, with two fairly flat broad faces. The measurements are a guide; keeping the thickness consistent matters more than a perfect triangle. Remove all plastic wrap and place them on a clean plate. Let the surfaces settle for about 5 minutes while you prepare the pan. Do not refrigerate for this short rest.
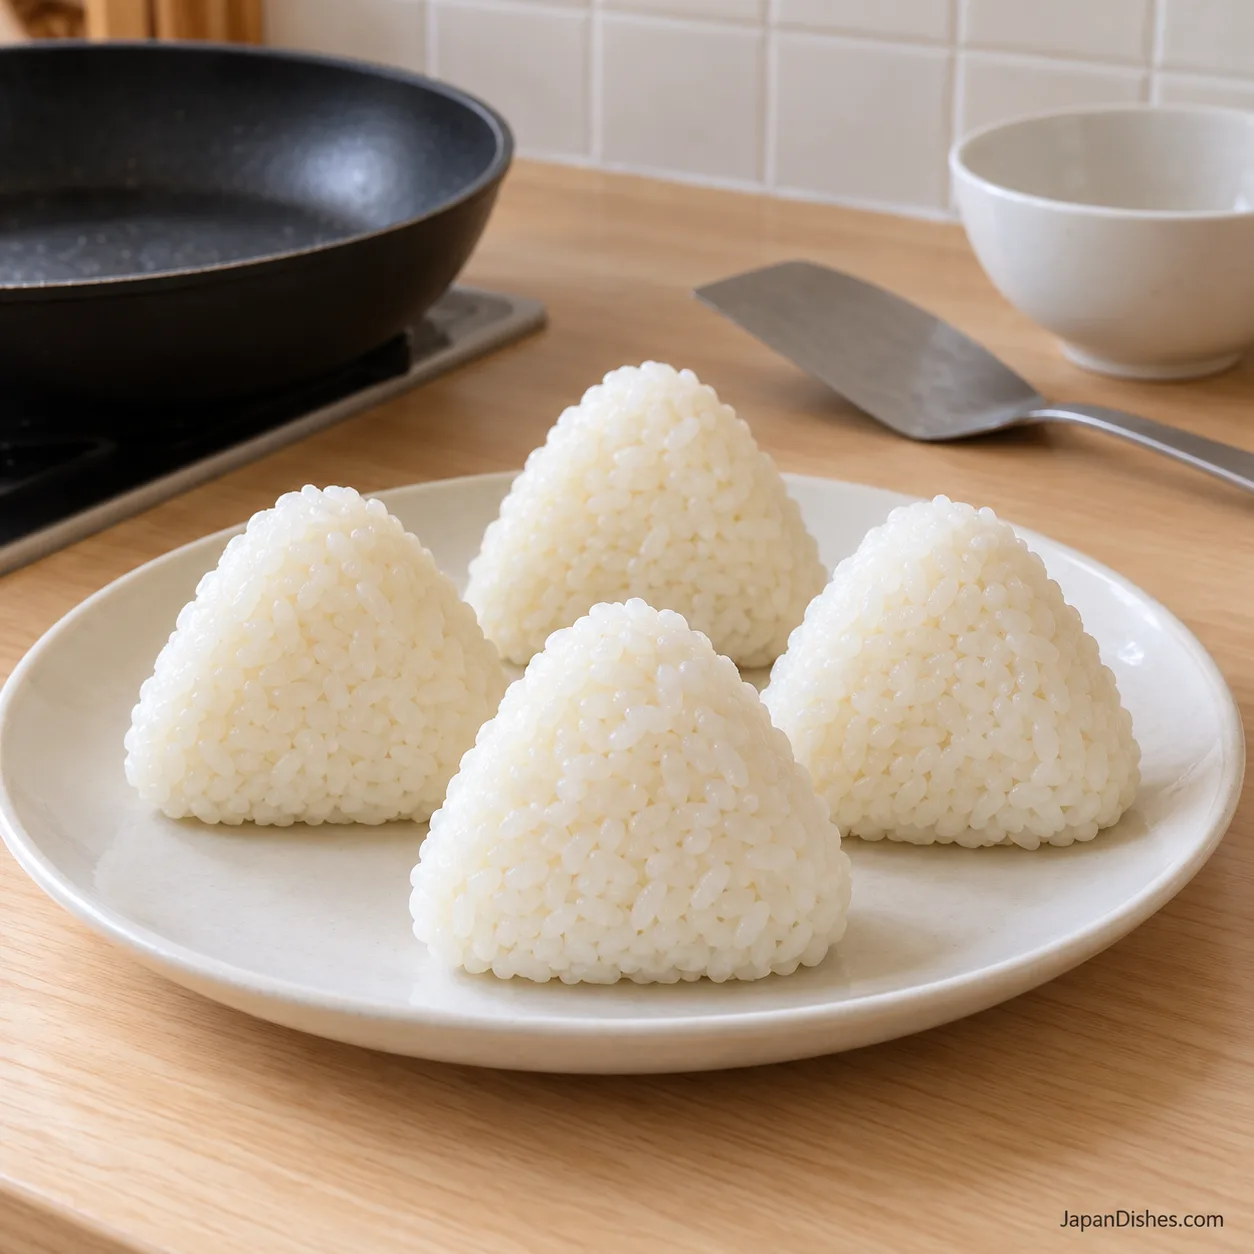
5. Warm and lightly oil the pan
Add the measured oil to the frying pan and spread it into a thin film. Warm over medium-low to medium heat, following your pan manufacturer’s guidance. The oil should move easily across the base but must not smoke. Set the rice balls within reach and have a broad turner ready. You want enough heat for a gentle sizzle, not an aggressively hot pan.
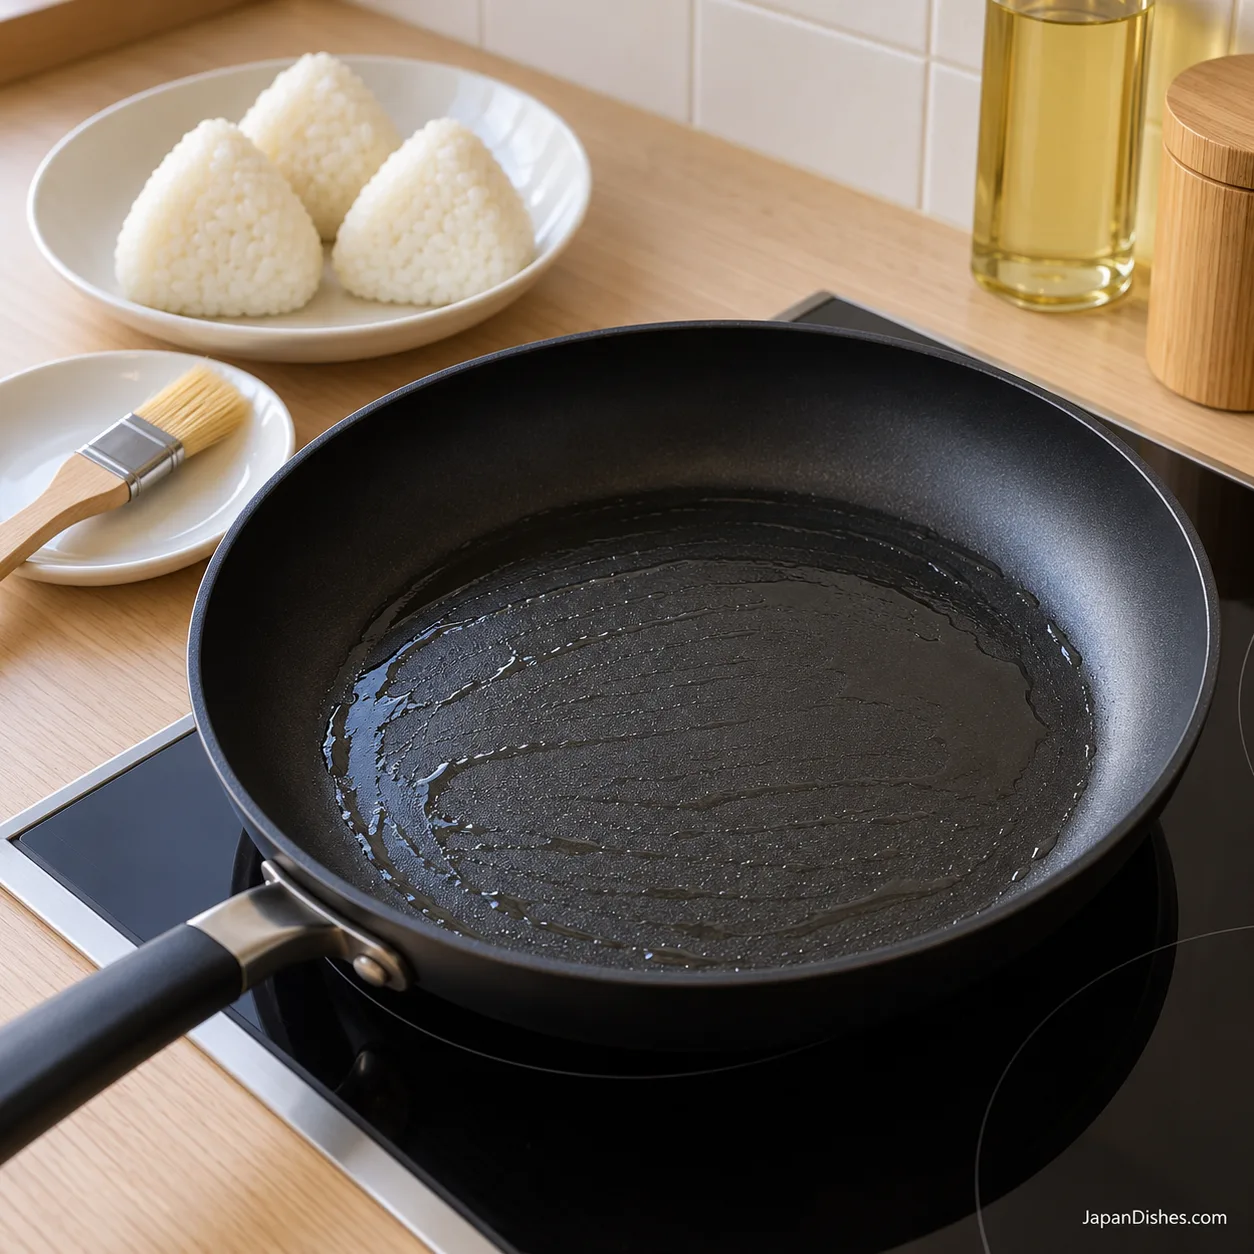
6. Let the first crust form
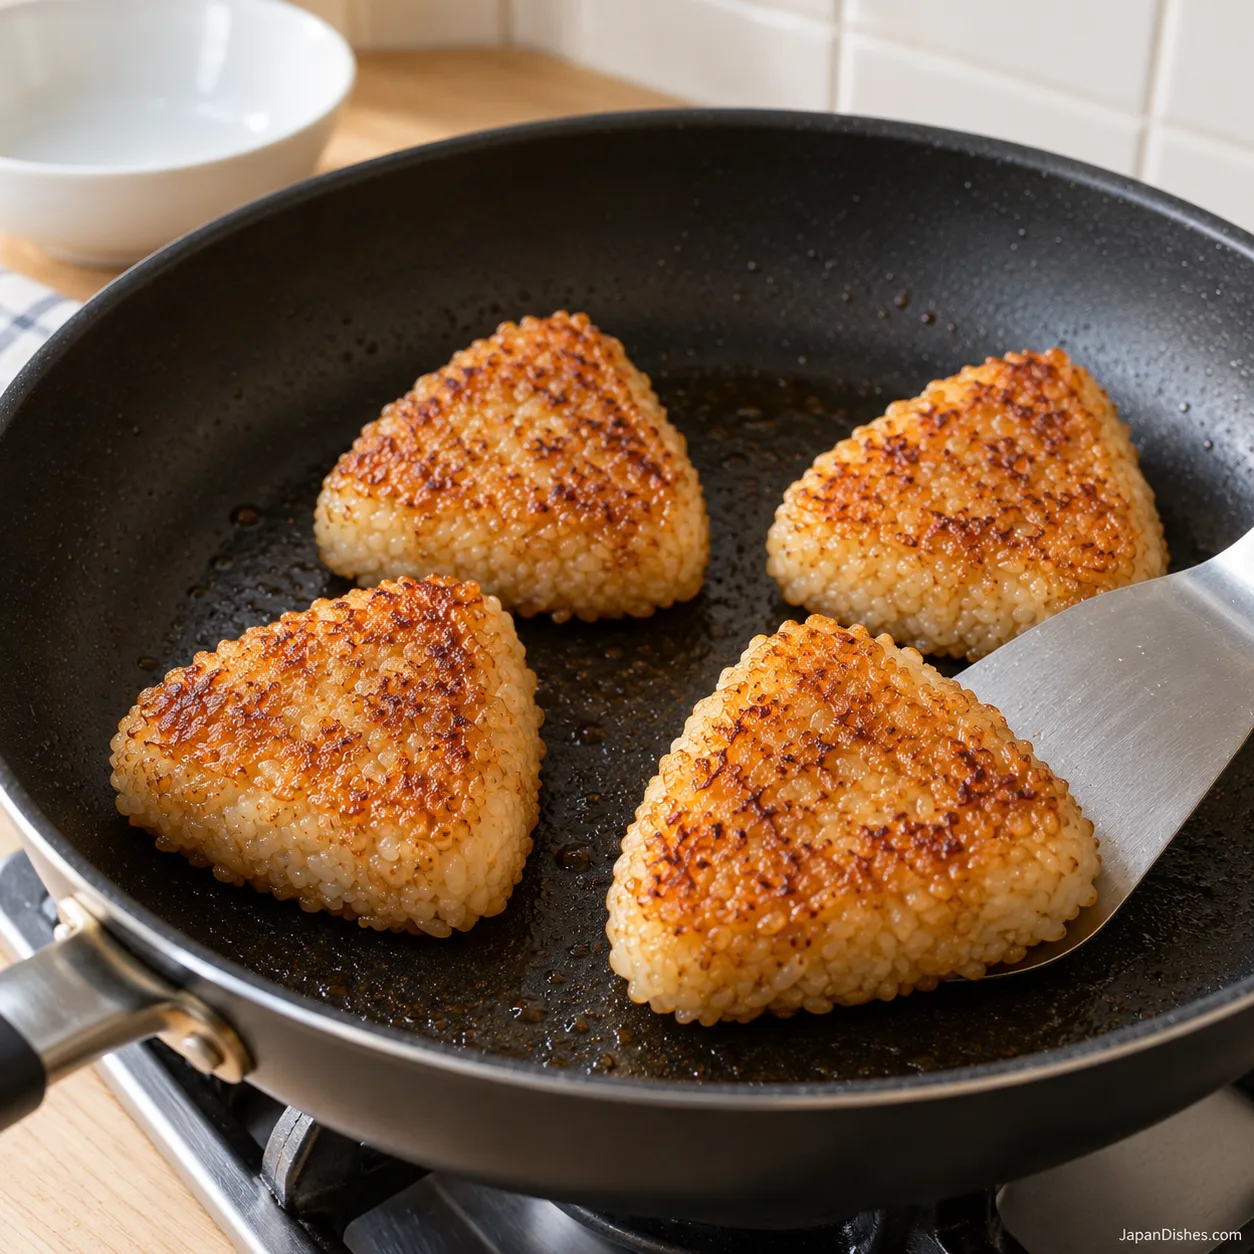
Lay the four rice balls on one broad face, leaving space between them. Cook undisturbed for about 4–5 minutes. Avoid nudging or trying to lift them every few seconds: the first crust needs time to bind the surface. Look for a pale golden edge where the rice meets the pan. If that edge darkens rapidly, lower the heat.
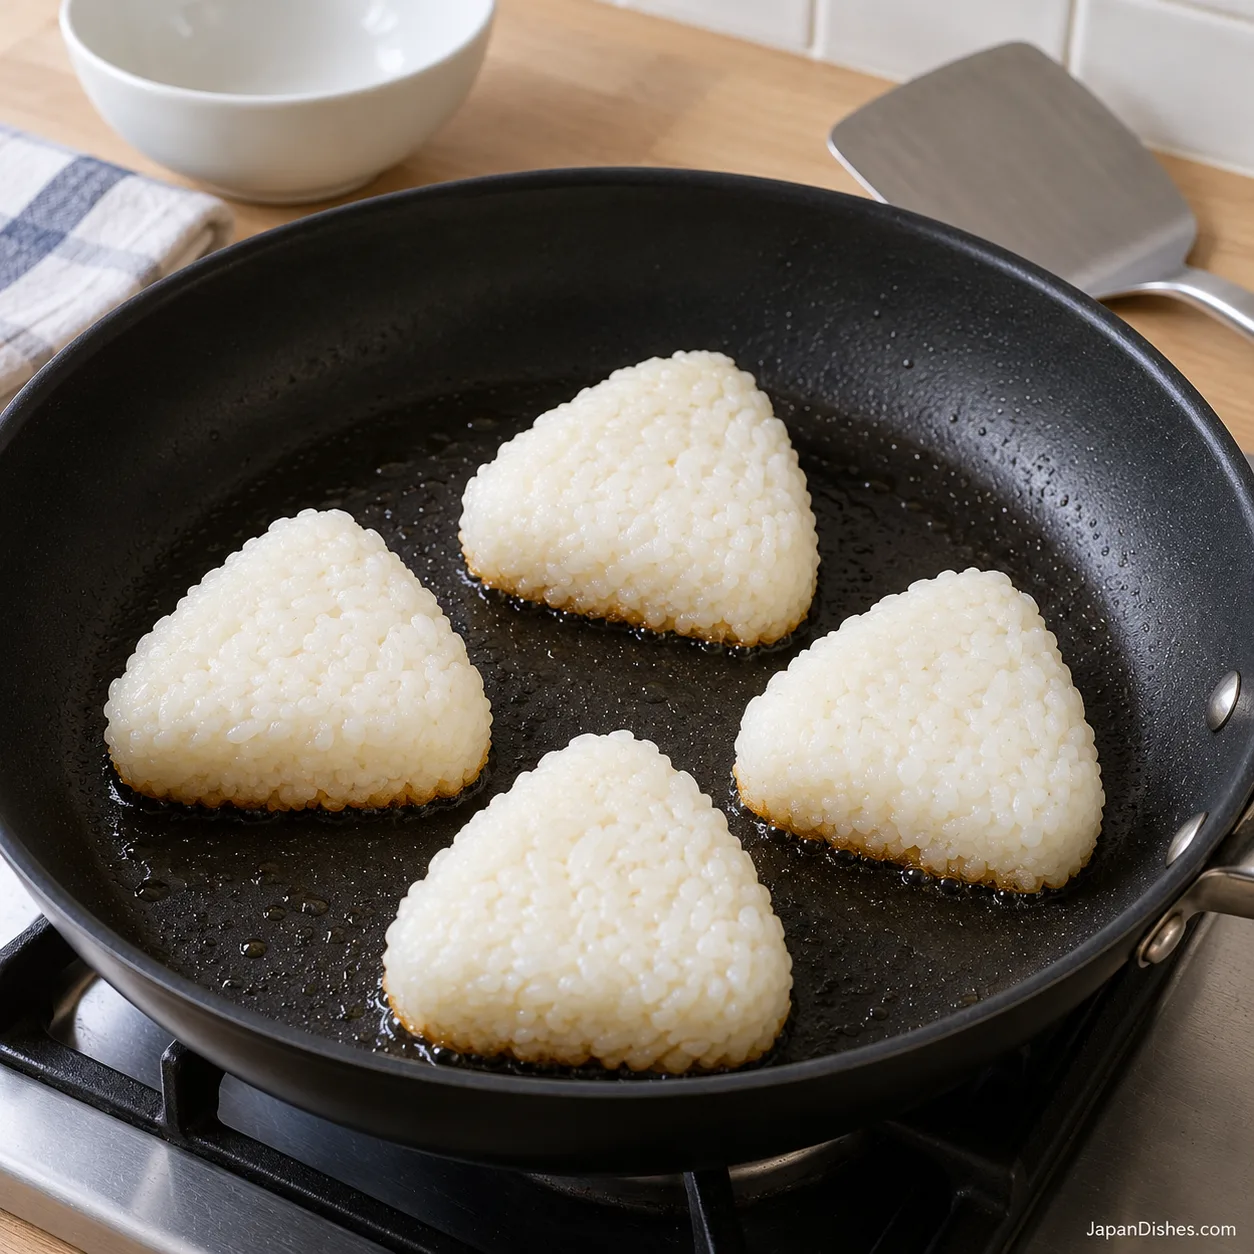
7. Turn gently and brown the second face
Slide a broad turner carefully under one rice ball. If the crust still sticks, give it another 30–60 seconds and try again rather than pulling the rice apart. Turn each rice ball once it lifts as a piece. Cook the second broad face for another 4–5 minutes, until lightly golden. Keep the shapes supported from beneath; do not squeeze them with narrow tongs.
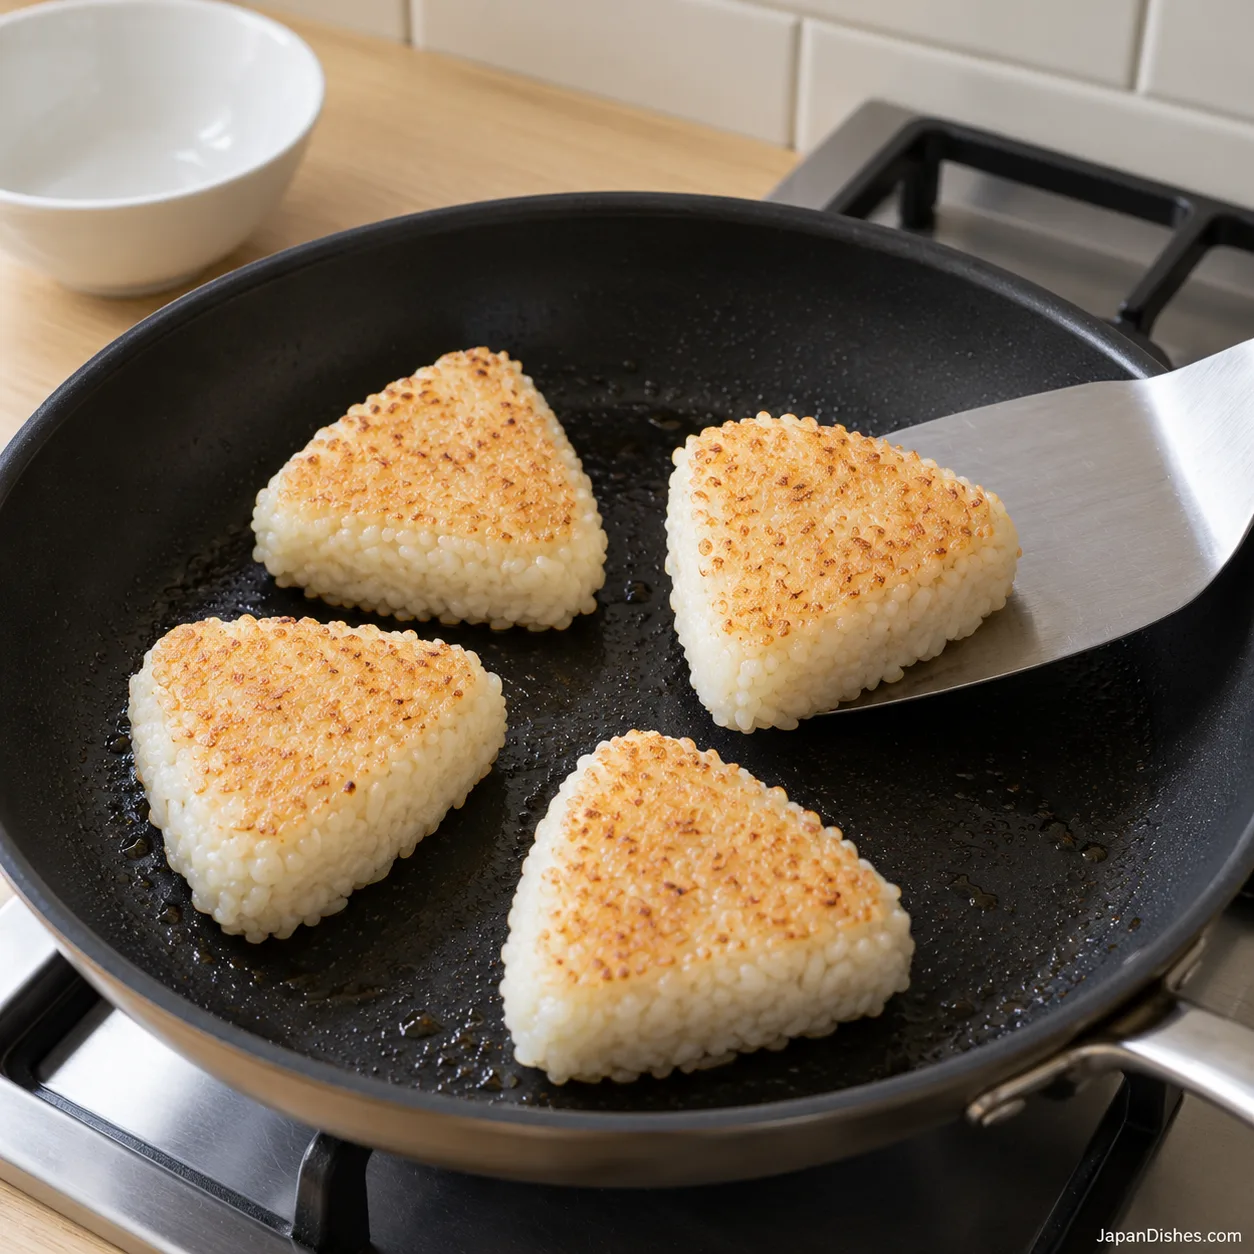
8. Brush on a light soy coating
Reduce the heat to low. Brush the upper golden faces lightly with the soy mixture, using a damp brush rather than drenching the rice. Do not pour the dish of sauce into the pan. Turn the rice balls so the brushed faces touch the pan. Brush the newly exposed faces thinly as well. The sauce should coat the crust without soaking through the whole rice ball.
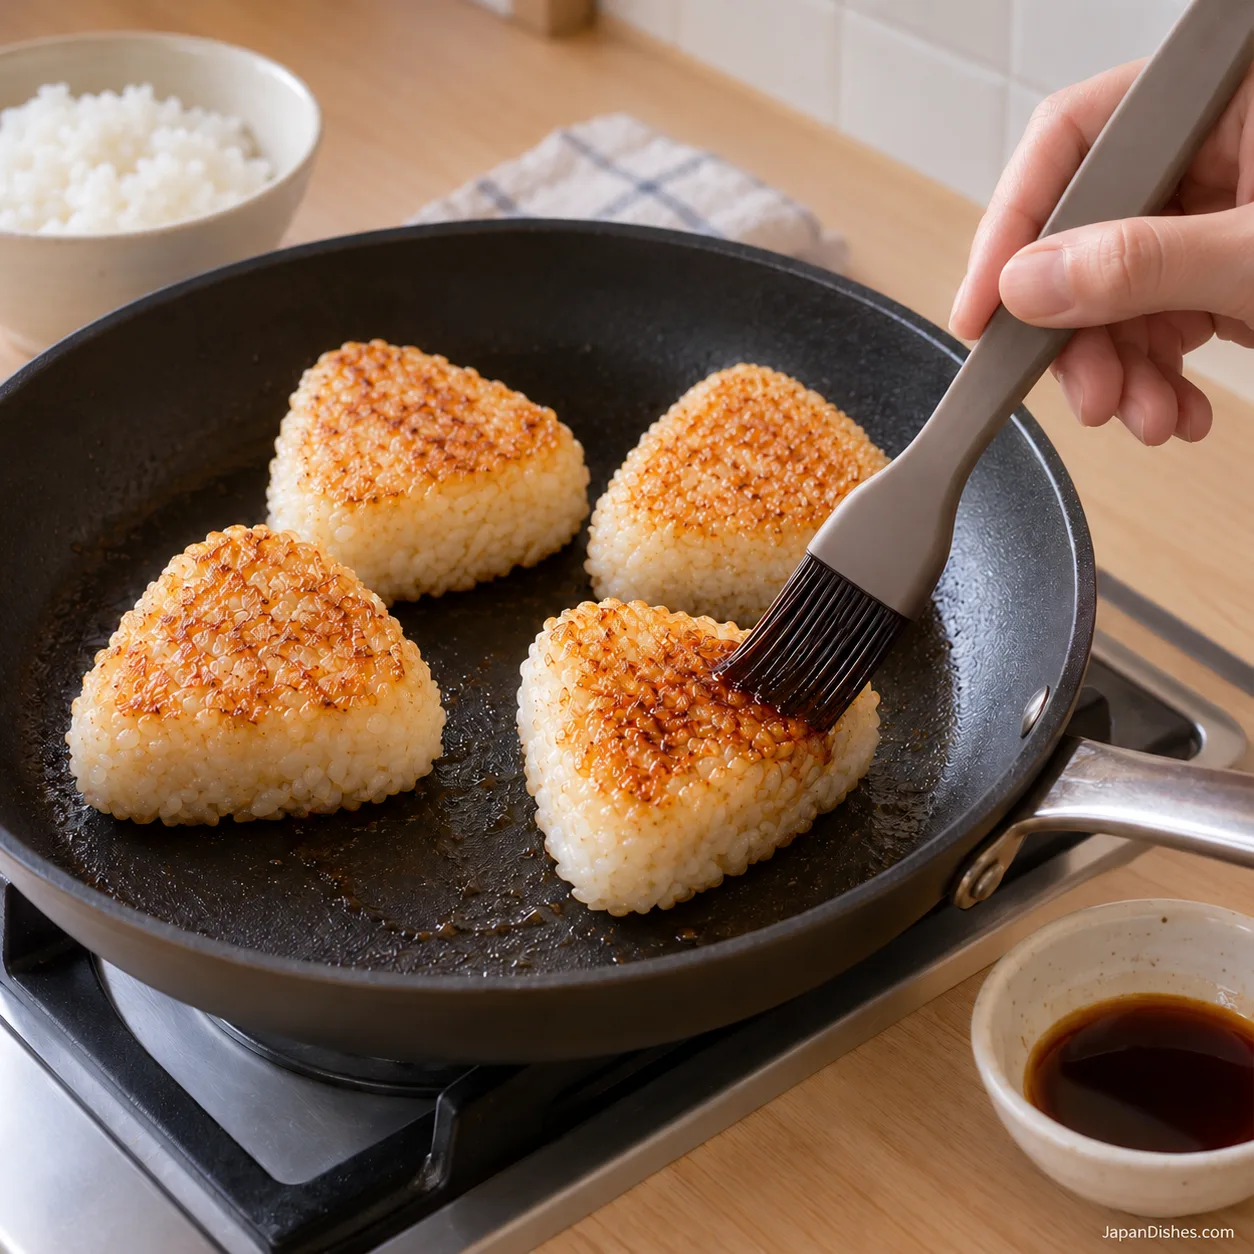
9. Toast the glaze briefly
Cook the first glazed face for about 30–60 seconds, watching closely. Turn and toast the other glazed face for another 30–60 seconds. The crust should become amber and smell pleasantly toasted. Remove sooner if the sauce darkens quickly; turn off the heat if it starts to smoke. For a little more color, work in short intervals rather than leaving the pan unattended.
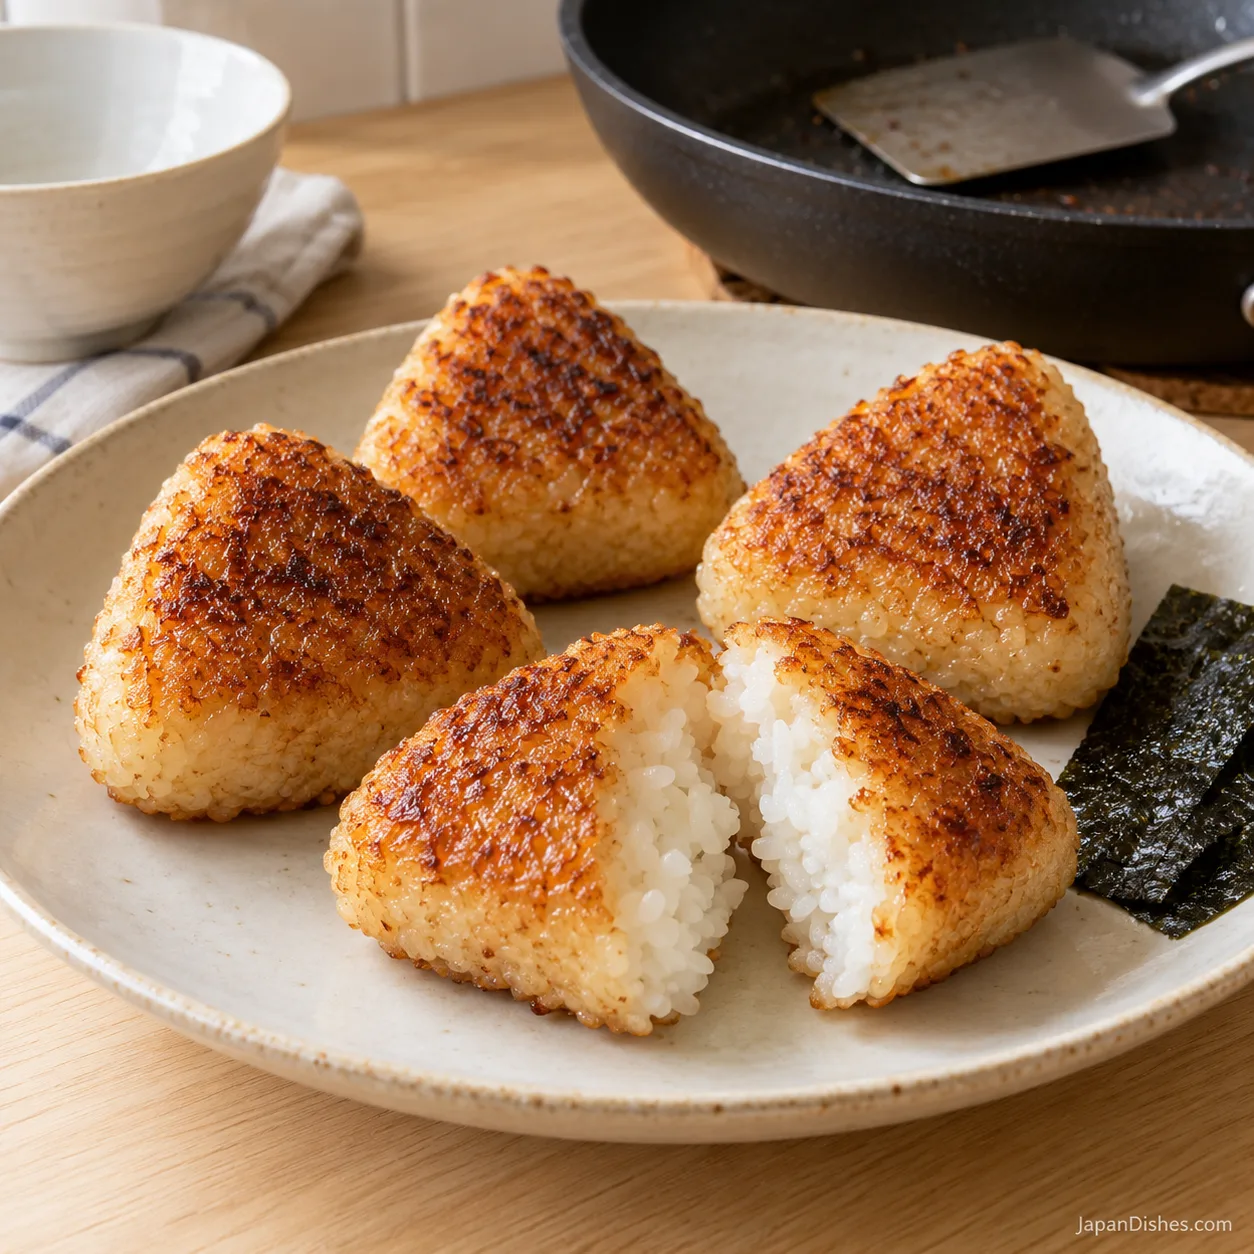
10. Serve while the crust is crisp
Lift the yaki onigiri onto a plate and allow a minute or two before eating, since the center can be hot. Add a small strip of toasted nori if you like. Break one open to check the contrast: a thin toasted crust around a soft white rice center. Serve promptly. If preparing some for storage, follow the cooling guidance below instead of leaving the plate out until later.
Troubleshooting: shape, crust and glaze
The rice ball falls apart
Check the rice variety first, then the shaping and turning. Press enough to close gaps, keep the broad faces even and wait for a crust before lifting. Adding more sauce early introduces moisture and can make the surface harder to handle. A small crack can be patched before cooking, but broken hot rice is better served as toasted rice than repeatedly squeezed in the pan.
The crust sticks to the pan
Check that the pan coating is in good condition and that you spread the oil evenly. Try a lower heat and give the rice time to release. Slide the turner underneath rather than scraping sideways. Loose burned grains in the pan should be removed before cooking another batch.
The glaze tastes bitter
The heat was likely too high or the glazed face cooked too long. Soy sauce colors quickly on a hot surface. Build the rice crust first, reduce the heat, brush lightly and finish in short intervals. A burned coating cannot be corrected by painting more sauce over it.
Variations
A lighter seasoning: Use reduced-salt soy sauce if preferred, still brushing sparingly. Do not add extra salt to the rice automatically. The plain center balances the seasoned outside.
A small filling: Once you are comfortable shaping the plain version, try a little fully cooked, well-drained salmon in the center. Seal rice completely around it and avoid overfilling. This changes the allergen and storage considerations; it is not part of the photographed batch.
A simple finish: Add nori just before eating. Use the soy-only method for your first batch so the visual cues match the photographs.
What to serve with yaki onigiri
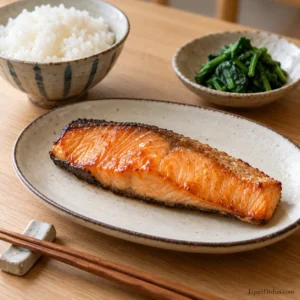
Serve two rice balls per person as part of a light meal, or one as a snack. Add a simple soup and vegetables, or pair them with our Mirin Salmon. If you enjoy softer seasoned rice balls, try the Tanuki Rice Balls next. Keep sauces and wet side dishes alongside the onigiri rather than underneath the crisp faces.

Make ahead, freeze and reheat
The main recipe starts with freshly cooked rice. For leftovers, cool promptly in small portions and refrigerate within 1 hour of cooking. Keep refrigerated and use within 24 hours. Reheat only once, until steaming hot throughout; the center should reach 70°C for 2 minutes or an equivalent safe time and temperature. For more detail, see the NHS guidance on cooked rice.
For a freezer batch, start with freshly cooked rice and make the onigiri as directed. Cool quickly and freeze in individual portions within 1 hour of cooking. Wrap once cool, then place in a freezer container; use within 1 month for quality. Defrost in the refrigerator and reheat once until steaming hot throughout. A brief pan finish immediately after heating can restore some crust as part of the same preparation. Eat straight away.
If you use previously chilled rice instead, cooking it in the pan counts as reheating: make sure it is steaming hot throughout and eat it immediately. Do not save that batch for another reheat. Reheating cannot reliably correct unsafe storage. The Food Standards Agency’s rice guidance explains cooling, freezing and the one-reheat rule.
Frequently asked questions
Can I use sushi rice?
Yes, if you mean plain cooked Japanese short-grain rice. Do not season it with the vinegar-and-sugar mixture used for sushi. Long-grain rice is not a direct substitute for this shaping method.
Do I need an onigiri mold?
No. Food-safe wrap and gentle pressure are enough. A mold can help with consistency, but do not pack it so firmly that the center becomes dense. Keep the thickness close to the photographed version.
Are yaki onigiri deep-fried?
Not in this recipe. A thin film of oil helps the broad faces toast in a frying pan. There is no pot of frying oil and no breadcrumb coating.
Can I cook them straight from frozen?
The storage method here uses refrigerator thawing followed by thorough reheating. A browned outside alone does not show that a frozen center is hot enough. Follow a separately verified method if you want to cook them directly from frozen.
Are these vegan?
The plain recipe can be vegan when your soy sauce, oil and nori contain no animal ingredients. Check labels, especially on seasoned seaweed. The optional salmon variation is not vegan.
For another explanation of browning the rice before the final soy coating, see Kikkoman’s pan-grilled rice-ball method. Follow the quantities and detailed directions on this page for this four-piece batch.
Crispy Yaki Onigiri 焼きおにぎり
Course: SnackCuisine: JapaneseDifficulty: Easy4
rice balls15
minutes15
minutes30
minutesCrispy pan-grilled yaki onigiri with a thin soy glaze and tender rice centers. Makes four rice balls in about 30 minutes using freshly cooked Japanese short-grain rice; rice cooking time is additional.
Ingredients
400 g freshly cooked, warm Japanese short-grain white rice (cooked weight)
2 teaspoons neutral cooking oil, such as rapeseed or sunflower oil
1 tablespoon Japanese soy sauce (15 ml)
1 teaspoon water (5 ml), for the glaze
4 small strips toasted nori, optional, for serving
Directions
- Weigh 400 g of freshly cooked Japanese short-grain rice into a wide bowl. Gently loosen it with a rice paddle rather than mashing it. In a small dish, stir together 1 tablespoon soy sauce and 1 teaspoon water. Measure 2 teaspoons neutral oil separately. Set out a plate and food-safe plastic wrap. Start shaping once the rice is comfortably warm rather than painfully hot.

- Divide the rice into four portions of about 100 g each. A scale makes this easier and helps the rice balls cook at a similar rate. Keep the portions loose at this stage. Work steadily so the rice stays warm enough to bind, and use a clean paddle to transfer it rather than repeatedly handling it.
- Place one portion in the center of a piece of food-safe wrap. Gather the wrap loosely around it, then cup the rice between your hands. Press the two broad faces gently and rotate to form three rounded sides. The grains should hold together without becoming a smooth paste. Unwrap, check for deep cracks and gently close any gaps. Repeat with the remaining portions.
- Aim for four rice balls roughly 7 cm across and about 2.5 cm thick, with two fairly flat broad faces. The measurements are a guide; keeping the thickness consistent matters more than a perfect triangle. Remove all plastic wrap and place them on a clean plate. Let the surfaces settle for about 5 minutes while you prepare the pan. Do not refrigerate for this short rest.
- Add the measured oil to the frying pan and spread it into a thin film. Warm over medium-low to medium heat, following your pan manufacturer’s guidance. The oil should move easily across the base but must not smoke. Set the rice balls within reach and have a broad turner ready. You want enough heat for a gentle sizzle, not an aggressively hot pan.
- Lay the four rice balls on one broad face, leaving space between them. Cook undisturbed for about 4–5 minutes. Avoid nudging or trying to lift them every few seconds: the first crust needs time to bind the surface. Look for a pale golden edge where the rice meets the pan. If that edge darkens rapidly, lower the heat.
- Slide a broad turner carefully under one rice ball. If the crust still sticks, give it another 30–60 seconds and try again rather than pulling the rice apart. Turn each rice ball once it lifts as a piece. Cook the second broad face for another 4–5 minutes, until lightly golden. Keep the shapes supported from beneath; do not squeeze them with narrow tongs.
- Reduce the heat to low. Brush the upper golden faces lightly with the soy mixture, using a damp brush rather than drenching the rice. Do not pour the dish of sauce into the pan. Turn the rice balls so the brushed faces touch the pan. Brush the newly exposed faces thinly as well. The sauce should coat the crust without soaking through the whole rice ball.
- Cook the first glazed face for about 30–60 seconds, watching closely. Turn and toast the other glazed face for another 30–60 seconds. The crust should become amber and smell pleasantly toasted. Remove sooner if the sauce darkens quickly; turn off the heat if it starts to smoke. For a little more color, work in short intervals rather than leaving the pan unattended.
- Lift the yaki onigiri onto a plate and allow a minute or two before eating, since the center can be hot. Add a small strip of toasted nori if you like. Break one open to check the contrast: a thin toasted crust around a soft white rice center. Serve promptly. If preparing some for storage, follow the cooling guidance below instead of leaving the plate out until later.
Notes
- Makes four rice balls, two light-meal servings. Prep 15 min includes a 5-minute surface rest; pan cooking about 15 min. Rice cooking is excluded. Use fresh warm Japanese short-grain rice. Soy sauce usually contains soy and wheat; use labeled gluten-free soy sauce if needed. Cool storage portions quickly, refrigerate or freeze within 1 hour, use refrigerated rice within 24 hours and reheat only once until steaming hot throughout. Previously chilled rice used in the pan has already been reheated; eat it straight away.