
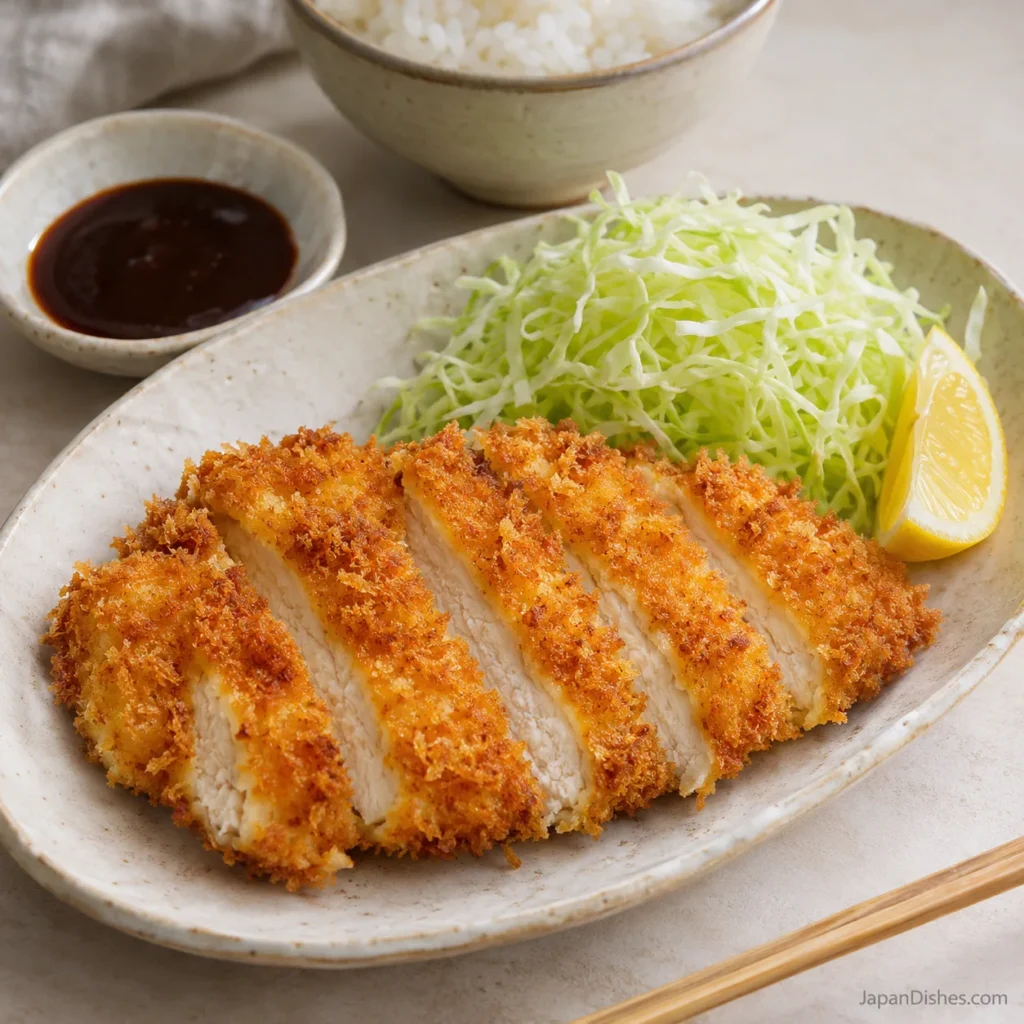
This chicken katsu recipe turns two chicken breasts into four crisp, golden cutlets, with a quick tangy sauce for dipping. The panko coating stays light, while an even thickness helps the chicken cook through before the crumbs get too dark.
Hello, I’m Hana (はな). Welcome to JapanDishes! This guide walks through the small details that make breaded chicken easier to manage at home: how to slice the breasts, how much flour to leave on, when to turn the cutlets and where to place the thermometer.
Allow about 40 minutes, plus any rice cooking time. The ten photo stages below cover the whole method, and the recipe card repeats the instructions so you can cook from one place.
What is chicken katsu?
Chicken katsu (チキンカツ) is a Japanese-style breaded chicken cutlet. Its coarse panko crust gives a different bite from flour-coated fried chicken. Here, the chicken is seasoned simply, then shallow-fried and sliced for serving with cabbage, lemon and a small dish of sauce.
Katsu describes the cutlet; it does not automatically mean curry. Serve it with plain rice for a simple meal, or add your favorite Japanese curry separately. Tonkatsu uses pork, while chicken katsudon combines a chicken cutlet with a cooked egg-and-onion topping over rice.
If you want that softer rice-bowl version, try our chicken katsudon recipe. This guide focuses on keeping the crust crisp and serving the sauce alongside.
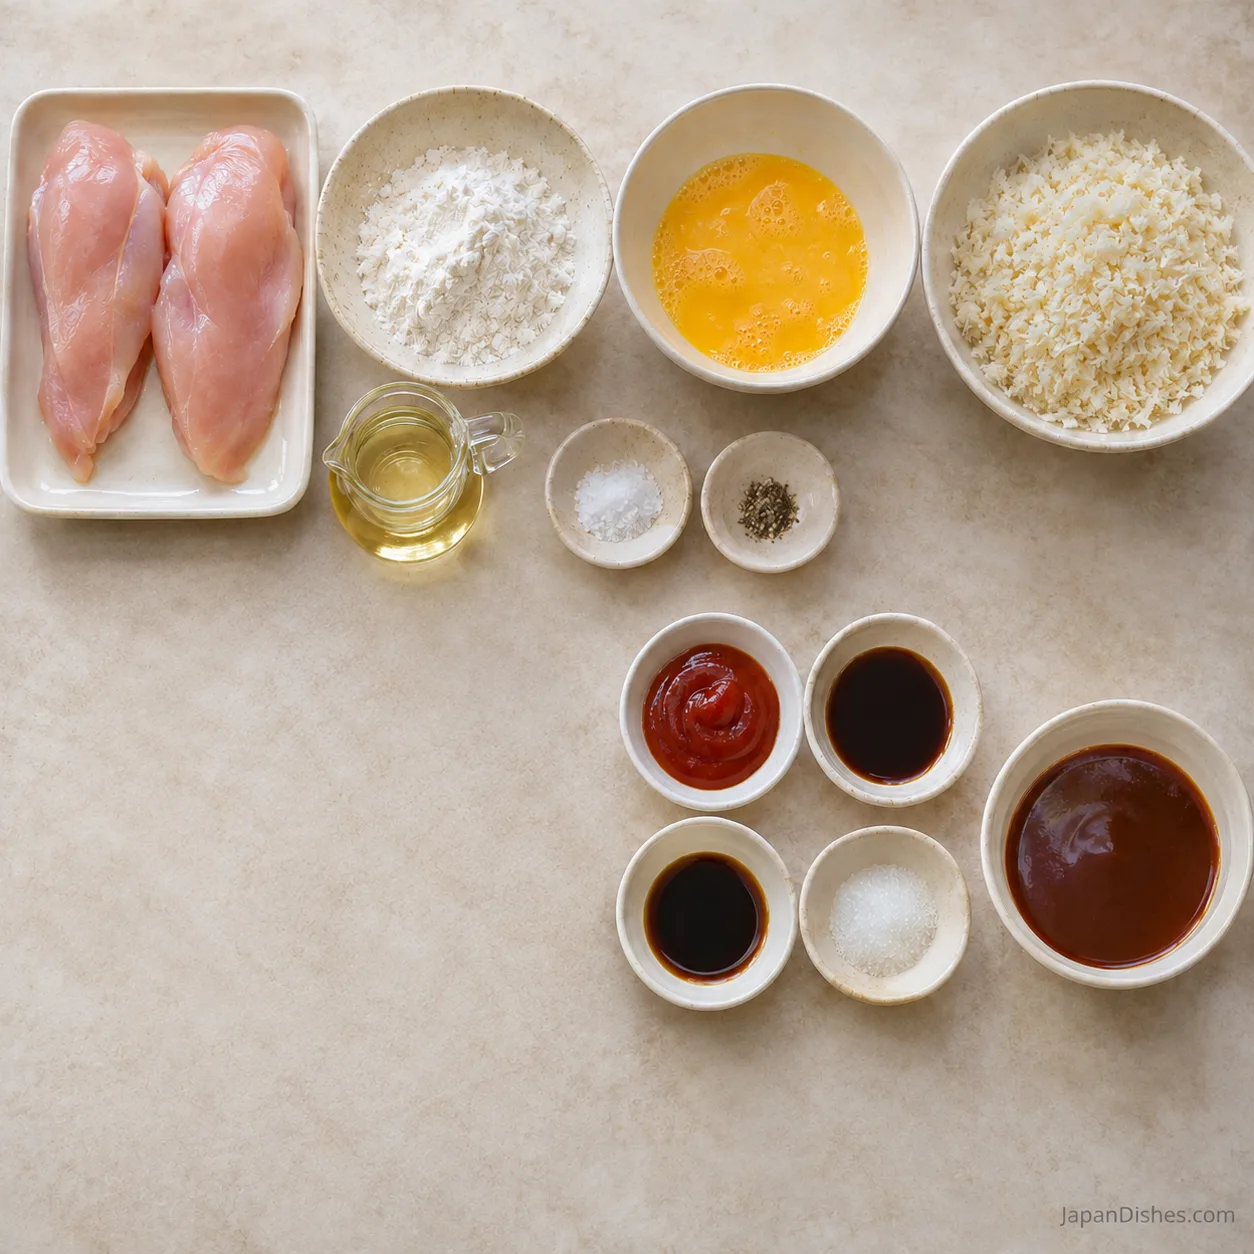
Ingredients for chicken katsu
- Chicken: 2 large boneless, skinless chicken breasts, about 500 g / 1.1 lb total, to make 4 cutlets
- Chicken: 1/2 teaspoon fine salt, plus a little more to taste after cooking
- Chicken: 1/4 teaspoon ground black pepper
- Coating: 60 g / about 1/2 US cup all-purpose flour (plain flour)
- Coating: 2 large eggs, beaten until no streaks remain
- Coating: 100 g coarse Japanese panko, about 2 loosely filled US cups depending on brand
- Frying: neutral oil, such as canola, rice bran or sunflower, about 500 ml / 2 US cups or enough for a 1/2-inch / 12 mm layer in your pan
- Sauce: 4 tablespoons ketchup
- Sauce: 2 tablespoons Worcestershire sauce
- Sauce: 1 teaspoon Japanese soy sauce
- Sauce: 2 teaspoons granulated sugar
- To serve, optional: cooked Japanese short-grain rice, finely shredded cabbage and lemon wedges
Use weight for the panko if possible: the volume changes with flake size and how tightly you fill the cup. Coarse Japanese panko gives an airy crust. Fine ordinary breadcrumbs work, but their coating will be more compact.
Chicken breasts vary considerably in size. Choose two fairly large breasts so each produces two useful cutlets. Small breasts can be flattened whole instead; keep the finished thickness close to 1/2 inch (12 mm), and check each piece individually as it cooks.
The sauce is a pantry approximation of Japanese katsu sauce. Ketchup supplies body, Worcestershire adds acidity and spice, soy gives savoriness and sugar rounds out the sharpness. Prepared bottled katsu sauce is an equally convenient choice.
Check labels for wheat, egg, soy and fish allergens; many Worcestershire sauces contain anchovies. Gluten-free flour and certified gluten-free panko can replace the wheat ingredients, but the soy and Worcestershire sauces also need suitable labels. Keep the oil free from gluten cross-contact.
Equipment
Use a stable cutting board, a sharp knife, three shallow breading dishes, a wide heavy pan with high sides, dry tongs, an oil thermometer, an instant-read food thermometer and a clean wire rack over a tray. Have a clean board and knife ready for the cooked chicken.
How to make chicken katsu: ten photo steps
1. Measure the ingredients and mix the sauce
Before handling raw chicken, stir 4 tablespoons ketchup, 2 tablespoons Worcestershire sauce, 1 teaspoon soy sauce and 2 teaspoons sugar in a small bowl until the sugar dissolves. Taste and set aside in a clean serving area. Prepare the cabbage and lemon with clean equipment if using, and start your rice separately. Measure the coating ingredients so nothing needs fetching with chicken-covered hands.
2. Slice two breasts into four cutlets
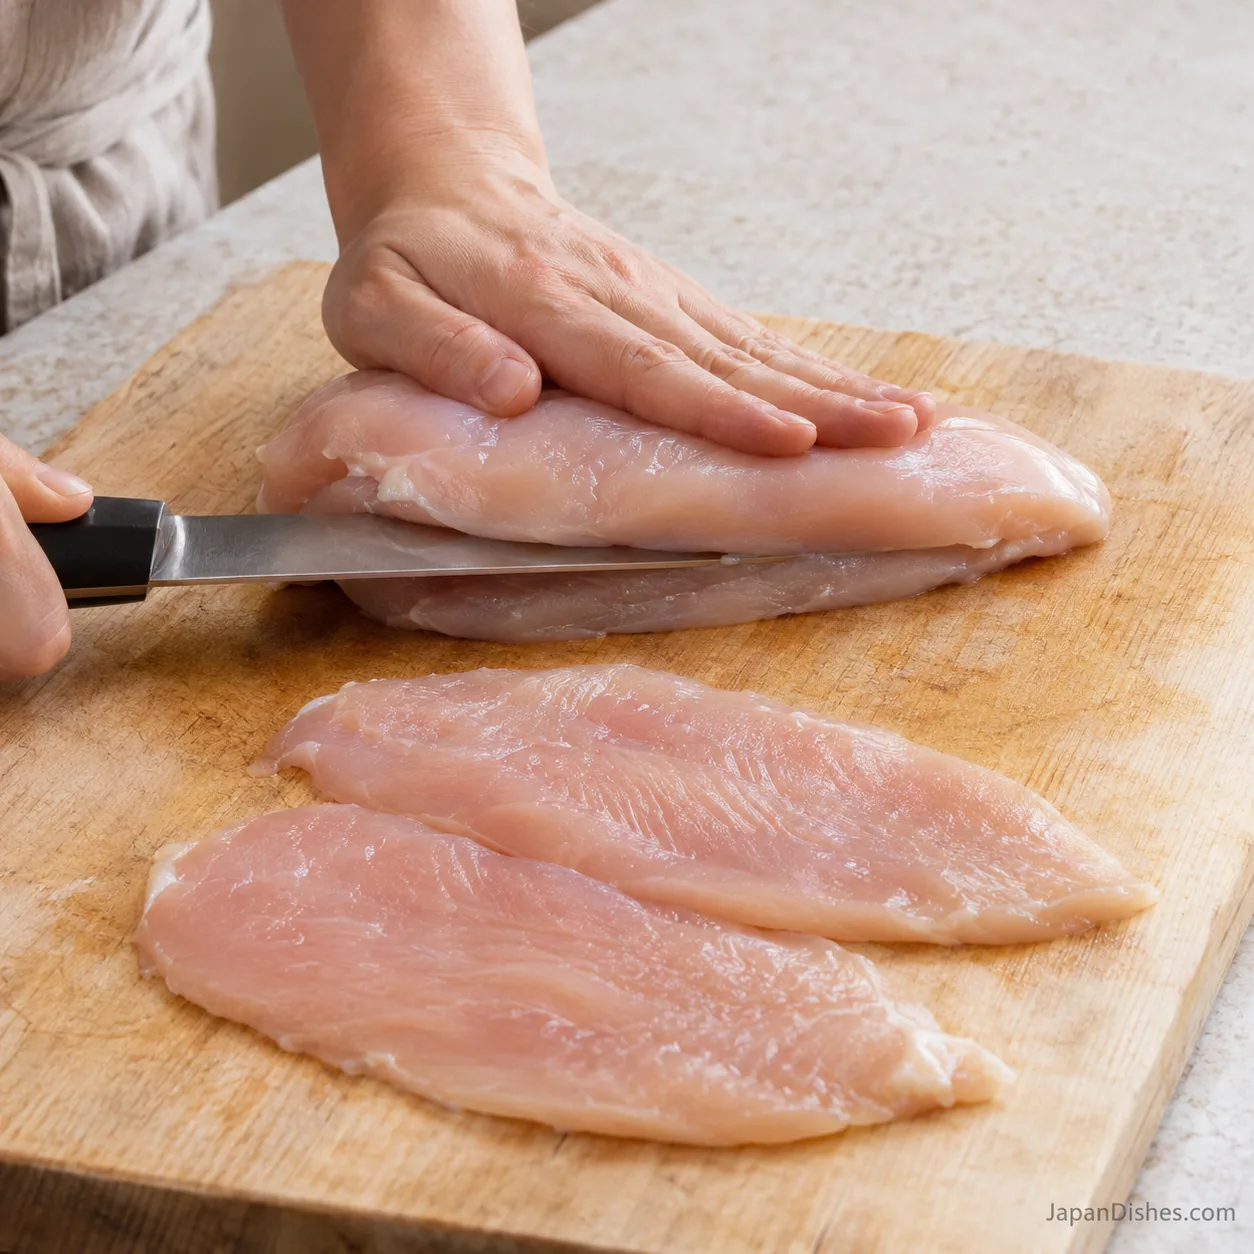
Pat the chicken dry with disposable paper towels; do not rinse it. Place one breast flat on a dedicated raw-meat board. With your free hand flat above the blade and fingers safely clear, keep the knife parallel to the board and slice horizontally through the thick center. Separate the two halves completely. Repeat with the second breast to make four broad cutlets, rather than strips.
3. Even the thickness and season
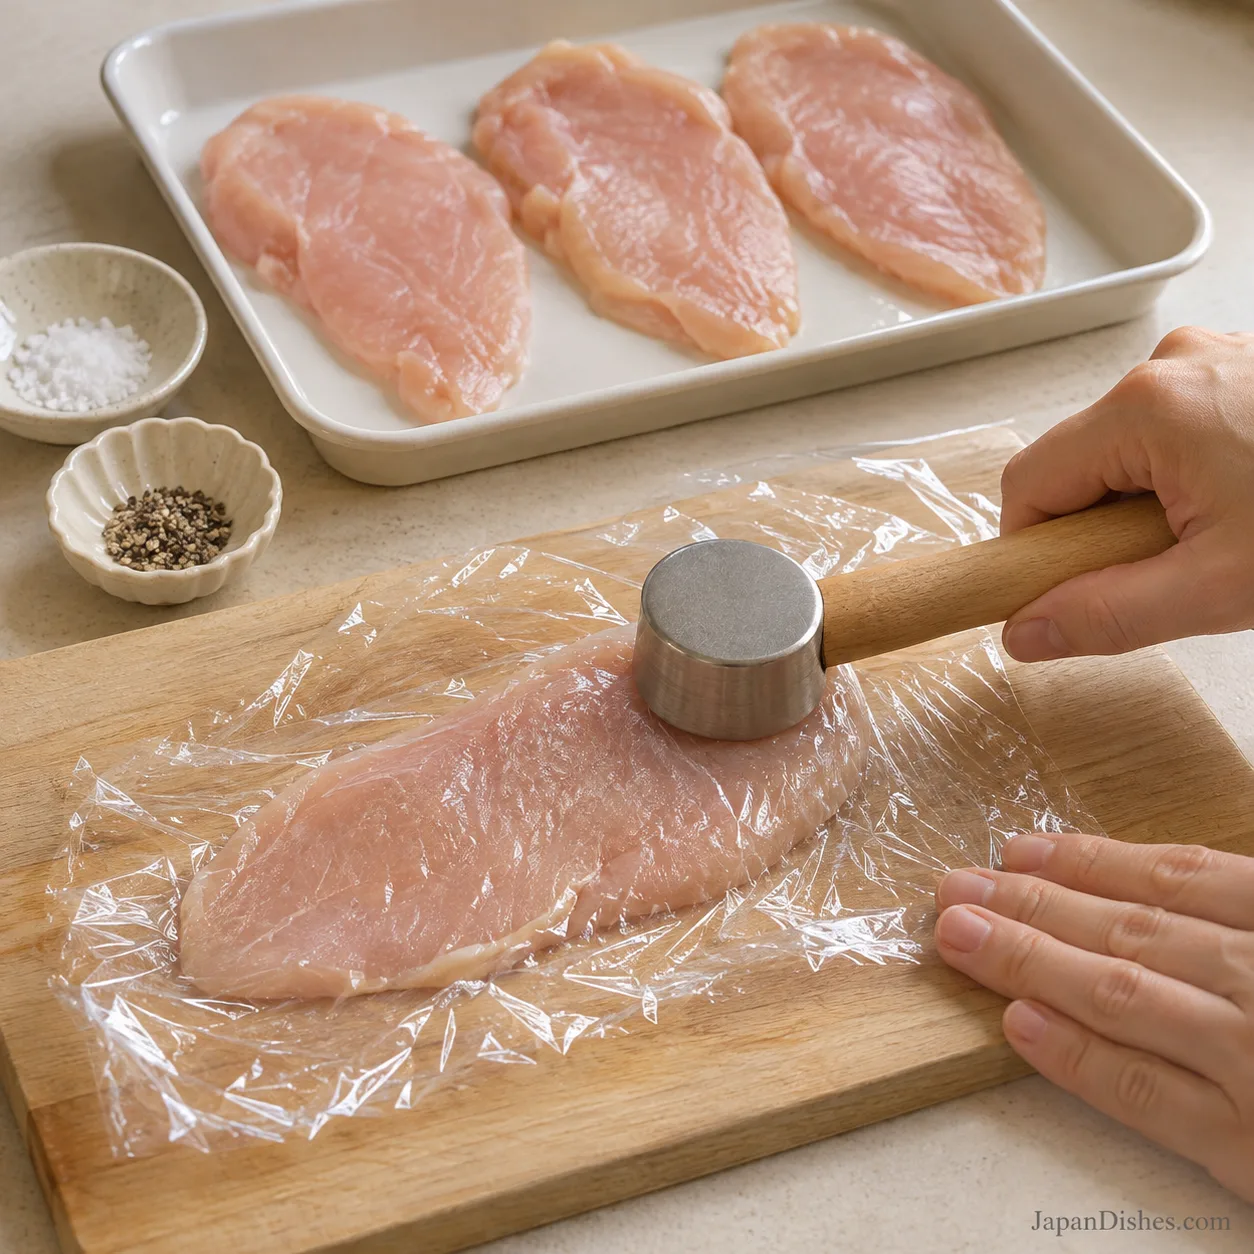
Put one cutlet between two sheets of food-safe wrap. Gently tap only the thicker areas with the flat face of a meat mallet or a rolling pin until the piece is about 1/2 inch (12 mm) thick throughout. Avoid pounding it paper-thin or tearing the edges. Repeat, remove the wrap and divide the 1/2 teaspoon fine salt and 1/4 teaspoon pepper over both sides of all four cutlets.
4. Arrange the breading station
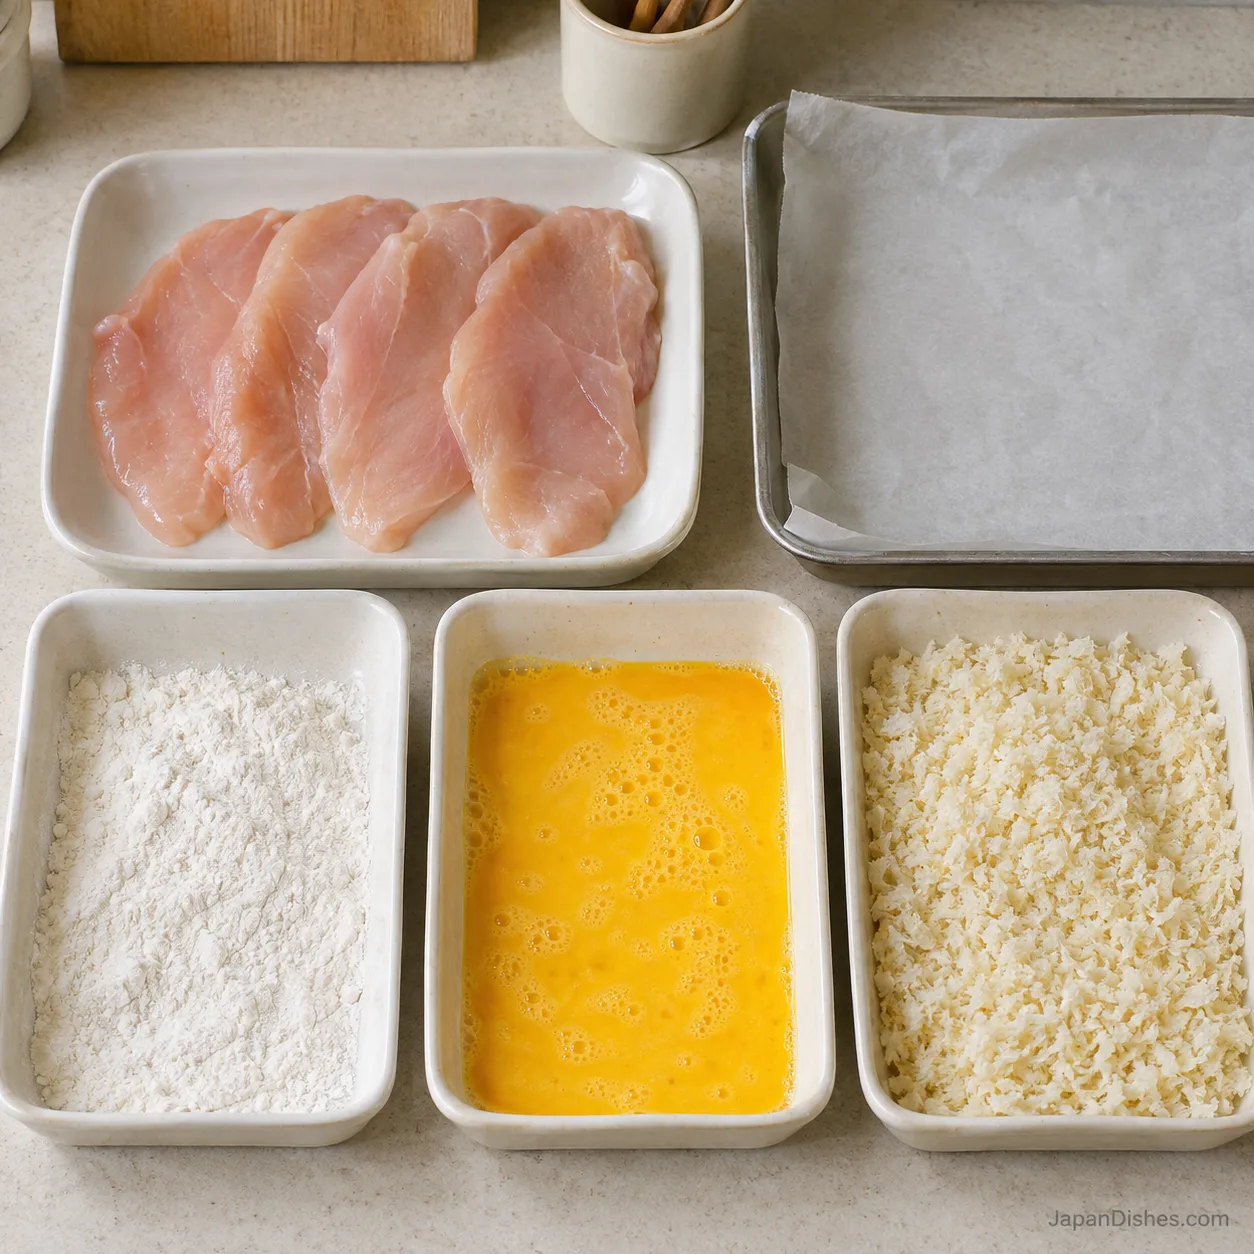
Place the flour, beaten eggs and panko in three separate shallow dishes, in that order. Set a parchment-lined tray after the panko for the coated raw chicken. Use one hand for the dry dishes and the other for egg, or use tongs, to reduce sticky clumps. Keep a different clean rack and utensils for the cooked cutlets, away from the raw-chicken station.
5. Add a thin flour layer
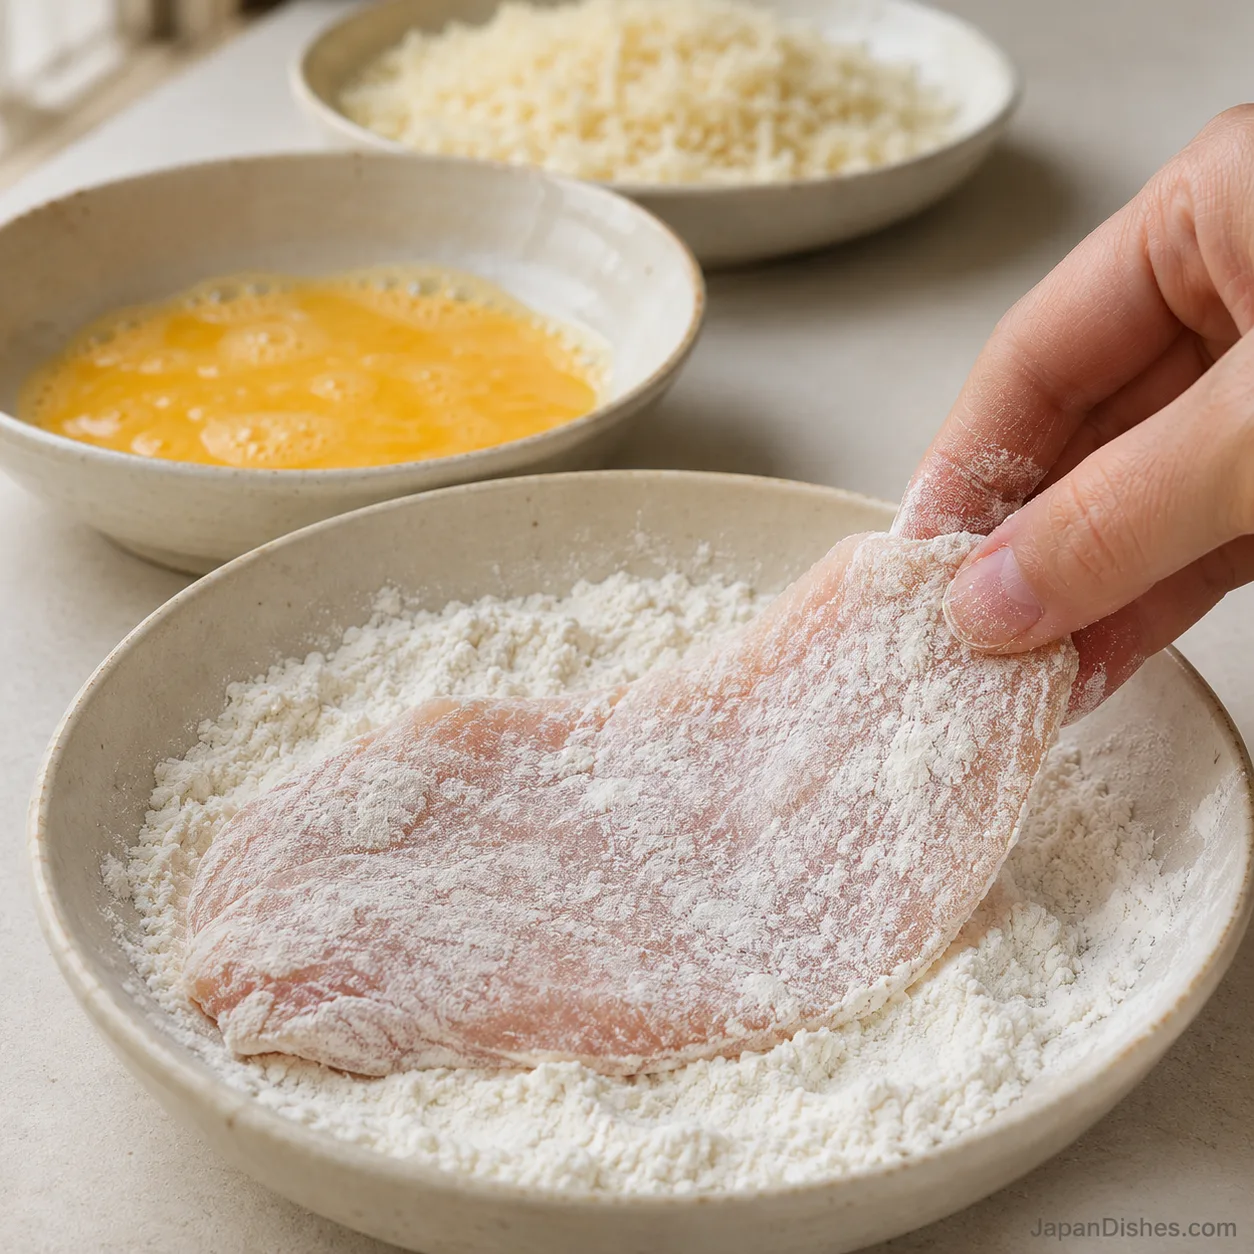
Lay one cutlet in the flour and turn it to cover both faces and the edges. Lift and gently shake off loose flour over the dish. The surface should look lightly dusted, without thick powdery patches. This thin layer helps the egg cling; a heavy flour coat can form a pasty layer under the crumbs.
6. Coat with beaten egg
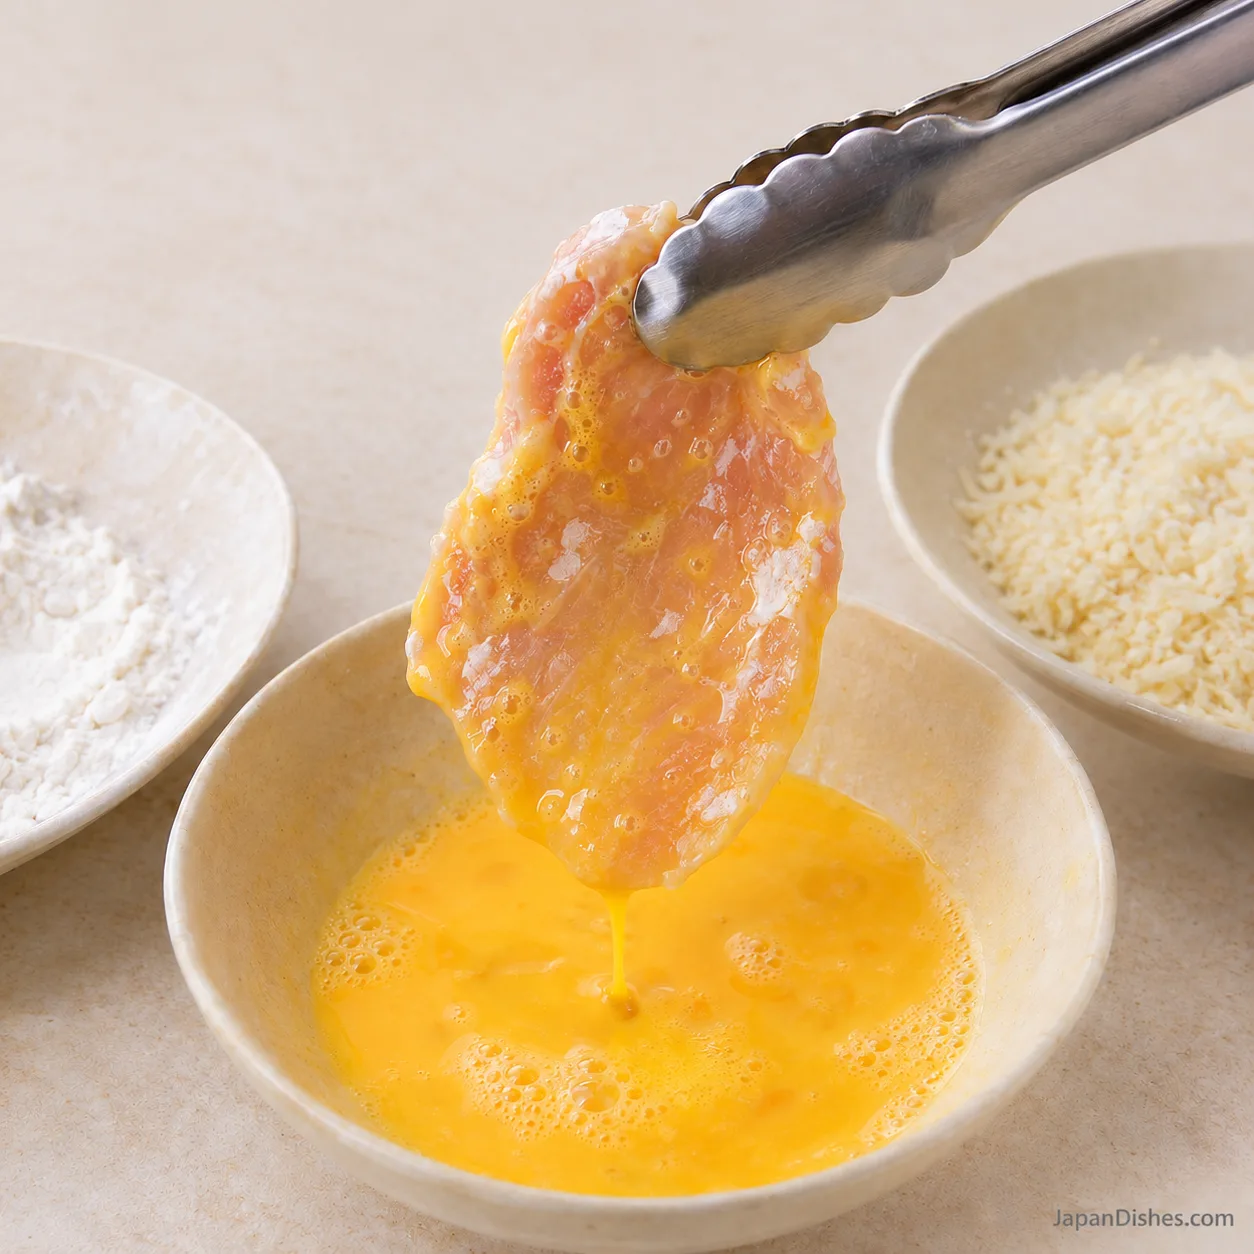
Dip the floured cutlet into the beaten eggs and turn it until every flour patch is moistened. Lift it with tongs or your wet hand and pause over the dish so the excess can drip off. Aim for a thin continuous coating, rather than a thick layer that will slide away. Move directly to the panko dish.
7. Press on the coarse panko
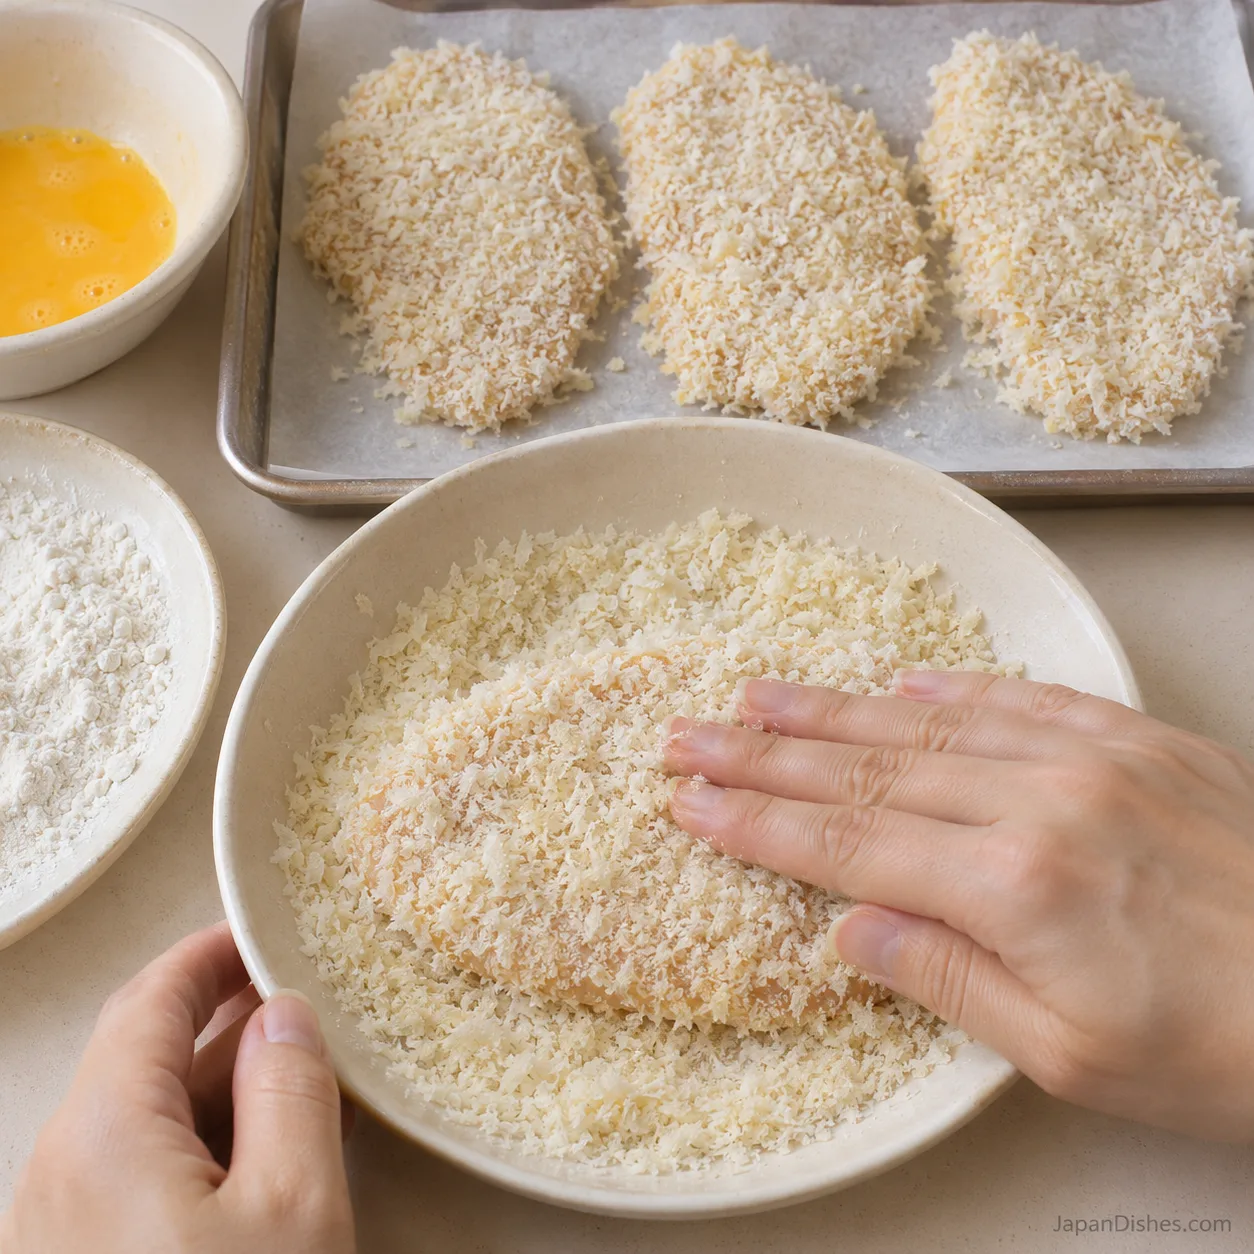
Lay the cutlet on the panko, spoon crumbs over the top and press gently with your dry hand. Turn once and cover any bare sides or edges. Keep the flakes airy instead of crushing them flat. Place on the raw-chicken tray and repeat the flour, egg and panko sequence with the other three cutlets. Wash your hands and clean the raw-meat board and surrounding surfaces before moving to frying.
8. Heat the oil and fry the first side
Pour oil into a wide heavy, high-sided pan to a depth of about 1/2 inch (12 mm); the amount depends on the pan. Leave ample space above the oil and heat to about 350°F (175°C). Carefully lower in one or two cutlets, laying them away from you, with space between. Fry the first side for about 3 minutes, adjusting the heat to keep the oil roughly 340–355°F (170–180°C). Avoid moving the chicken while its crust sets.
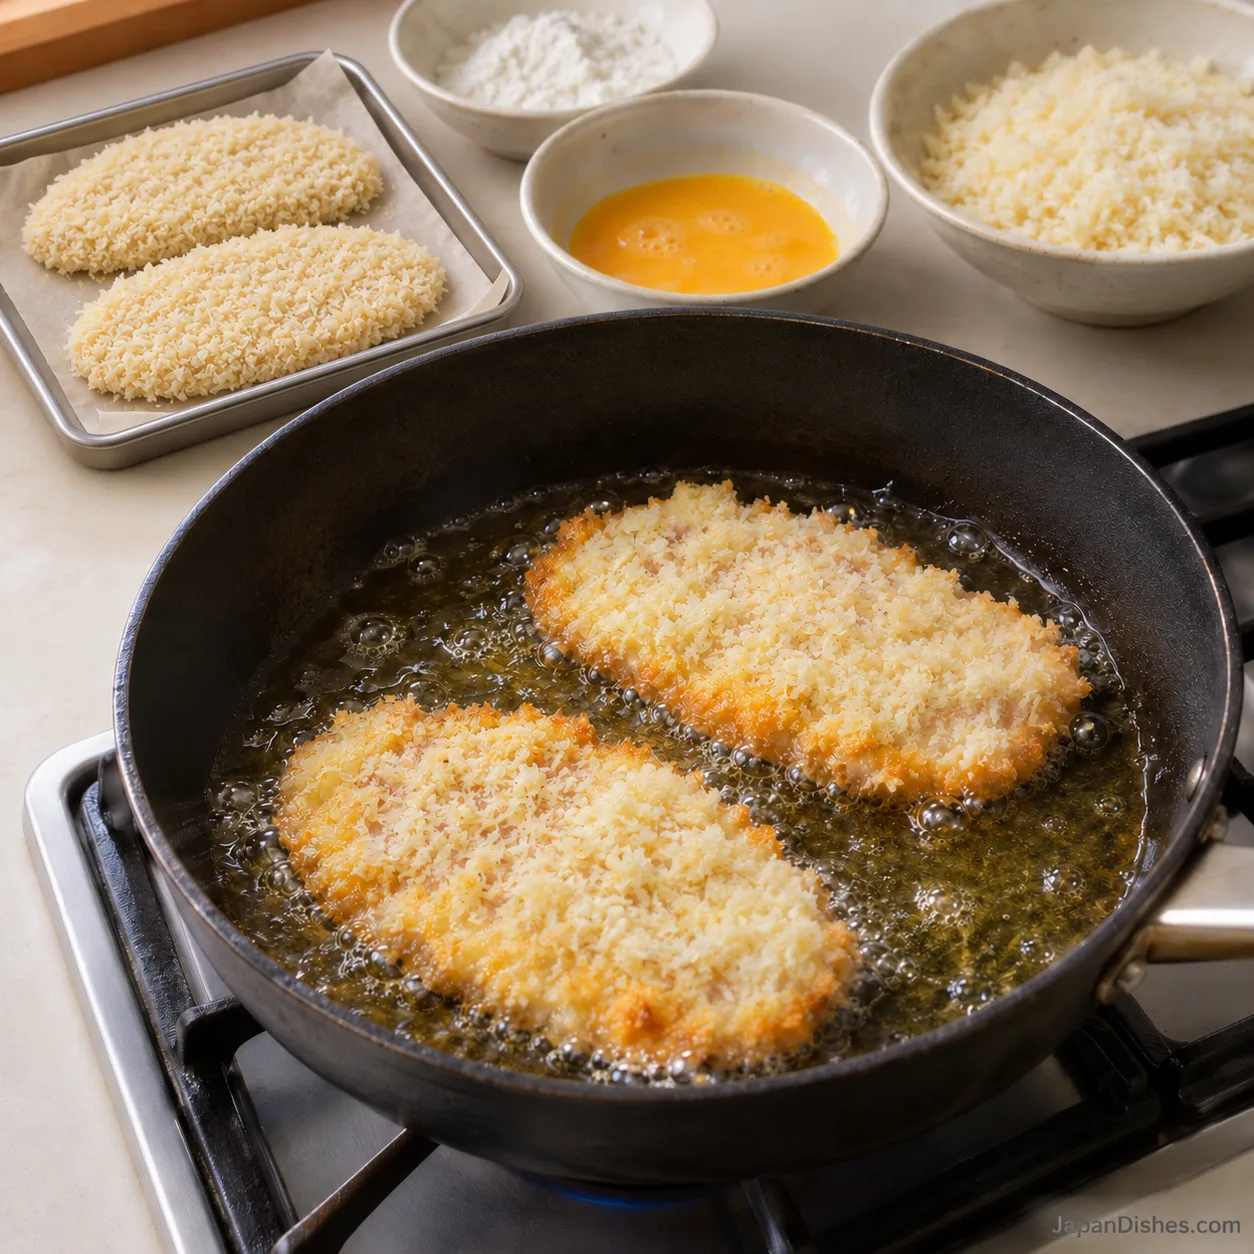
9. Turn and check the center
Using dry tongs, turn each cutlet carefully and fry for about 3 more minutes, until golden. Lift onto the clean rack and insert a clean instant-read thermometer horizontally from the side into the thickest center. Every cutlet must reach at least 165°F (74°C); color and timing alone are not enough. If below that temperature, return it to the oil and cook in short intervals, checking again. Lower the heat if crumbs darken too quickly. Skim loose dark crumbs and bring the oil back to temperature before frying the next batch.
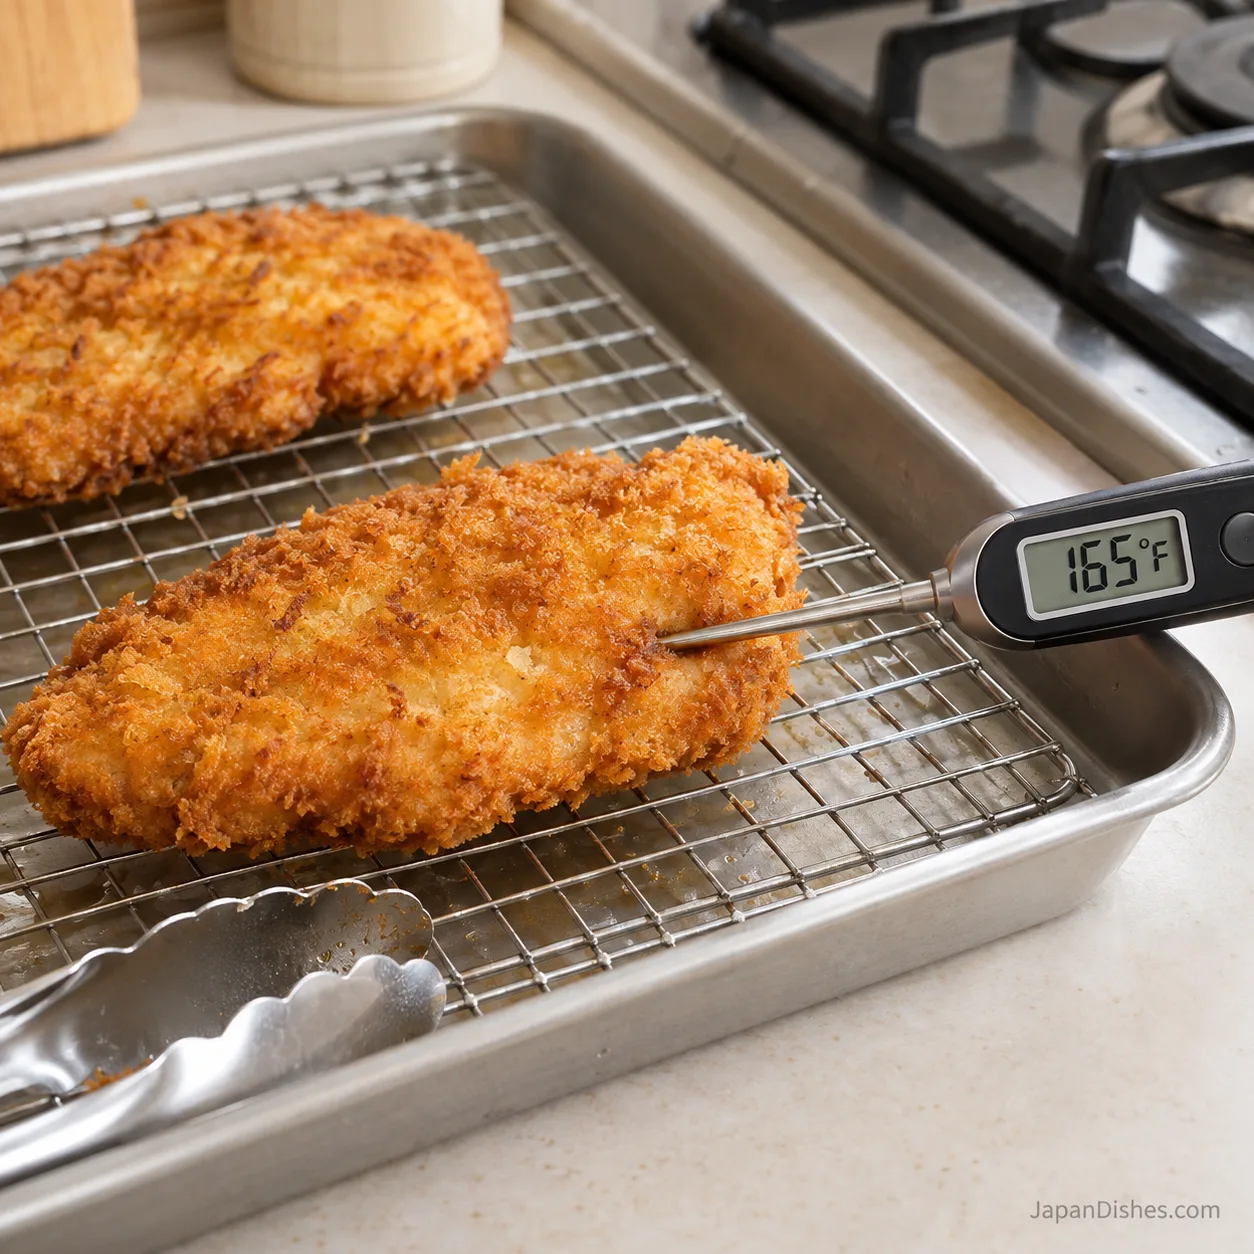
10. Drain briefly, slice and serve
Let each fully cooked cutlet drain on the wire rack for about 2–3 minutes. Do not stack or cover tightly, which traps steam. Use a clean knife and clean cooked-food board to slice across the cutlet into broad strips. Serve promptly with cabbage, lemon, rice and the reserved sauce alongside. Discard leftover flour, egg and panko that touched raw chicken, and let the frying oil cool completely before handling it.
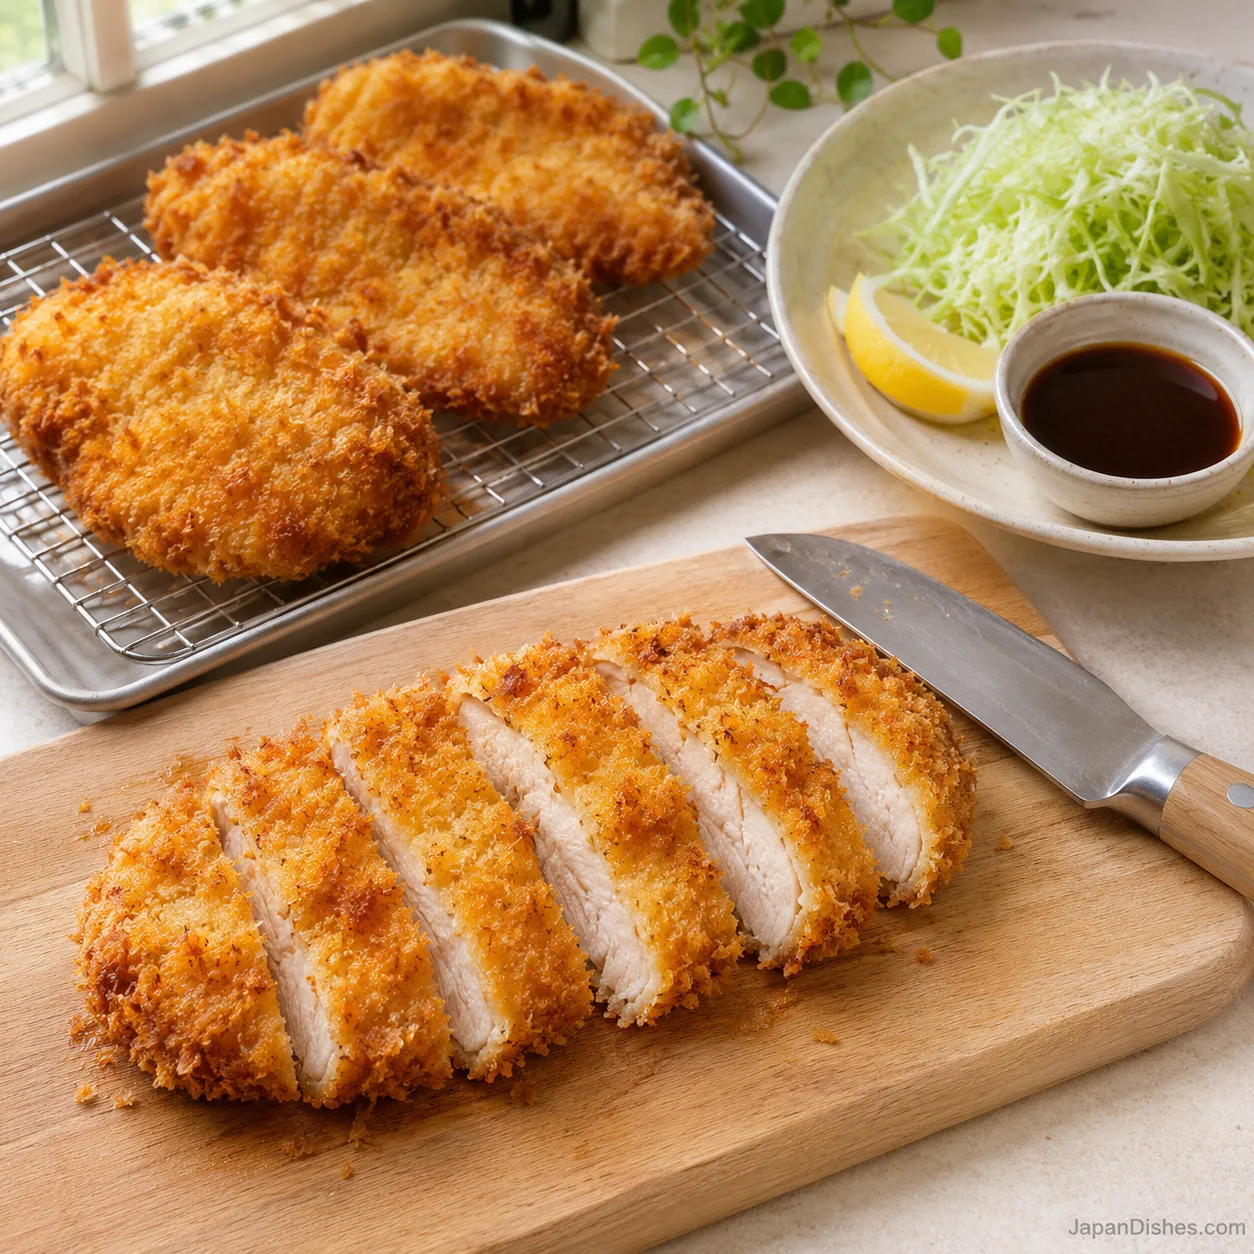
Troubleshooting the chicken and crust
Why does the coating come off?
Start with dry chicken and leave only a light flour layer. Let excess egg drip off, then cover the edges with panko. Once the chicken enters the oil, give the first side time to set before turning. Repeatedly nudging or squeezing the cutlet loosens the crust.
Why is my chicken katsu greasy or soft?
Cool oil and a crowded pan are common causes. Cook in batches and recheck the oil temperature before adding more chicken. A rack lets steam escape from underneath; a flat plate, a pile of paper towels or a tight cover can soften the bottom.
What if the crumbs brown before the center is safe?
The cutlet may be thicker than intended or the oil too hot. Reduce the heat and continue cooking until its center reaches 165°F (74°C). For the next batch, even out thick sections before breading and monitor the oil. Do not serve undercooked chicken because the outside looks ready.
What if the sauce tastes too sharp?
Worcestershire brands vary. Stir in an extra small pinch of sugar or a teaspoon of ketchup, then taste again. Add soy cautiously because it increases saltiness. Keep the finished sauce away from tools or dishes used with raw chicken.
Variations
Thigh variation: boneless, skinless chicken thighs can be opened out and flattened evenly. Their shape and thickness differ, so use the same center-temperature endpoint rather than assuming identical cooking time.
For a curry plate, spoon Japanese curry beside the chicken just before eating. Keeping most sauce off the breading preserves the crisp texture. Use our Japanese chicken curry guide for the separate curry component.
For a lighter-feeling plate, serve a smaller cutlet with extra cabbage and a modest bowl of rice. This is a fried recipe; changing the portion does not turn it into a low-fat cooking method.
What to serve with chicken katsu
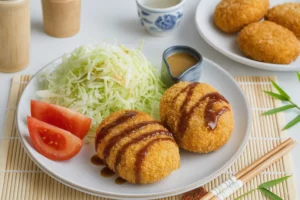
One of the four cutlets makes a moderate serving with rice and vegetables. Pair it with homemade miso soup or a simple chilled vegetable side. Add sauce at the table so each person can choose how much to use. For another panko-coated meal, our Japanese croquettes offer a potato-based alternative.
Make ahead, storage and reheating
For the best texture, cook and eat the chicken katsu immediately. If preparing ahead, slice the chicken and measure the ingredients earlier, keeping raw chicken covered in the refrigerator at 40°F (4°C) or below. Bread close to cooking time so the crumbs stay dry.
Refrigerate cooked chicken within 2 hours, or within 1 hour when the surrounding temperature is above 90°F (32°C). Arrange it in a shallow container without leaving it on the counter to cool completely. Keep sauce and cabbage separate. Use refrigerated cooked chicken within 3–4 days.
To restore some crispness, place chilled cutlets on a rack over a tray in a preheated 375°F (190°C) oven. Start checking after about 10 minutes and continue until the center reaches 165°F (74°C); thickness and oven performance affect the time. A microwave can reheat safely, but the crumbs will soften.
Freeze fully cooked cutlets once promptly chilled, separated with parchment and tightly wrapped; use within about 1 month for best texture. Thaw in the refrigerator before reheating. For the temperature and refrigeration rules, see USDA reheating guidance and CDC food-safety advice.
Frequently asked questions
Is chicken katsu the same as chicken katsudon?
No. Chicken katsu is the breaded cutlet itself. In chicken katsudon, sliced katsu is combined with onion and egg in a seasoned broth and served over rice. That topping deliberately softens some of the crust.
Can I use regular breadcrumbs?
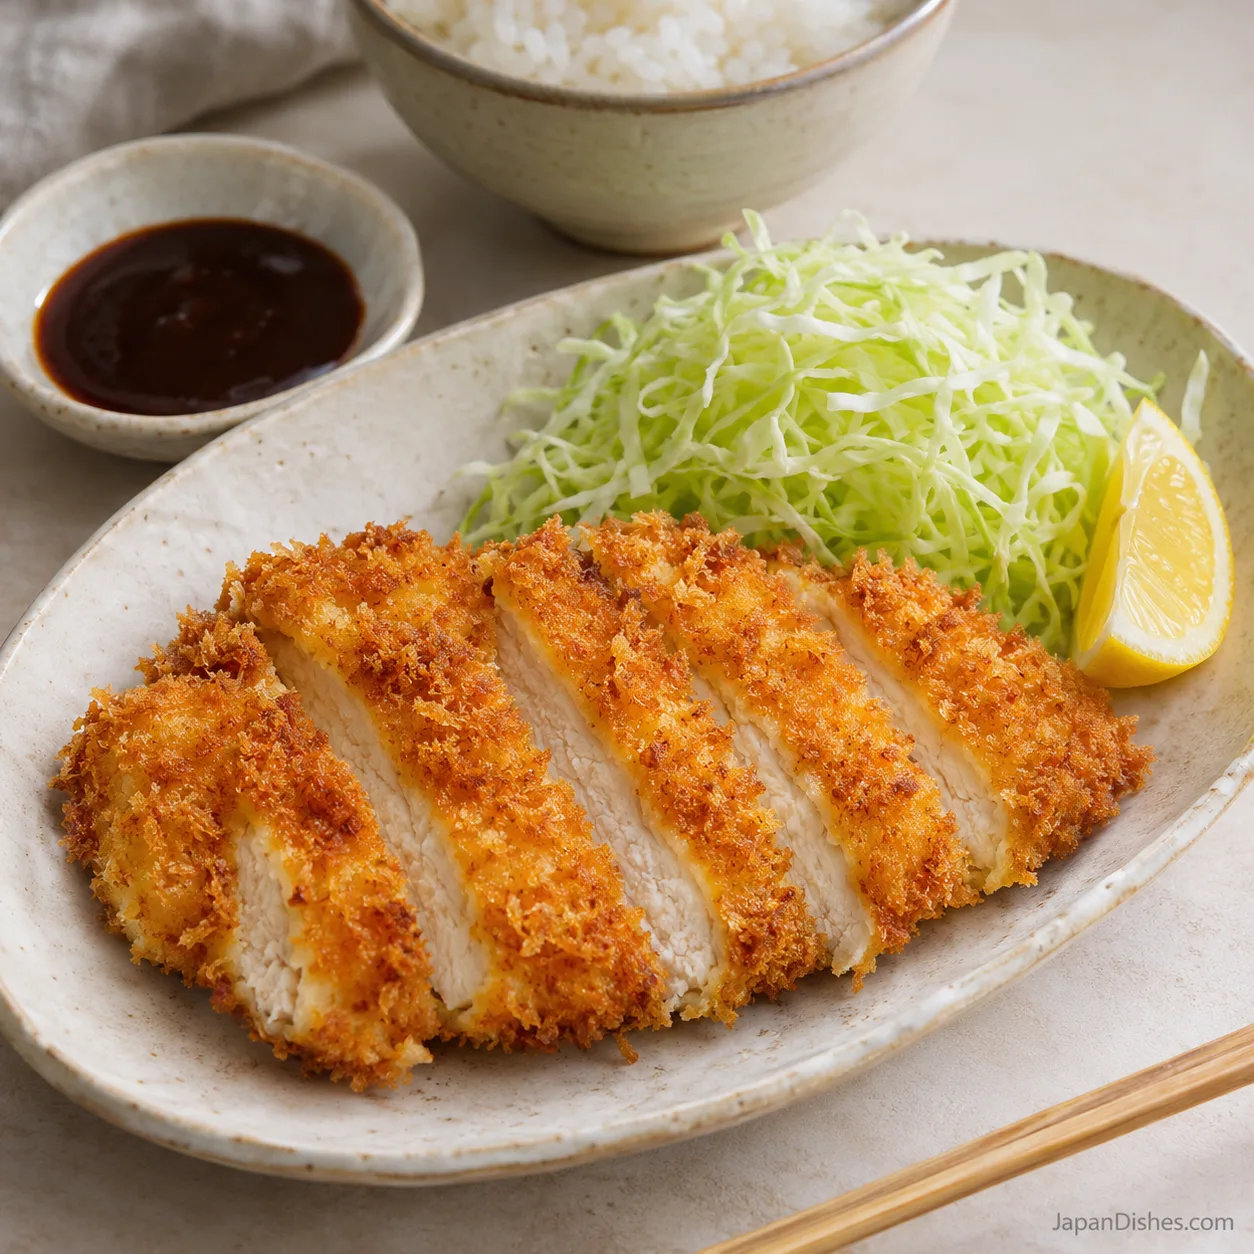
Yes, but the coating will be finer and denser. Panko flakes give the light, craggy texture shown here. Keep the three-stage flour, egg and breadcrumb sequence whichever crumbs you choose.
How do I know the chicken is cooked?
Measure the thickest center from the side with a food thermometer. Each cutlet must reach at least 165°F (74°C). A golden crust or white-looking interior is not a reliable substitute for that check.
Can I make this in an air fryer?
An air fryer can cook breaded chicken, but it needs a different oil application and timing. This recipe describes shallow-frying. Do not transfer the six-minute frying estimate directly to an air fryer; use a method designed for your appliance and check the same safe center temperature.
Does chicken katsu need a marinade?
Not for this method. Even cutlets, light seasoning and careful frying are enough. A wet marinade changes how the flour and egg adhere, so it is not included in the quantities or timing here.
Check every cutlet with a food thermometer: chicken must reach 165°F (74°C) in the thickest center. Cooking times are guides, not a substitute for that check.
Crispy Chicken Katsu with Homemade Sauce チキンカツ
Course: Main courseCuisine: JapaneseDifficulty: Easy to Moderate4
servings20
minutes20
minutes40
minutesCrispy Japanese chicken katsu made with thin chicken breast cutlets, a light flour-and-egg coating and coarse panko. Shallow-fried in batches and served with a quick homemade katsu sauce. Makes four cutlets.
Ingredients
Chicken: 2 large boneless, skinless chicken breasts, about 500 g / 1.1 lb total, to make 4 cutlets
Chicken: 1/2 teaspoon fine salt, plus a little more to taste after cooking
Chicken: 1/4 teaspoon ground black pepper
Coating: 60 g / about 1/2 US cup all-purpose flour (plain flour)
Coating: 2 large eggs, beaten until no streaks remain
Coating: 100 g coarse Japanese panko, about 2 loosely filled US cups depending on brand
Frying: neutral oil, such as canola, rice bran or sunflower, about 500 ml / 2 US cups or enough for a 1/2-inch / 12 mm layer in your pan
Sauce: 4 tablespoons ketchup
Sauce: 2 tablespoons Worcestershire sauce
Sauce: 1 teaspoon Japanese soy sauce
Sauce: 2 teaspoons granulated sugar
To serve, optional: cooked Japanese short-grain rice, finely shredded cabbage and lemon wedges
Directions
- Before handling raw chicken, stir 4 tablespoons ketchup, 2 tablespoons Worcestershire sauce, 1 teaspoon soy sauce and 2 teaspoons sugar in a small bowl until the sugar dissolves. Taste and set aside in a clean serving area. Prepare the cabbage and lemon with clean equipment if using, and start your rice separately. Measure the coating ingredients so nothing needs fetching with chicken-covered hands.

- Pat the chicken dry with disposable paper towels; do not rinse it. Place one breast flat on a dedicated raw-meat board. With your free hand flat above the blade and fingers safely clear, keep the knife parallel to the board and slice horizontally through the thick center. Separate the two halves completely. Repeat with the second breast to make four broad cutlets, rather than strips.
- Put one cutlet between two sheets of food-safe wrap. Gently tap only the thicker areas with the flat face of a meat mallet or a rolling pin until the piece is about 1/2 inch (12 mm) thick throughout. Avoid pounding it paper-thin or tearing the edges. Repeat, remove the wrap and divide the 1/2 teaspoon fine salt and 1/4 teaspoon pepper over both sides of all four cutlets.
- Place the flour, beaten eggs and panko in three separate shallow dishes, in that order. Set a parchment-lined tray after the panko for the coated raw chicken. Use one hand for the dry dishes and the other for egg, or use tongs, to reduce sticky clumps. Keep a different clean rack and utensils for the cooked cutlets, away from the raw-chicken station.
- Lay one cutlet in the flour and turn it to cover both faces and the edges. Lift and gently shake off loose flour over the dish. The surface should look lightly dusted, without thick powdery patches. This thin layer helps the egg cling; a heavy flour coat can form a pasty layer under the crumbs.
- Dip the floured cutlet into the beaten eggs and turn it until every flour patch is moistened. Lift it with tongs or your wet hand and pause over the dish so the excess can drip off. Aim for a thin continuous coating, rather than a thick layer that will slide away. Move directly to the panko dish.
- Lay the cutlet on the panko, spoon crumbs over the top and press gently with your dry hand. Turn once and cover any bare sides or edges. Keep the flakes airy instead of crushing them flat. Place on the raw-chicken tray and repeat the flour, egg and panko sequence with the other three cutlets. Wash your hands and clean the raw-meat board and surrounding surfaces before moving to frying.
- Pour oil into a wide heavy, high-sided pan to a depth of about 1/2 inch (12 mm); the amount depends on the pan. Leave ample space above the oil and heat to about 350°F (175°C). Carefully lower in one or two cutlets, laying them away from you, with space between. Fry the first side for about 3 minutes, adjusting the heat to keep the oil roughly 340–355°F (170–180°C). Avoid moving the chicken while its crust sets.
- Using dry tongs, turn each cutlet carefully and fry for about 3 more minutes, until golden. Lift onto the clean rack and insert a clean instant-read thermometer horizontally from the side into the thickest center. Every cutlet must reach at least 165°F (74°C); color and timing alone are not enough. If below that temperature, return it to the oil and cook in short intervals, checking again. Lower the heat if crumbs darken too quickly. Skim loose dark crumbs and bring the oil back to temperature before frying the next batch.
- Let each fully cooked cutlet drain on the wire rack for about 2–3 minutes. Do not stack or cover tightly, which traps steam. Use a clean knife and clean cooked-food board to slice across the cutlet into broad strips. Serve promptly with cabbage, lemon, rice and the reserved sauce alongside. Discard leftover flour, egg and panko that touched raw chicken, and let the frying oil cool completely before handling it.
Notes
- Times are approximate for four 1/2-inch (12 mm) cutlets fried in two batches. Prep 20 minutes; cooking, oil heating and brief draining about 20 minutes; total about 40 minutes. Rice cooking is additional. Use a thermometer: chicken and reheated leftovers must reach 165°F (74°C). Keep raw and cooked equipment separate. Sauce yields about 7 tablespoons. Discard breading ingredients that touched raw chicken. Contains wheat, egg and soy; Worcestershire may contain fish. No nutrition estimate is supplied because absorbed frying oil varies.