

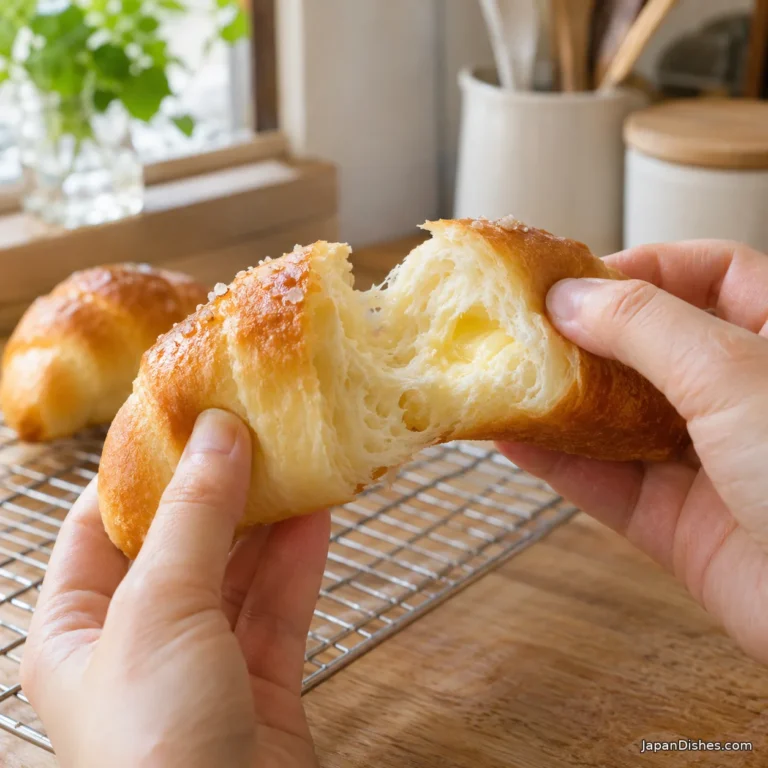
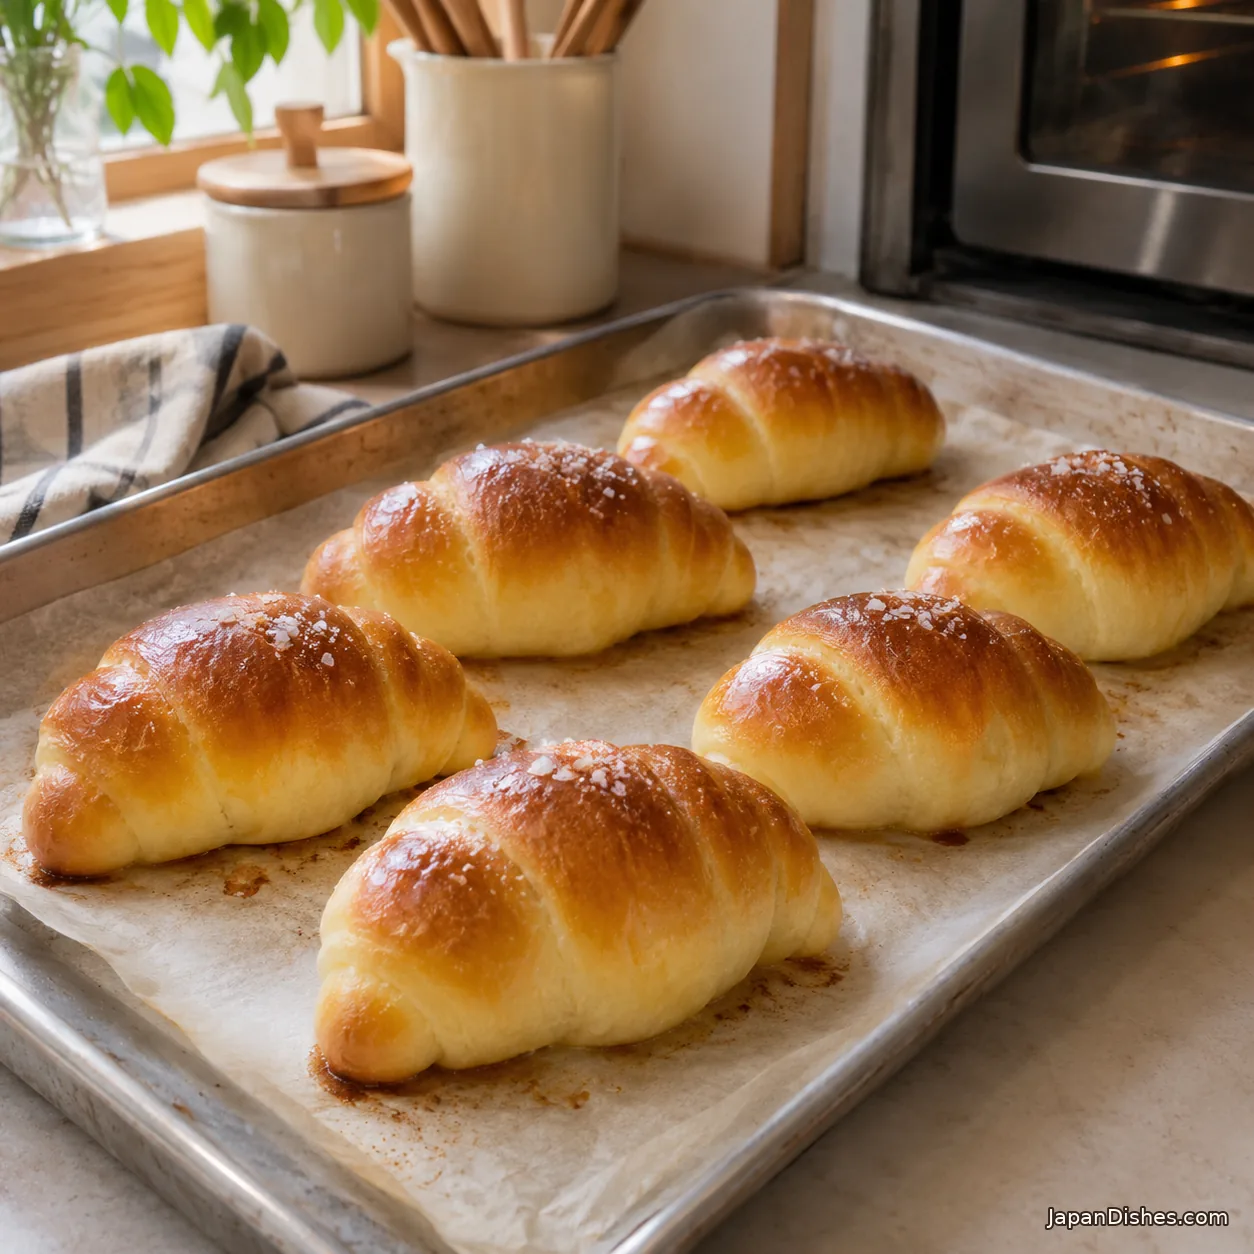
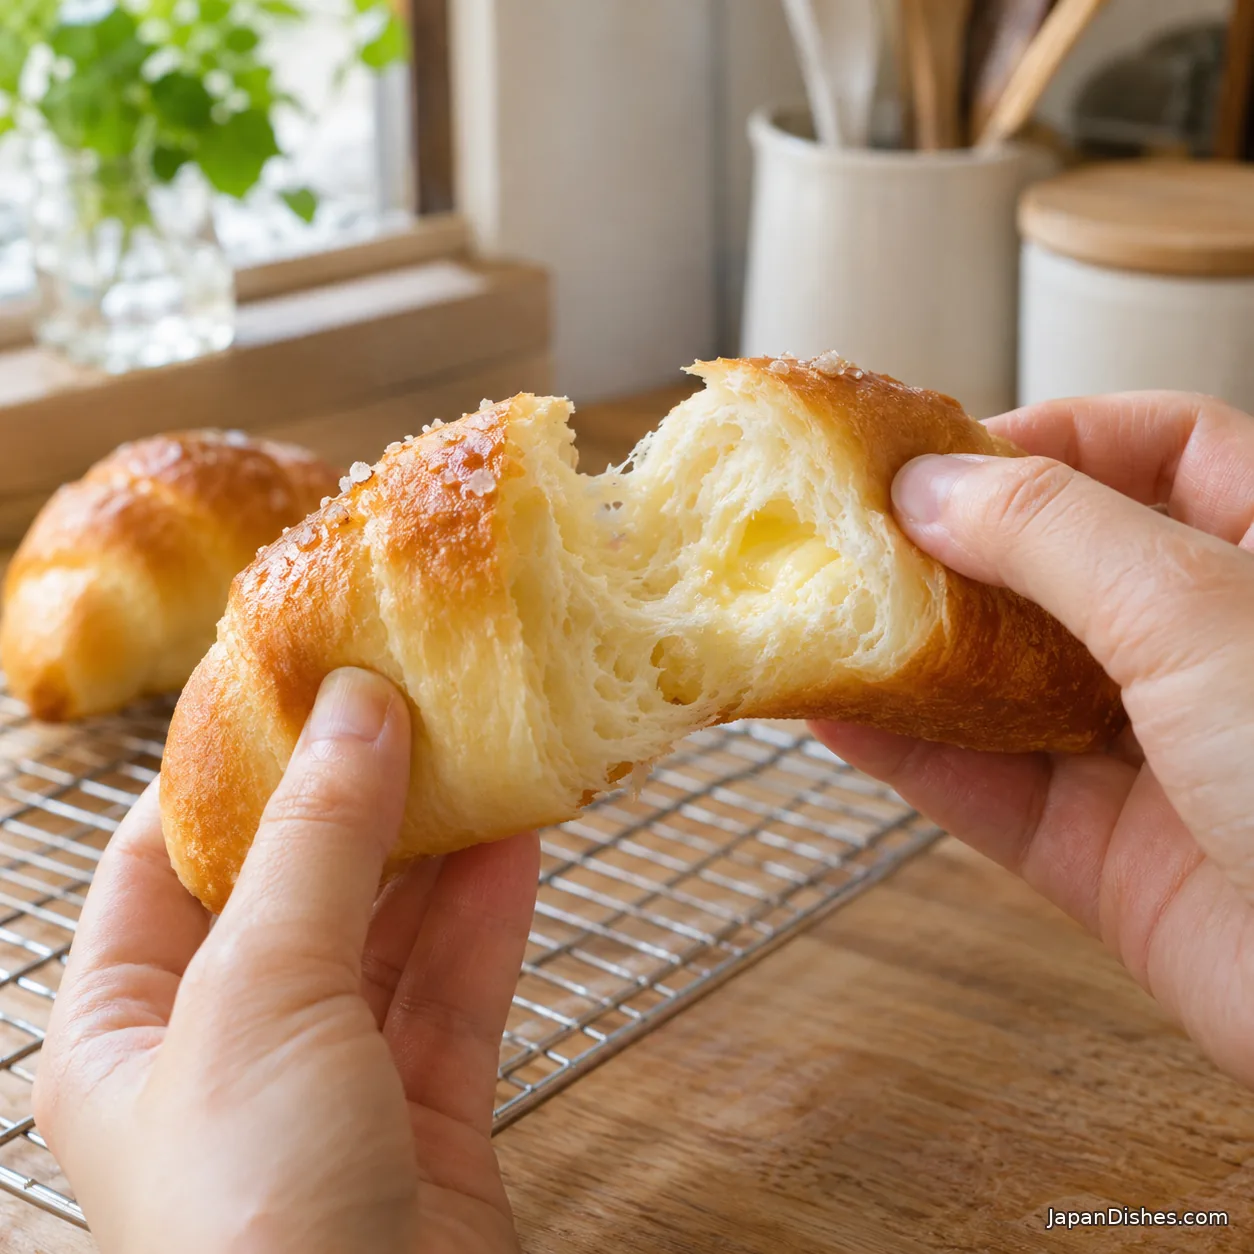
Shio pan is a Japanese salt bread roll with a golden top, a crisp buttery base and a soft interior that pulls apart in wisps. The little pocket inside starts with a cold piece of butter rolled into the dough. In the oven the butter melts, and a little of it can escape onto the tray and brown the base.
I’m Hana. If you’re making shio pan for the first time, watch the shape of the dough more than the shape of the finished roll. A long triangle gives you room to tuck in the butter and roll it up without squeezing. The rolls can be a little crooked and still bake beautifully.
What is shio pan?
Shio means salt and pan means bread in Japanese. Yawatahama’s tourism office identifies Pain Maison, a bakery in Ehime Prefecture, as the birthplace of shio pan. The rolls became popular in Japan and also found a following in South Korea, where salt bread is called sogeum-ppang. A classic roll looks a little like a croissant, but this is a kneaded yeast dough. There’s no butter block to laminate, no repeated folding, and no need to chase pastry layers.
This home version makes eight small rolls from one batch of dough. Use the rise times as a guide: the temperature of your room and dough can move the schedule by half an hour or more. Give yourself time to check the dough before moving on.
Ingredients for shio pan
- 250 g bread flour (about 2 cups, spooned and leveled; weighing recommended)
- 165 g lukewarm water (about ⅔ cup plus 1½ teaspoons)
- 12 g granulated sugar (1 tablespoon)
- 3 g instant yeast (about 1 teaspoon)
- 4 g fine sea salt (about ⅔ teaspoon, depending on grain size)
- 15 g unsalted butter, softened, for the dough (about 1 tablespoon)
- 64 g unsalted butter, cold, for filling (eight 8 g pieces; about 4½ tablespoons total)
- 1 teaspoon flaky sea salt, for finishing, or to taste
- 1 teaspoon water for brushing the tops, or as needed
Bread flour gives this dough enough strength to hold the filling and enough chew to contrast with the crisp base. All-purpose flour can work, but it may absorb less water. If you use it, hold back the last tablespoon of water and add it only if the dough looks stiff after mixing.
Use instant yeast for the stated method. Water should feel barely warm. A hot bowl of water is unnecessary. If the room is cool, put the covered dough somewhere draft-free and give it more time to rise.
Use softened butter in the dough and cold butter in the centers. Cut the filling into narrow batons about 1½ inches (4 cm) long rather than thick cubes, so the dough can wrap around them evenly. Keep the batons refrigerated until you shape.
Fine salt seasons the dough; flaky salt gives a few distinct salty bites on top. If you can’t find flakes, use a very light sprinkle of coarse sea salt. A full teaspoon of fine table salt across the tops can taste harsher.
Equipment
Have a digital scale, mixing bowl, bench scraper, rolling pin, rimmed baking sheet, oven-rated parchment, pastry brush and wire rack ready. A stand mixer is optional.
How to make shio pan: nine photo steps
1. Mix a rough dough
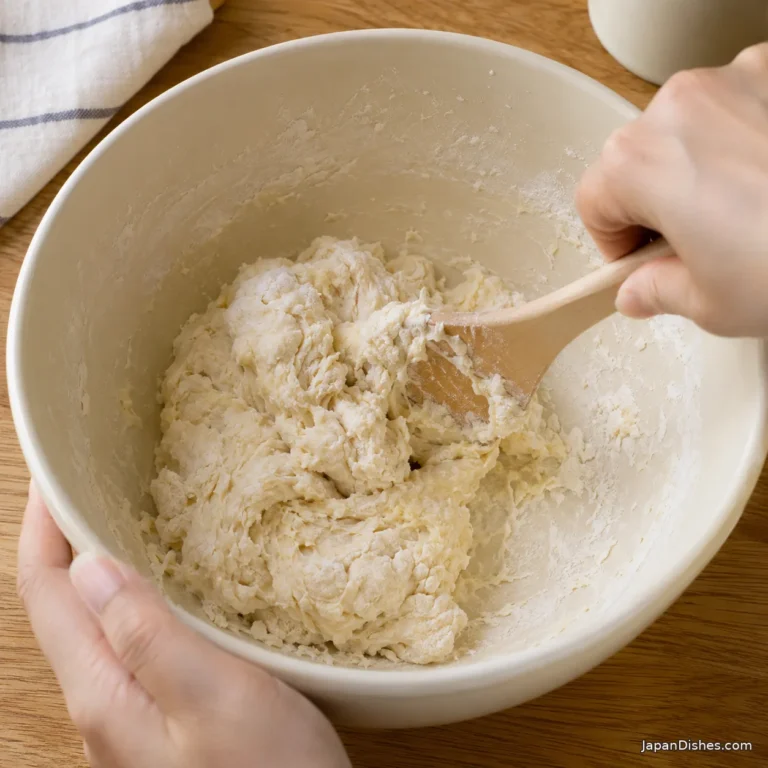
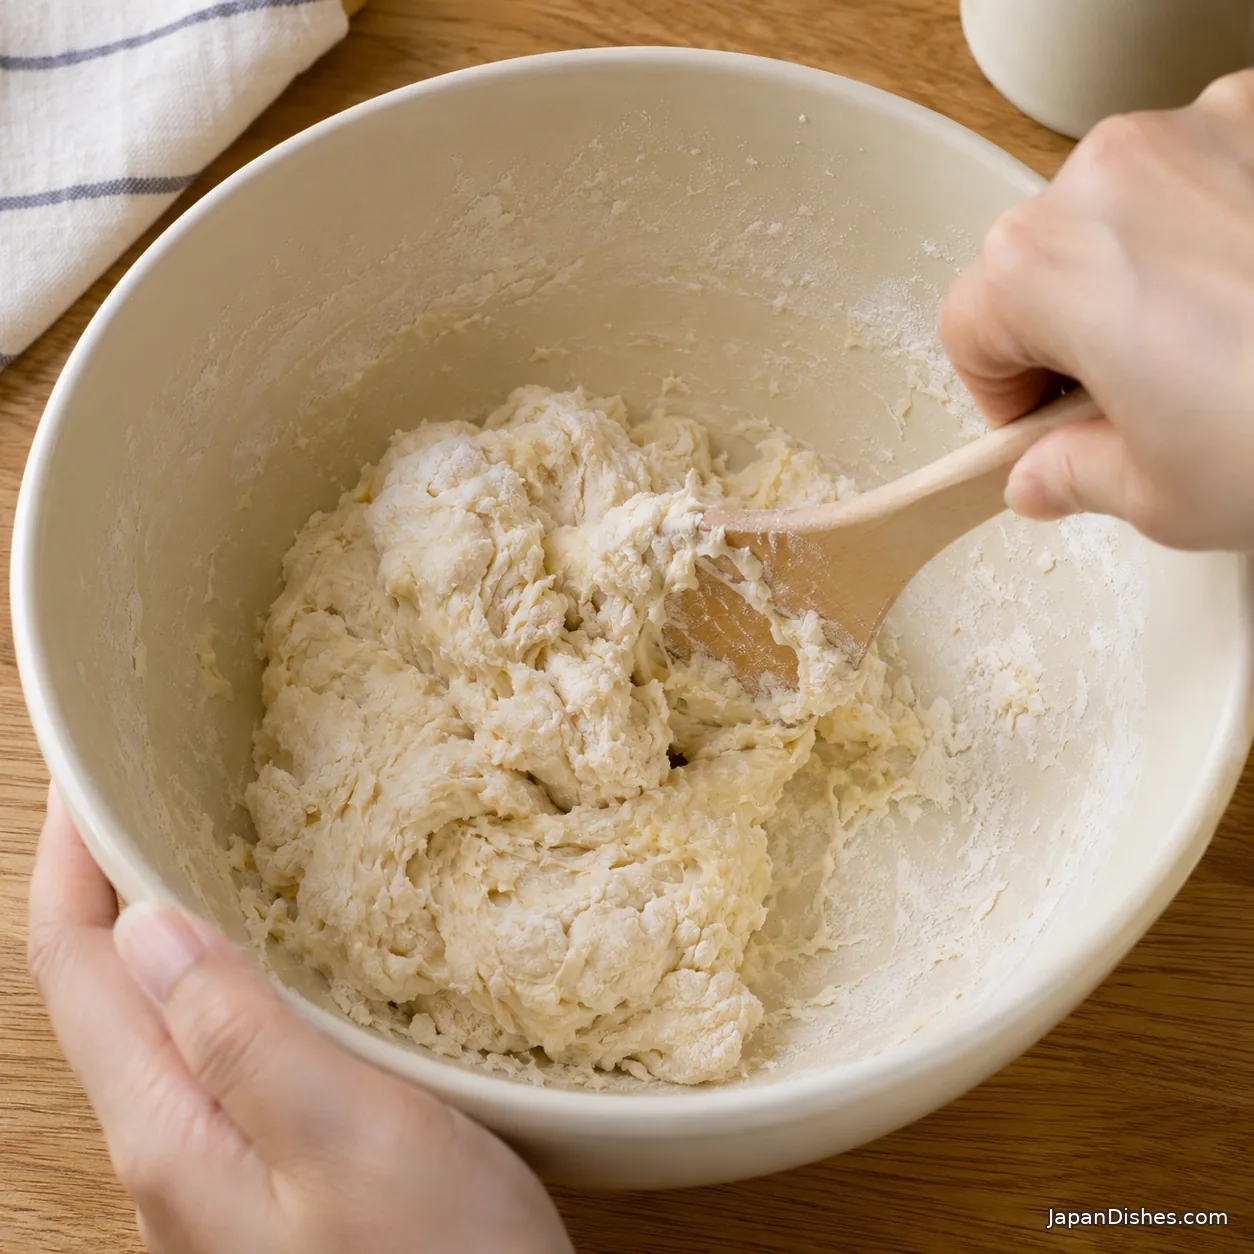
Stir the bread flour, sugar, instant yeast and fine sea salt in a bowl. Add the lukewarm water and mix until all the flour is moistened and there are no dry pockets at the bottom. The dough will look uneven and may feel sticky. Cover the bowl and leave it for 10 minutes so the flour has time to absorb the water.
2. Knead in the softened butter
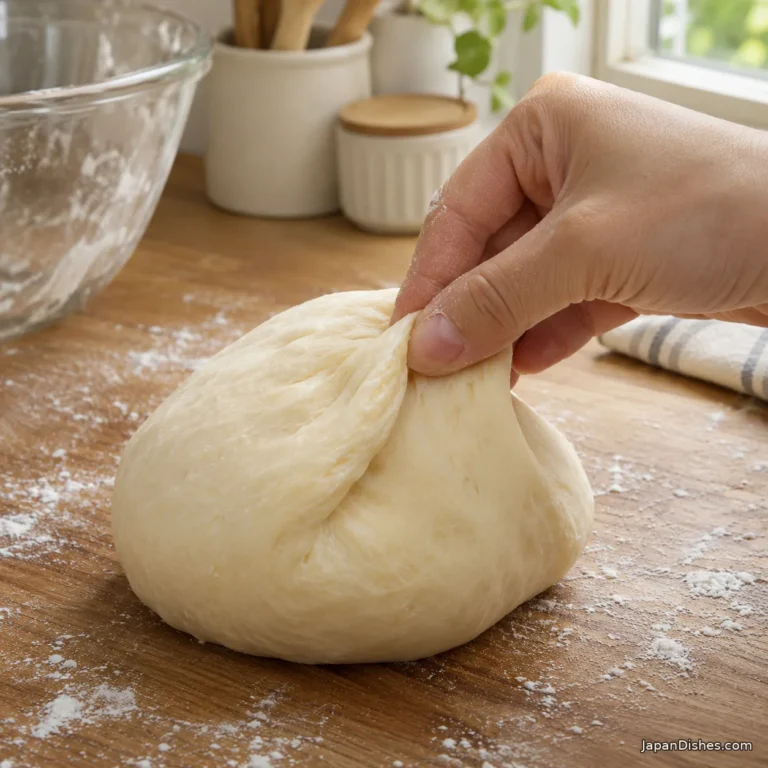
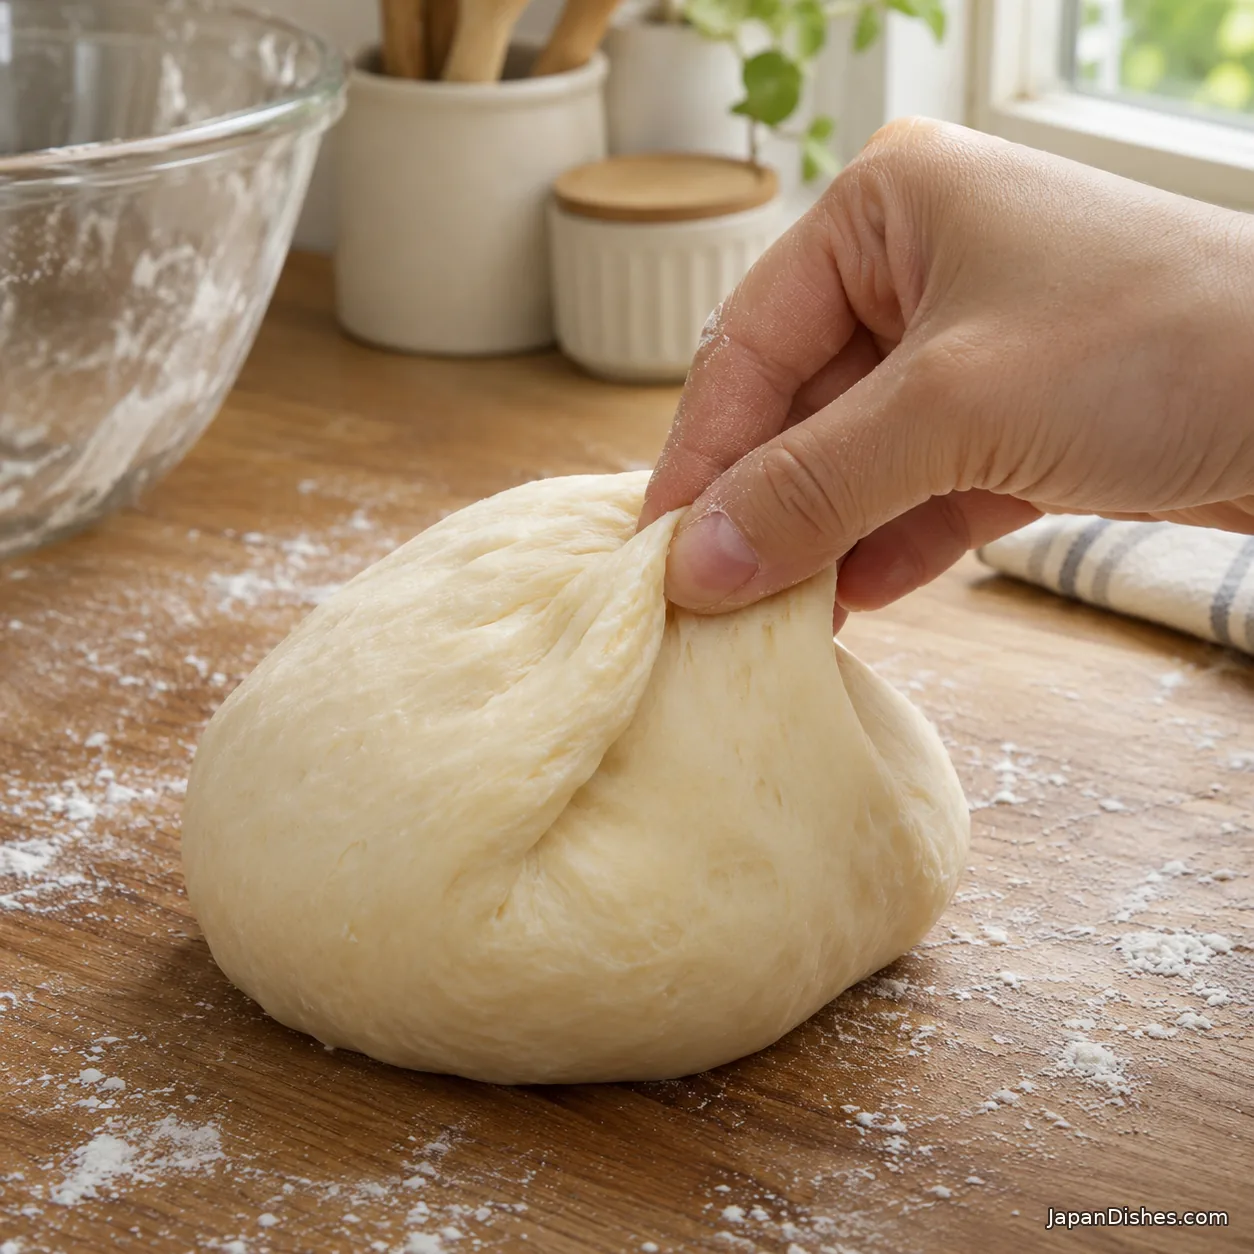
Knead the dough for 3 to 4 minutes, then work in the 15 g softened butter a little at a time. It will feel slippery at first; keep folding and pressing until the butter disappears into the dough. Knead for another 6 to 8 minutes, until the ball looks smooth and a pinched-off edge can stretch into a thin film before tearing. Use a scraper to lift sticky dough rather than adding flour by the handful.
3. Let the dough rise
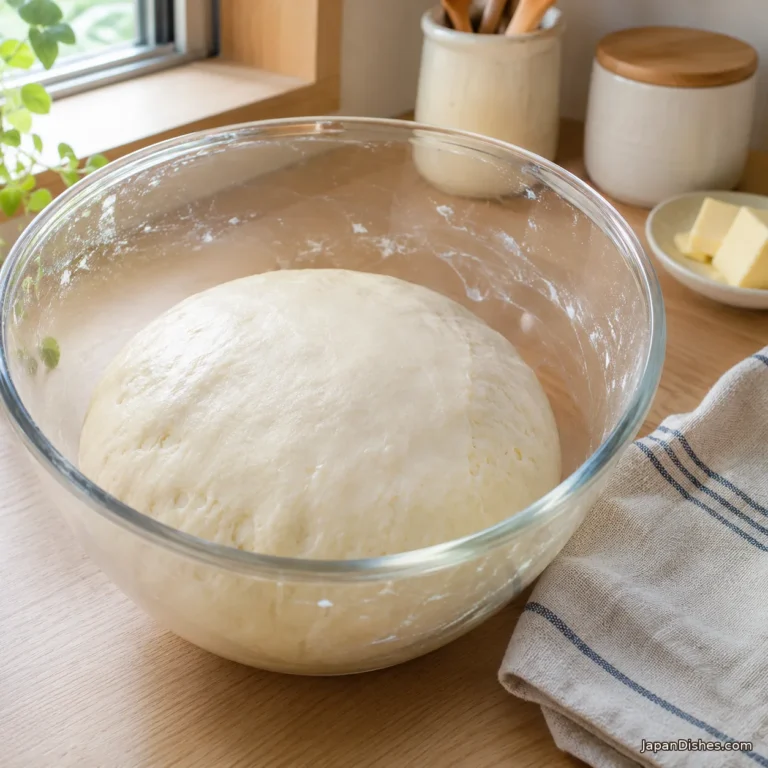
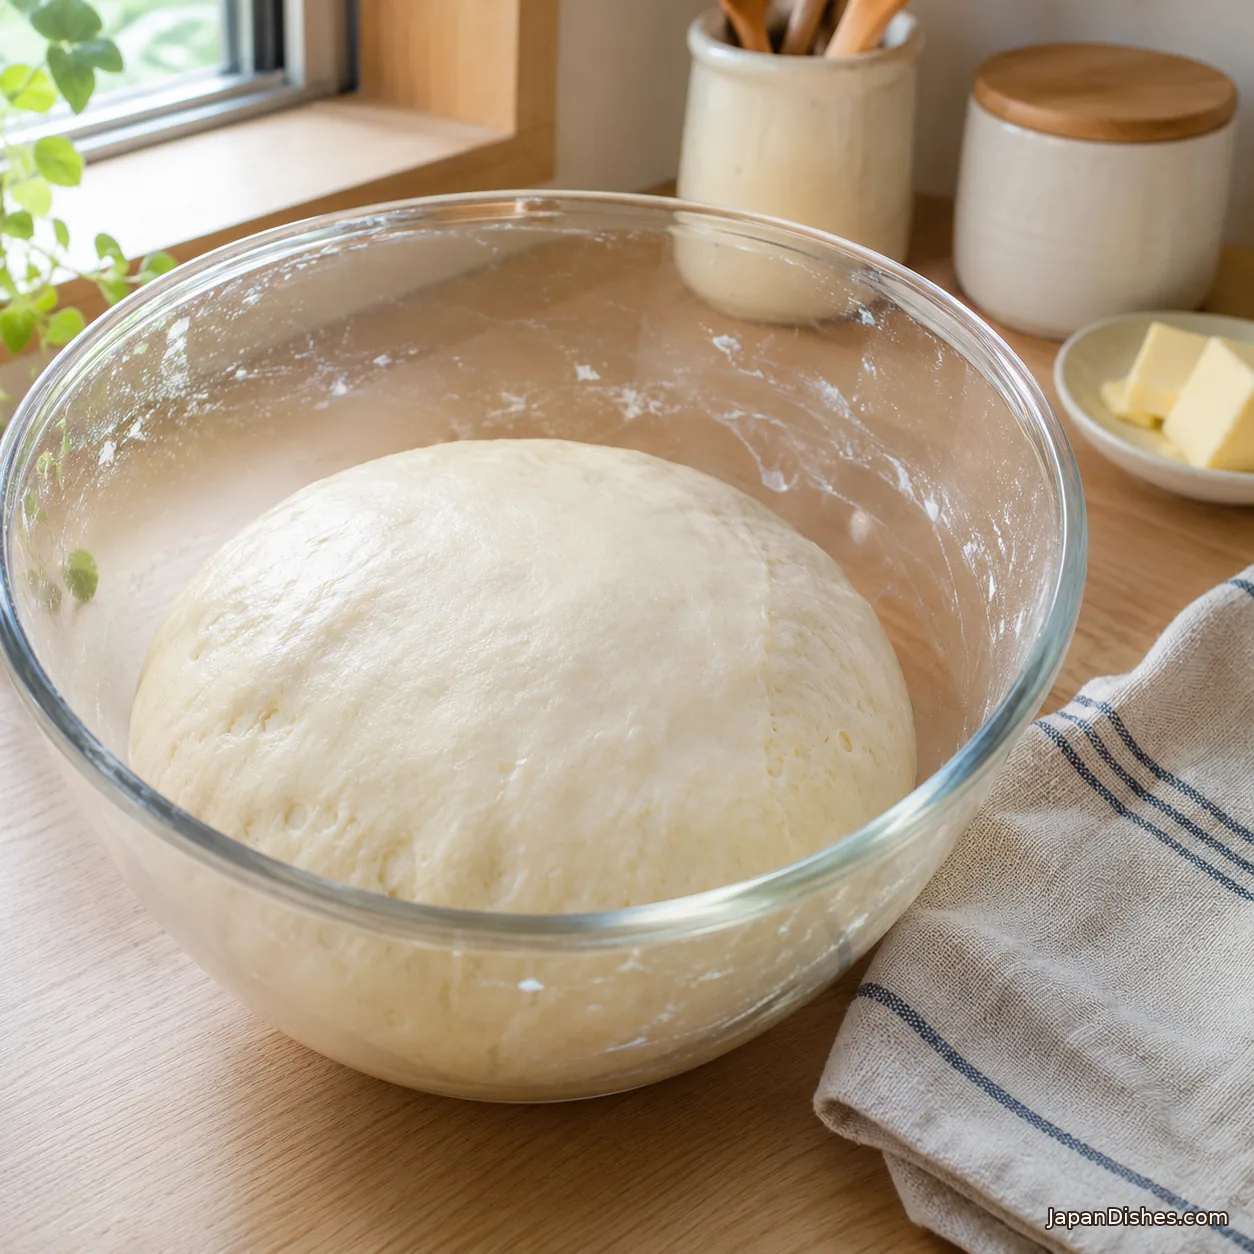
Gather the dough into a ball and put it in a clean bowl. Cover and leave it at room temperature until it looks aerated and close to doubled, about 60 to 85 minutes in a comfortably warm kitchen. While it rises, cut the cold filling butter into eight 8 g batons and refrigerate them. Line a rimmed baking sheet with parchment rated for 400°F (205°C).
4. Divide, round and rest
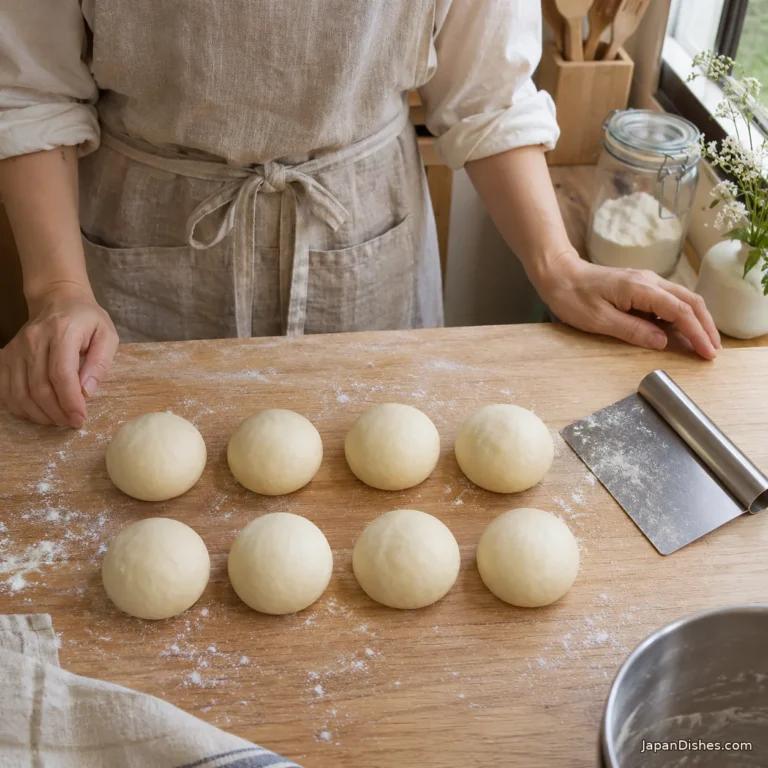
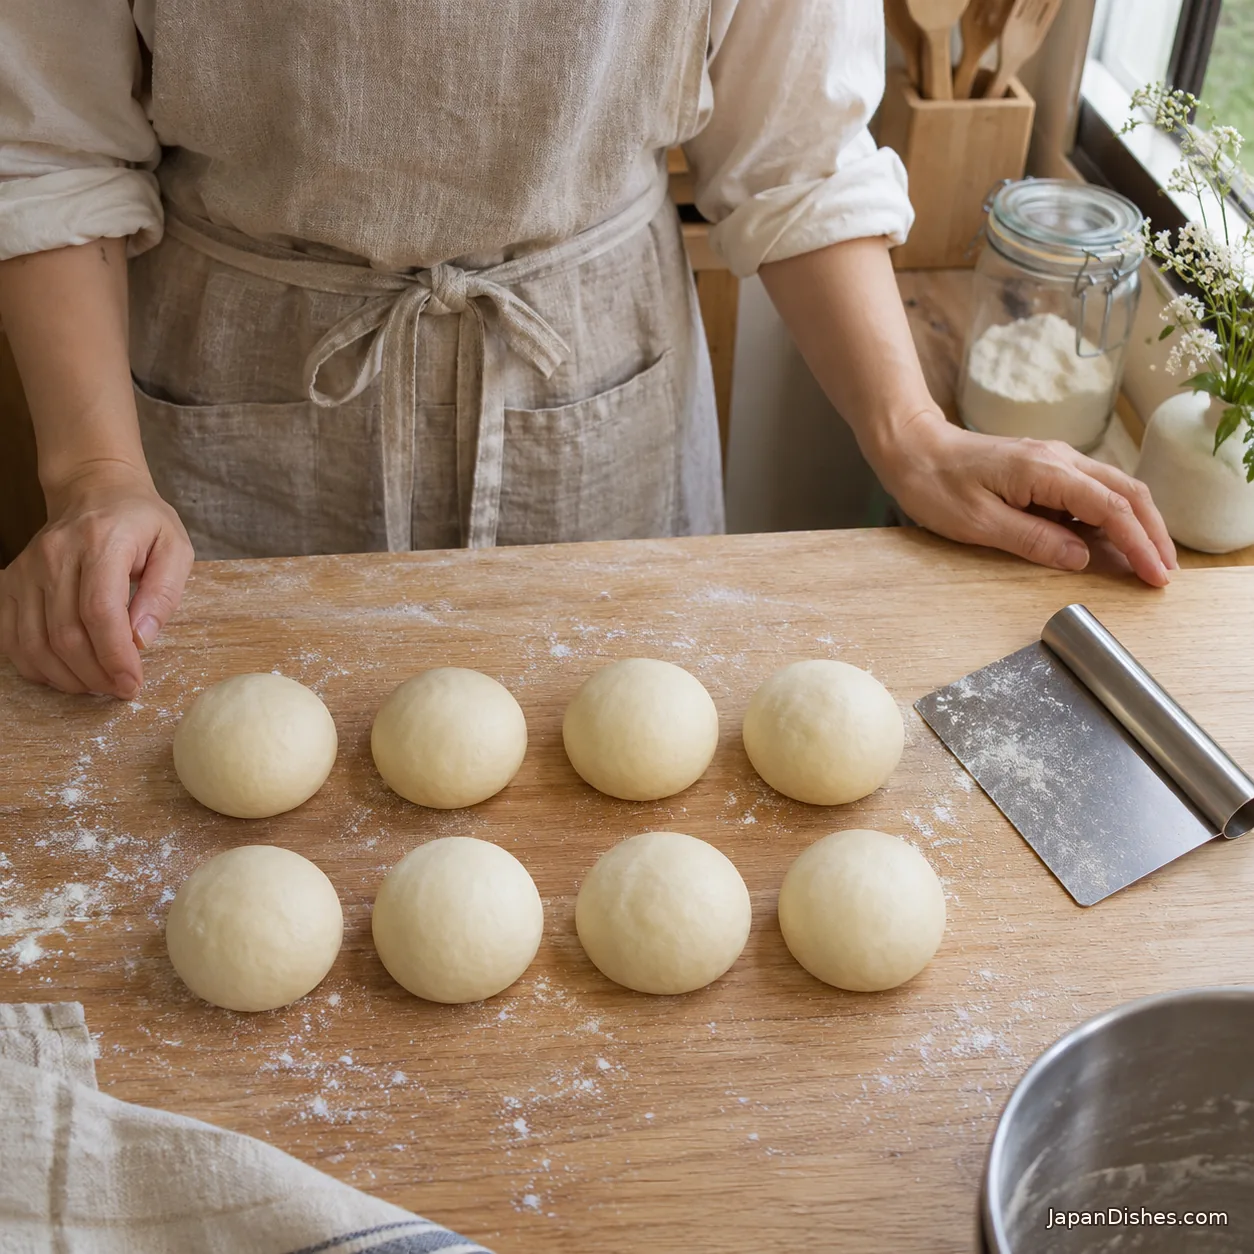
Turn the dough onto a lightly floured counter and press just enough to release the largest bubbles. Divide it into eight pieces of about 56 g each. Cup your hand over each piece and roll it in a short circle to form a smooth ball. Cover the pieces and rest them for 10 to 15 minutes. If a piece springs back as soon as you start rolling, give it another few minutes.
5. Roll each piece into a long triangle
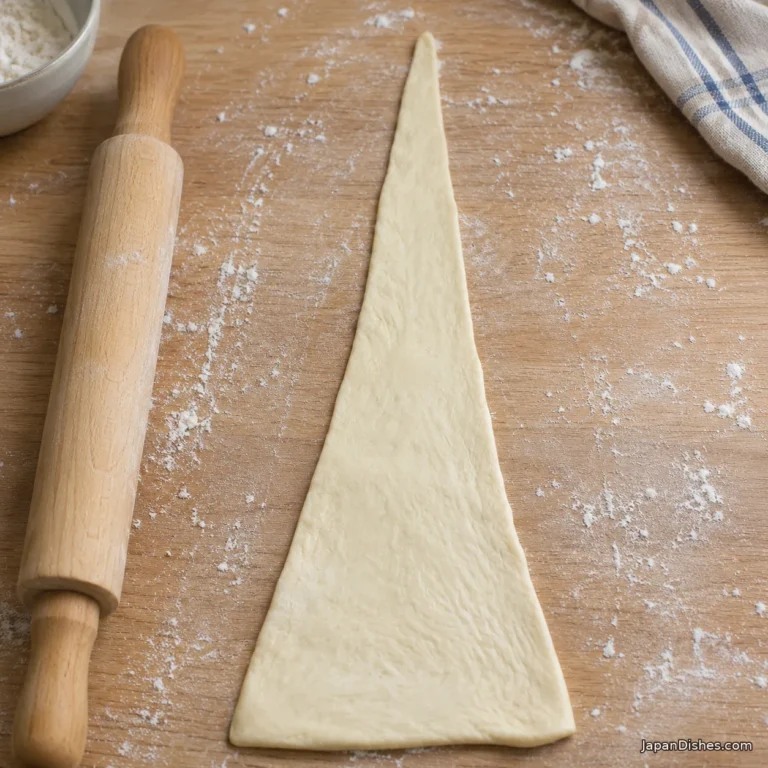
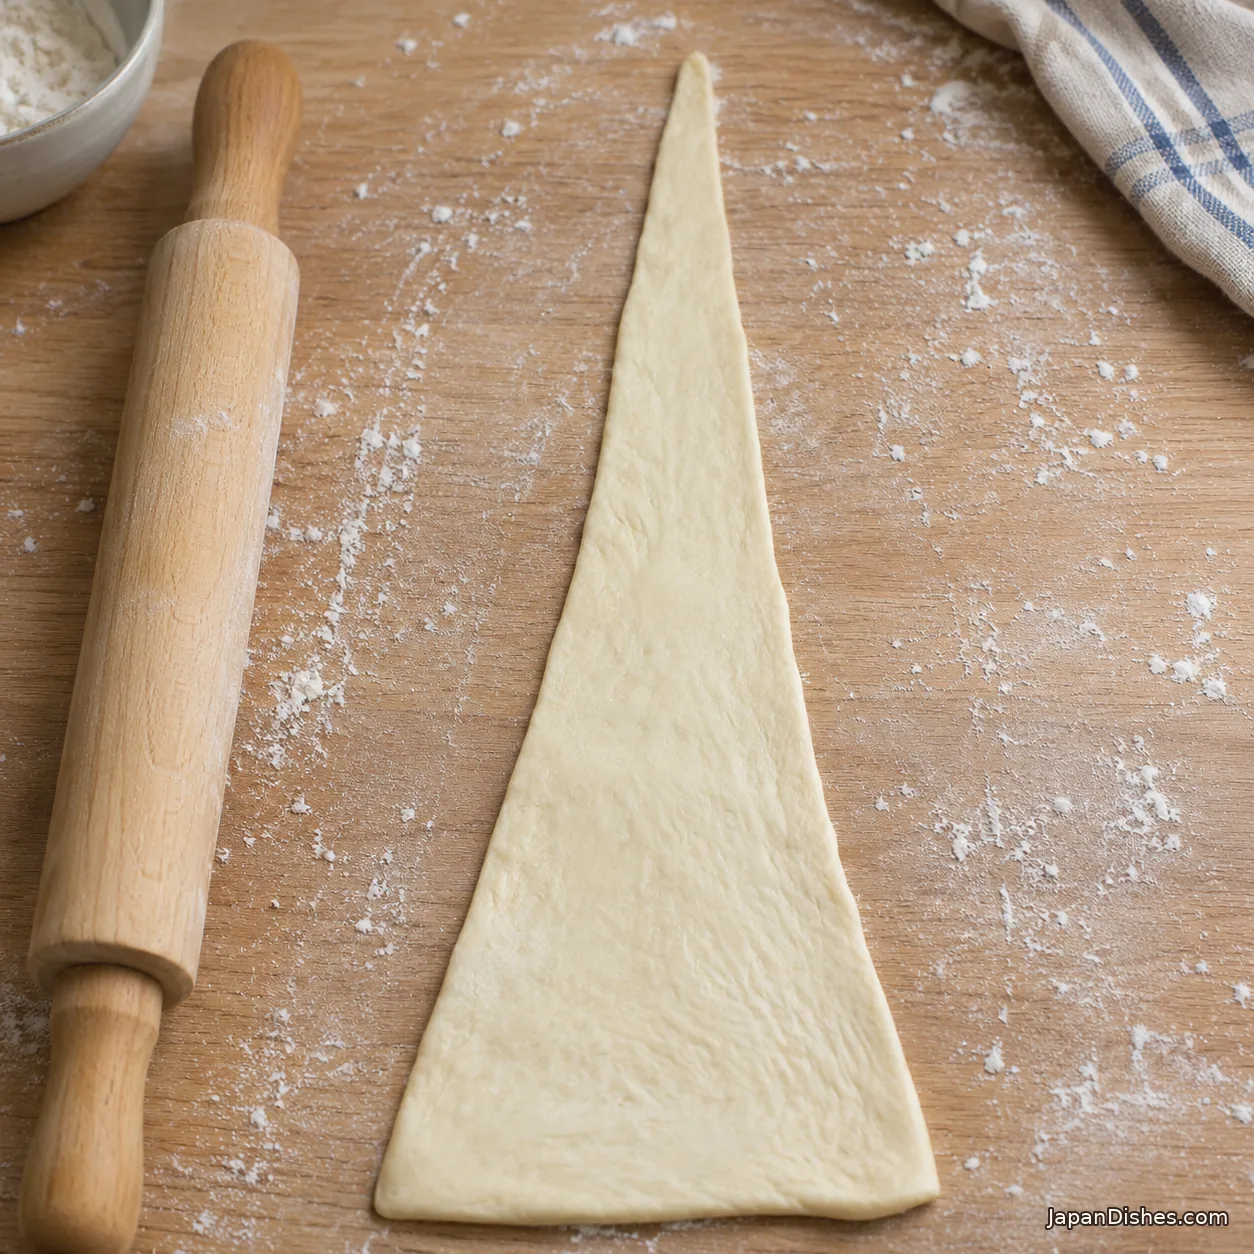
Press a dough ball into a short teardrop. With a lightly floured rolling pin, lengthen it into a triangle about 9 to 10 inches (23 to 25 cm) long and 3 to 3½ inches (8 to 9 cm) across the base. Keep the base broad enough to cover the ends of the butter. Roll the tip thinner than the base, but avoid tearing it.
6. Wrap each triangle around cold butter
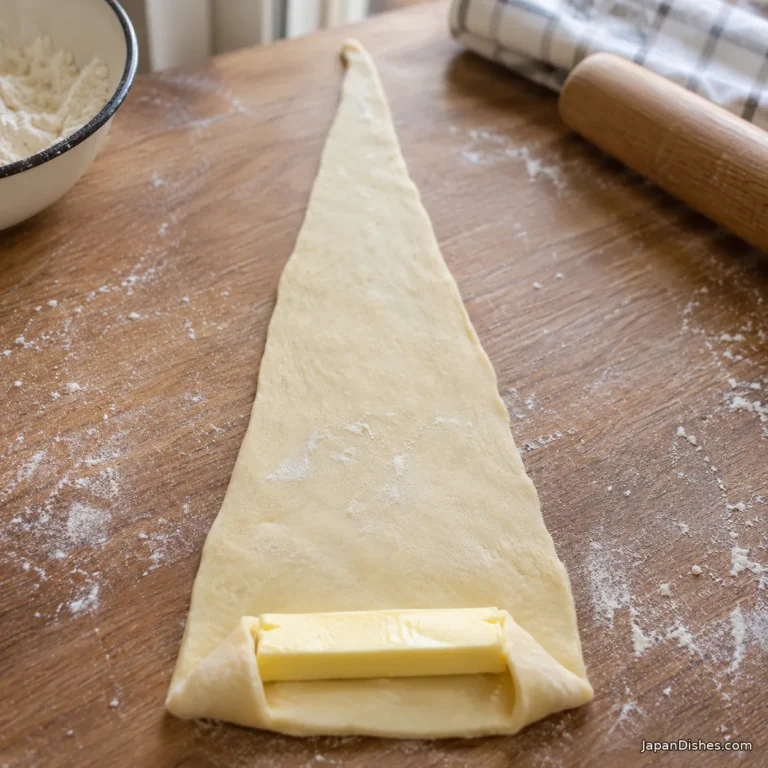
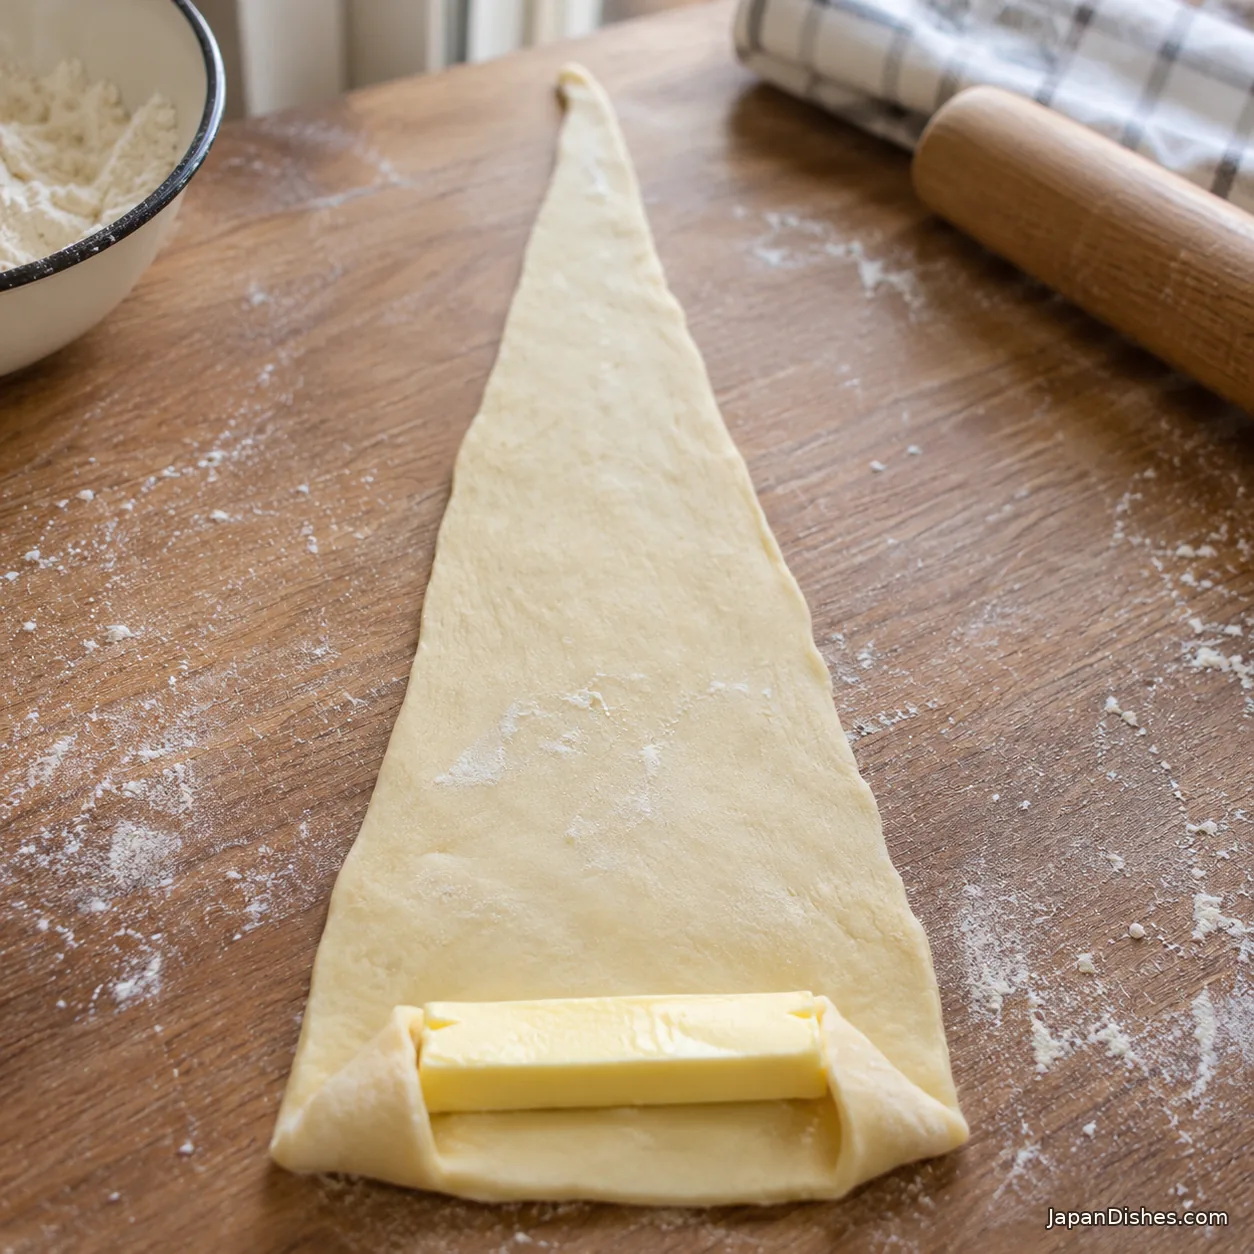
Lay a cold butter baton crosswise just above the wide edge. Bring the dough over the butter and pinch the ends to enclose it. Roll toward the point without tugging hard. Put the roll on the lined tray with the tip tucked underneath so it can’t lift during baking. Repeat with the remaining pieces, leaving about 2 inches (5 cm) between rolls.
7. Proof, brush and sprinkle with salt
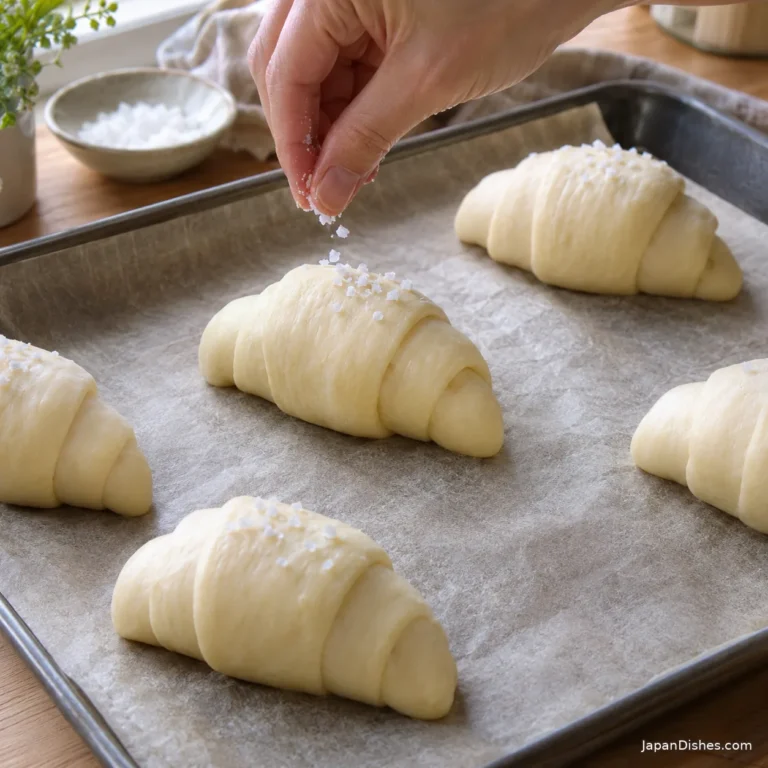
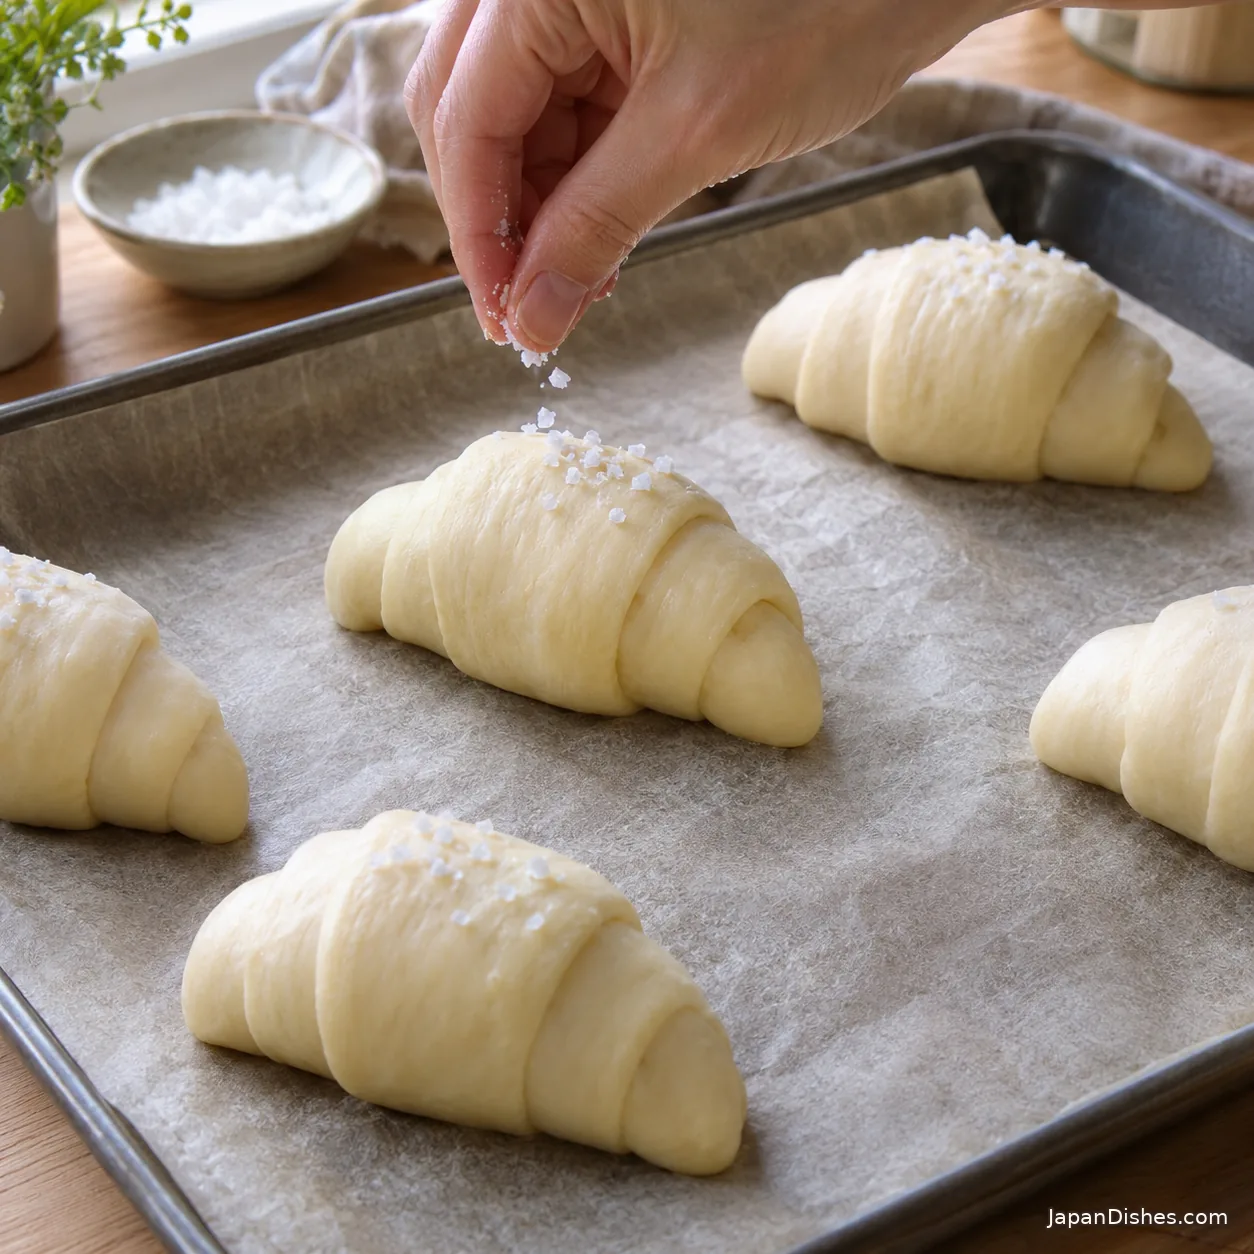
Cover the tray loosely and leave it in a draft-free spot until the rolls look noticeably puffy, about 35 to 50 minutes. A lightly floured fingertip pressed gently into a roll should leave a mark that comes back slowly. Preheat the oven to 400°F (205°C) during this rise. Just before baking, brush the tops lightly with water and scatter on a few flakes of sea salt.
8. Bake until golden
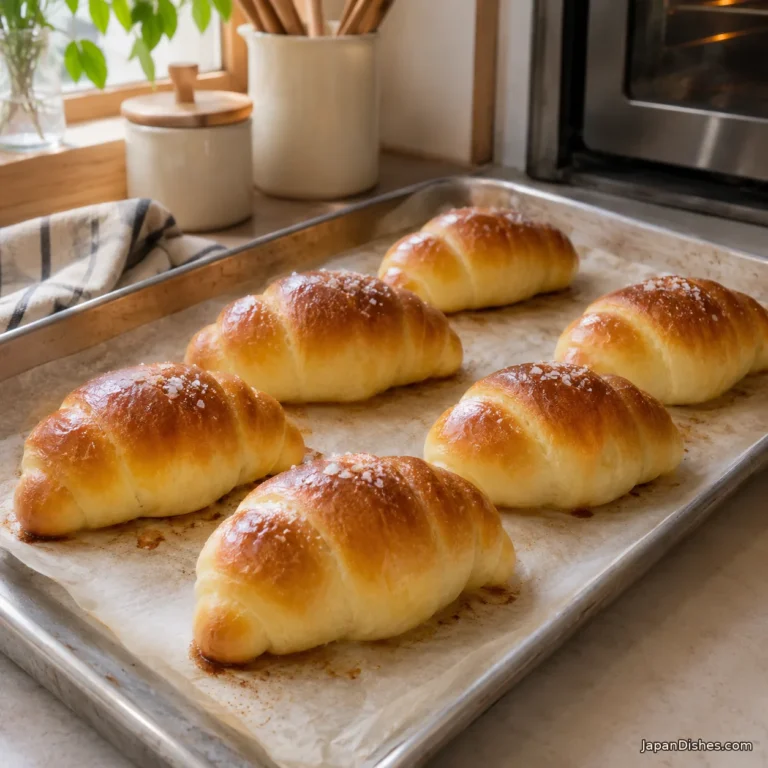
Bake on the middle rack for 15 to 19 minutes. Look for an evenly golden top and a deeper golden base. A little butter on the parchment is normal. If the rolls still look pale at 15 minutes, leave them in for another few minutes. Turn the tray once near the end only if your oven browns unevenly.
9. Cool on a rack and serve warm
Leave the tray on a heatproof surface for about 2 minutes, then lift the rolls onto a wire rack. Give them another 5 minutes before pulling one open, so the crumb can settle and the bottoms stay crisp. Serve warm. The size of the butter pocket varies from roll to roll and doesn’t tell you whether the bread is done.
Tips for a soft crumb and a crisp base
The bottoms came out soft
Bake until the undersides are clearly golden, then transfer the rolls to a rack so steam can escape. A silicone mat can brown differently from parchment. If you’re troubleshooting, use parchment on a metal tray and start with a fully preheated oven.
A lot of butter leaked out
A few shiny streaks are expected. If most of the butter escapes, check that you pinched the dough shut around both ends of each baton and put the tip underneath. Keep the filling chilled and proof in a comfortably warm room, away from a hot oven or radiator.
The rolls turned dense
Check that the first rise visibly expanded the dough and that the shaped rolls puffed before baking. Adding extra flour to fix every sticky patch can also make the crumb dense. Knead with a scraper and let the dough rest if it fights the rolling pin.
Variations
Make smaller rolls by dividing the dough into ten pieces and cutting ten smaller butter batons from the same total amount. Start checking the oven a couple of minutes earlier.
For a sesame finish, add a pinch of toasted sesame seeds along with fewer salt flakes. Keep the butter filling the same while you learn the shaping technique.
What to serve with shio pan
Serve shio pan at breakfast with tea, or alongside homemade miso soup for a light lunch. If you like the soft crumb, try Japanese milk bread next. For a filled bakery snack with a crisp coating, try kare pan.


Make ahead and storage
Cool the rolls completely before closing them in a bag or container. They’re best the day they’re baked, but you can keep plain rolls at room temperature for up to 2 days. Refresh them at 350°F (175°C) for 5 to 7 minutes. The oven restores the base better than a microwave.
For longer storage, freeze completely cooled rolls in an airtight bag for up to 1 month for best quality. Thaw them at room temperature, then warm them in the oven until the bottoms are crisp again.
Frequently asked questions
Why does shio pan have a hole inside?
The filling butter melts and releases steam during baking, leaving a space where the baton was. A small pocket is enough. The roll should still have plenty of soft bread around it.
Can I make shio pan without a stand mixer?
Yes. A bowl, your hands and a bench scraper are enough. Wait for the softened butter to disappear into the dough before deciding whether the dough needs more kneading.
Do I need an egg wash?
No. A light brush of water helps flaky salt stick. There are no eggs in this dough.
Is shio pan the same as a croissant?
No. Shio pan wraps a piece of butter in ordinary yeast dough. A croissant uses many layers of butter and dough, created through folding and rolling.
Baking reference: King Arthur Baking’s guide to checking the rise.

Shio Pan (Japanese Salt Bread) 塩パン
Course: Bread, SnackCuisine: JapaneseDifficulty: Medium8
rolls35
minutes20
minutes3
hoursMake eight Japanese salt rolls with crisp butter-baked bottoms, soft bread interiors and a light sprinkle of flaky sea salt. Allow about 3 hours, including rising.
Ingredients
250 g bread flour (about 2 cups, spooned and leveled; weighing recommended)
165 g lukewarm water (about ⅔ cup plus 1½ teaspoons)
12 g granulated sugar (1 tablespoon)
3 g instant yeast (about 1 teaspoon)
4 g fine sea salt (about ⅔ teaspoon, depending on grain size)
15 g unsalted butter, softened, for the dough (about 1 tablespoon)
64 g unsalted butter, cold, for filling (eight 8 g pieces; about 4½ tablespoons total)
1 teaspoon flaky sea salt, for finishing, or to taste
1 teaspoon water for brushing the tops, or as needed
Directions
- Stir the bread flour, sugar, instant yeast and fine sea salt in a bowl. Add the lukewarm water and mix until all the flour is moistened and there are no dry pockets at the bottom. The dough will look uneven and may feel sticky. Cover the bowl and leave it for 10 minutes so the flour has time to absorb the water.

- Knead the dough for 3 to 4 minutes, then work in the 15 g softened butter a little at a time. It will feel slippery at first; keep folding and pressing until the butter disappears into the dough. Knead for another 6 to 8 minutes, until the ball looks smooth and a pinched-off edge can stretch into a thin film before tearing. Use a scraper to lift sticky dough rather than adding flour by the handful.
- Gather the dough into a ball and put it in a clean bowl. Cover and leave it at room temperature until it looks aerated and close to doubled, about 60 to 85 minutes in a comfortably warm kitchen. While it rises, cut the cold filling butter into eight 8 g batons and refrigerate them. Line a rimmed baking sheet with parchment rated for 400°F (205°C).
- Turn the dough onto a lightly floured counter and press just enough to release the largest bubbles. Divide it into eight pieces of about 56 g each. Cup your hand over each piece and roll it in a short circle to form a smooth ball. Cover the pieces and rest them for 10 to 15 minutes. If a piece springs back as soon as you start rolling, give it another few minutes.
- Press a dough ball into a short teardrop. With a lightly floured rolling pin, lengthen it into a triangle about 9 to 10 inches (23 to 25 cm) long and 3 to 3½ inches (8 to 9 cm) across the base. Keep the base broad enough to cover the ends of the butter. Roll the tip thinner than the base, but avoid tearing it.
- Lay a cold butter baton crosswise just above the wide edge. Bring the dough over the butter and pinch the ends to enclose it. Roll toward the point without tugging hard. Put the roll on the lined tray with the tip tucked underneath so it can’t lift during baking. Repeat with the remaining pieces, leaving about 2 inches (5 cm) between rolls.
- Cover the tray loosely and leave it in a draft-free spot until the rolls look noticeably puffy, about 35 to 50 minutes. A lightly floured fingertip pressed gently into a roll should leave a mark that comes back slowly. Preheat the oven to 400°F (205°C) during this rise. Just before baking, brush the tops lightly with water and scatter on a few flakes of sea salt.
- Bake on the middle rack for 15 to 19 minutes. Look for an evenly golden top and a deeper golden base. A little butter on the parchment is normal. If the rolls still look pale at 15 minutes, leave them in for another few minutes. Turn the tray once near the end only if your oven browns unevenly.
- Leave the tray on a heatproof surface for about 2 minutes, then lift the rolls onto a wire rack. Give them another 5 minutes before pulling one open, so the crumb can settle and the bottoms stay crisp. Serve warm. The size of the butter pocket varies from roll to roll and doesn’t tell you whether the bread is done.
Notes
- Makes eight rolls. Weigh the flour and both amounts of butter for consistent shaping. Keep the filling butter cold. Allow about 3 hours including rising; cooler kitchens can take longer. Bake at 400°F (205°C) until golden and transfer to a rack.